tomatoes

Grilled Flatbread

Grilled-Flatbread_V2_01a.jpg

Meat and veggies aren't the only thing to make on the grill -- try something new with our grilled flatbread! Puffy, with a delightful crackle on the exterior, grilled flatbread is different from a traditional pizza crust, but no less delicious. For this recipe, we’ve topped our flatbread with melty mozzarella, spicy garlic, and piled it high with fresh-from-the-garden salad.

Grilled Flatbread - with an Arugula, Tomato, & Basil Salad
Serves 2

Flatbread Ingredients:
1 cup lukewarm water
1 packet instant yeast
1 teaspoon honey
1 teaspoon Kosher salt
2-1/2 cups all-purpose flour, plus more for dusting and kneading
1 tablespoon olive oil, plus 1 tbsp olive oil for brushing crust
2 cloves garlic, thinly sliced
4-6 ounces fresh mozzarella cheese, thinly sliced

Salad Topping Ingredients:
4 cups arugula, washed
1/4 cup shaved Parmesan Reggiano
10 oz ripe cherry tomatoes, halved
1/2 small red onion, thinly sliced
6 leaves fresh basil, sliced chiffonade style

Salad Dressing Ingredients:
1 tablespoon freshly squeezed lemon juice
1/2 shallot, minced
3 tablespoons olive oil
1/2 tablespoon balsamic vinegar
1/4 teaspoon Kosher salt
1/4 teaspoon black pepper

Directions:
1. Prepare the dough. Add the yeast to warm water, and proof for 2 minutes (until a few bubbles begin to appear). Then add in the olive oil, honey, salt, and one cup of the flour. Mix together, and then slowly add in the remaining flour; mix until a rough dough ball is formed. Transfer the dough to a floured surface. With the heel of your hand, knead the dough, adding flour as necessary to keep it from sticking. Knead until the dough turns into a smooth ball; place in an oiled bowl. Cover the bowl with a towel and let rise at room temperature until doubled in size, about 1 hour.

2. Meanwhile, prep the salad ingredients. Wash the arugula, shave the Parmesan, halve the tomatoes, and finely slice the red onion. Chiffonade the basil by stacking individual basil leaves, rolling them all together, then thinly slice them into ribbons.

3. whisk together the salad dressing ingredients. Cover and refrigerate.

4. Once the dough has doubled in size, prepare a direct/indirect grill, with high heat on one side.

5. Divide the dough into 2 equal portions. On a floured surface, pat each piece into a circle, about 12" in diameter. Prepare 2 parchment-lined baking sheets. Brush the parchment with a little olive oil, then place the two crusts on the parchment. Brush the top of the crusts with a little more olive oil.

6.Once the grill is hot, work quickly to grill the dough. Use the parchment paper to lift the crust, turn it over onto the grill and remove the parchment from the top of the dough. Close the lid and grill the dough for 4-5 minutes until dough begins to flu and brown slightly. Then, carefully use long tongs or a large grill spatula, flip the dough and place over indirect heat.

7. Brush the grilled side of the crust with olive oil, sprinkle with the garlic and fresh mozzarella slices. Cover and grill for another 5-10 minutes, or until the cheese has melted. Watch closely and check often to make sure the flatbread doesn't burn. Remove the cheesy flatbread from the grill and get ready to top it with the salad.

8. In a large bowl, use tongs to toss the salad in the dressing until coated. Top the grilled flatbread with the salad, sprinkle with additional salt and pepper and enjoy immediately.

Marinated Flank Steak

Steak_v2_01.jpg

Treat Dad to delicious steak from the grill! Perfectly grilled meat is a great way to anchor a celebration meal! Our version of tender flank steak is filled with savory flavors from the marinade and grilling process itself. The steak is further enhanced with the fresh herbal flavors of a tantalizing chimichurri sauce, and the bursting freshness of blistered cherry tomatoes.

Marinated Flank Steak With Chimichurri & Blistered Cherry Tomatoes
Serves 4

Ingredients:
1 (2 lb) flank steak
8 oz cherry tomatoes

For the Marinade:
2 tablespoons olive oil
2 teaspoons Worcestershire sauce
1/4 cup soy sauce
1 small lime, juiced (about 1/8 cup)
1 tablespoon honey
1 teaspoon Kosher salt
1/2 teaspoon freshly ground pepper
1 teaspoon chili powder
1/2 teaspoon garlic powder

For the Chimichurri:
1 cup fresh flat-leaf parsley (stems are ok)
1 cup fresh cilantro (stems are ok)
2 garlic cloves, peeled
1 small shallot, halved (about 2 tablespoons)
1 small jalapeño pepper, quartered, seeds removed
1/2 cup olive oil
1/4 cup red wine vinegar
3 tablespoons fresh lime juice
3/4 teaspoon dried crushed red pepper
1/2 teaspoon Kosher salt
1/2 teaspoon black pepper

Directions:
1. WHISK THE MARINADE ingredients together until combined, and then pour over the flank steak. Chill and marinate in a sealed container or bag for 1 hour, or up to overnight. Allow the steak to come to room temperature for about 20 minutes prior to grilling.

2. PREPARE THE CHIMICHURRI SAUCE. In a powerful blender or food processor, combine all of the chimichurri ingredients and pulse until well combined but still with some texture to the sauce. Set aside until ready to serve with the cooked steak.

3. GRILL THE STEAK! Fire up the grill, preheat the grill to high. Place the steak on the grill, and cook for 3-4 minutes, flip once, and cook for another 3-4 minutes. Continue grilling and flipping until the internal temperature reaches 135°F for medium-rare.

4. REMOVE THE STEAK FROM THE GRILL, and let it rest for 10 minutes to let the juices set and reabsorb.

5. WHILE THE STEAK RESTS, PREPARE THE BLISTERED CHERRY TOMATOES. Toss the tomatoes in 1 tablespoon of olive oil. In a cast iron skillet on the stovetop or in a grill basket on the grill, cook the cherry tomatoes. Sear and toss until the tomatoes begin to blister, and just begin to crack open. Remove from the heat.

6. When ready to serve, cut the steak into thin strips slicing against the grain.

7. Serve with a generous spoonful of chimichurri sauce and several blistered cherry tomatoes.

Fiesta Chop Salad

FiestaChop2021_v3_01.jpg

This Fiesta Chop Salad is packed with goodies! Start with the fresh crunch of chilly iceberg lettuce, then add cheese, chili beans, red onions, tomatoes, grilled corn, AND corn chips! The creamy, tangy cilantro dressing ties it all together. Enjoy all the fresh, delicious flavors – your taste buds will be doing a happy dance!

Fiesta Chop Salad
Serves 6 - 8

Creamy Cilantro Dressing:
(makes about 1 cup of dressing)
1/4 cup white wine vinegar
1 tablespoon fresh lime juice
1/4 cup olive oil
1/2 cup plain Greek yogurt
2 teaspoons sugar
1/2 teaspoon dried cumin
1/2 teaspoon garlic powder
1/2 teaspoon dried oregano
1/4 teaspoon paprika
1/4 teaspoon Kosher salt
1/4 teaspoon black pepper
2 tablespoons fresh cilantro, minced

Salad Ingredients:
1 head chopped iceberg lettuce
10 oz grape tomatoes, halved
1 can (14 oz) chili beans, slightly drained
4 ears corn, grilled and kernels cut off the cob
Olive oil for brushing corn cobs
1/4 red onion, finely diced
3 cups grated sharp cheddar cheese
2 cups corn chips (like Fritos)

Directions:
1. Make the dressing. Prepare the cilantro by finely mincing for the dressing. Whisk together the vinegar, lime juice, olive oil, Greek yogurt and sugar together in a small jar until well combined. Add the spices and cilantro, and whisk or shake until emulsified.

2. Prep the veggies. Over direct heat, grill the corn (turning as needed) until char marks appear. About 15-20 minutes. Once the grilled corn has cooled slightly, carefully cut the kernels off from the cob with a sharp knife, or a corn stripping tool.

3. Meanwhile, wash and chop the lettuce. Finely dice the red onion and halve the grape tomatoes.

4. Assemble the salad. Toss all of the salad ingredients together with the dressing and then top the salad with the corn chips. Toss once more to incorporate the chips. Serve immediately!

Pea Pesto Pasta

Pea_Pesto_v2_01a.jpg

A good pasta dish can transform everyday ingredients into something extraordinary any day of the week. Springtime flavors inspire this fresh take on pasta. We think your family will love this super-quick, spring pea pesto pasta dish. Buon appetito!

Spring Pea Pesto Pasta
Serves 4

Spring Pea Pesto Ingredients:
1/2 cup frozen peas
1/4 cup Parmesan cheese
1/2 teaspoon Kosher salt
1/4 teaspoon freshly ground black pepper
1/4 teaspoon crushed red pepper flakes
1/2 cup olive oil
1/2 cup packed fresh basil leaves
1 tablespoon packed fresh mint leaves
juice of 1/2 lemon (about 2 tablespoons)
1 small clove fresh garlic

Pasta:
1 lb thin spaghetti

Garnish:
1 pint Sun Gold tomatoes, halved
8 oz burrata cheese
Mint leaves, chiffonade
Basil leaves, chiffonade
Lemon zest

Directions:
1. Gather all of the pesto ingredients together. Be sure to thoroughly wash all of the fresh herbs! Pulse the pesto ingredients together in a food processor. Taste test the pesto, and adjust the salt and pepper accordingly. If needed, add more olive oil for a thinner consistency. Enjoy pesto immediately, or keep covered and refrigerated (or even frozen) until ready to use.

2. Slice the tomatoes in half with a small paring knife. Roll the basil and mint leaves and cut in a chiffonade cut for a garnish.

3. Cook the pasta according to the package instructions. Drain, reserve about 1 cup of the pasta cooking water. For better pasta, salt the water! The cooking water should be “like the sea” – start with about 1 teaspoon coarse kosher salt per quart of water. This seems like a lot of salt, and it is, but most of this will be discarded when the pasta is drained. Test the pasta frequently as it approaches completion. Pasta should be cooked to al dente – “to the tooth” – tender, yet chewy, not at all mushy. The easiest way to check for doneness, is to remove a piece of pasta and test between your teeth. Or, cut a piece of test pasta, and check the cross section view. The smallest white dot, or white line at the center of the pasta piece indicates doneness is nearly at hand.

4. Mix the pesto with the drained and cooked pasta, stir with tongs until the pasta is well-coated with the pesto. Add reserved pasta water, to thin the sauce, if needed. 5. Garnish the pasta with the tomato halves, pieces of fresh burrata, mint, and basil leaves. Enjoy!

Deep Dish Pizza

Who doesn’t love pizza??? Tonight it’s deep dish pizza on the menu! This deep dish version of pizza is inspired by a few unique pizza places that feature a partial cheese crust. Inside, delicious layers of flavor are assembled into some sort of pizza heaven. Fresh dough is topped with a layer of cheese, red onions, a robust red sauce, and finally, a hearty serving of spicy sausage - one slice is nearly enough!

Deep Dish Pizza - Sausage & Red Onion with a Crispy, Caramelized, Cheesy Crust
Makes two 12-inch deep dish pizzas - Serves 8

Dough Ingredients:
3/4 cup warm water
2-1/4 teaspoons (or one packet) yeast
1 tablespoon sugar
1 teaspoon kosher salt
2 tablespoons olive oil
2 tablespoons butter, melted
2-1/2 cups all-purpose flour

Pizza Toppings:
1 lb low-moisture mozzarella cheese, sliced in 1/8"-thick slices
8 ounces parmesan cheese, shredded
1 pound sausage, roughly rolled into 1" bite-sized discs
1/2 red onion, thinly sliced

Sauce Ingredients:
2 cloves garlic, minced
2 tablespoon olive oil
1 (28 oz) can petite diced tomatoes
1 (14oz) can crushed tomatoes
1 (6 oz) can tomato paste
2 teaspoons dried basil
2 teaspoons dried oregano
1 teaspoon dried marjoram
1/4 teaspoon fresh ground pepper
1 teaspoon Kosher salt
1 tablespoon sugar

Directions:
1. Prepare the pizza dough by hand or by using a stand mixer. Pour the warm water into a large bowl, and add the yeast. Stir slowly for about two minutes, then add the sugar, salt, olive oil, and melted butter and stir again until combined. Add 1 cup of flour, and stir until combined. Slowly add the remaining 1-1/2 cup of flour until a dough ball has formed. Knead the dough several times until a smooth ball has developed. Cover the dough with a damp cloth and let the dough rise in a warm location for about 1-1/2 hours.

2. Meanwhile, prepare the sauce. Sauté the garlic with the olive oil, stirring until fragrant. Be sure to watch this step carefully so that the garlic doesn't burn! Once the garlic is fragrant, add the diced tomatoes, crushed tomatoes, tomato paste, basil, oregano, marjoram, pepper, salt, and sugar. Bring the sauce to a low simmer and cook stirring as needed for 40-45 minutes or until the sauce has thickened nicely.

3. Use two well-seasoned 12" cast iron pans or deep dish pizza pans. Cover the surface with a generous layer of canola oil on the bottom and sides. Press the dough into the cast iron as a single flat layer and let the dough rise for an additional 30 minutes in the pan. (You can freeze half the ingredients for later.)

4. Preheat the oven to 500 degrees F.

5. Once the dough has risen in the pan, it's time to assemble the pizza. Make a layer of folded mozzarella slices all along the edge of the pan creating a "cheese crust" and then continue to layer on top of the layer of dough. Add the shredded parmesan on top of the mozzarella.

6. Spread the sliced red onions around the pizza on top of the cheese layers.

7. Add a hefty layer of pizza sauce to the pizza covering the onions completely.

8. Finally, top with pizza with the sausage discs.

9. Line a large baking sheet with aluminum foil to place on the oven rack directly below the pizza to catch any drips as the pizza cooks. Turn on a ventilation fan, and perhaps even crack a window. Any cheese that spills over will make a bit of a smoke.

10. Tent a loose piece of aluminum foil over the pizza. Bake for 20 minutes.

11. Check to make sure that the drip pan is correctly aligned to catch any spillage and continue baking for an additional 20-25 minutes or until the pizza crust is well set, the sausage is cooked, and the sauce and cheese below are bubbling hot. The sides of the crust that are made of cheese might look blackened, but they should not taste burnt, instead they will taste of delightful caramelized cheese and help to hold all of the ingredients in place.

12. Let the pizza cool slightly, enough to slide it from the pan onto a parchment paper-lined cutting board. Cut the pizza into slices with a sharp cook's knife working from the cheesy edge into the middle.

13. Pace yourself when enjoying - one pizza is hearty! One 12-inch pizza serves 4 hungry adults.

Classic Minestrone Soup

Minestrone, a classic Italian soup, features a wide range of  vegetables, beans, and pasta. Our recipe version focuses on techniques for building great flavor in stages. The result? Deep, rich, satisfying tastes and textures without being over-cooked. You’ll find this soup highly flexible – use seasonal vegetables, or whatever you have on hand.  We think you’ll agree that this minestrone easily earns its reputation as a healthy, winter comfort food.

Comforting Minestrone Soup
Serves 4 - 6

Ingredients:
4 tablespoons olive oil
1 yellow onion, diced
3 celery stalks, dice
2 carrots, cut on the bias into slices
2 small potatoes, cut into 1/2" cubes
3 cloves garlic, minced
1/2 tablespoon tomato paste
2 bay leaves
1 Parmesan cheese rind
1 can (28 oz) diced tomatoes
6 cups vegetable broth
1 can (15.5 oz) Great Northern beans
1 can (15.5 oz) butter beans
1 cup ditalini pasta (or other small pasta)
1/2 teaspoon Kosher salt
1/2 teaspoon pepper
2 sprigs fresh thyme
1/4 teaspoon red pepper flakes
1 tablespoon red wine vinegar
1 cup frozen peas
3 cups chopped kale
Parmesan cheese, shaved, for serving

Directions:
1. Start by making the mirepoix. Heat the olive oil in a large Dutch oven over medium-high heat. Add the onions and sauté for about 3 minutes until softened. Add the celery and carrots, and continue to cook for another 3-5 minutes, or until softened.

2. Add the potatoes and garlic and continue to cook for another 5 minutes. Stir in the tomato paste.

3. Add the bay leaves, Parmesan rind, canned tomatoes, vegetable broth, Great Northern and butter beans, ditalini pasta, salt, pepper, thyme, and red pepper flakes. Bring to a boil over medium-high heat.

4. Reduce the heat to medium-low and simmer the soup for another 20-25 minutes. Use tongs to remove the Parmesan rind, bay leaves, and thyme stems.

5. Stir in the red wine vinegar, frozen peas, and chopped kale. Cook for one more minute, or until the kale just begins to wilt. Serve with shaved Parmesan cheese as a garnish on top.

Spicy Chickpea Soup with Ginger and Spinach

As the weather begins to shift and evenings become increasingly cooler, we find ourselves craving rich, satisfying soups. This recipes showcases the mighty chickpea with all of its nutritional power in a flavorful, hearty soup! The warm spices and coconut milk add deep flavors to this fabulous dish. We’re sure that you’ll be adding this recipe to your cool weather menu rotation.

Spicy Chickpea Soup with Ginger and Spinach
Serves 6 - 8

Ingredients:
1/4 cup extra virgin olive oil, plus 1 tablespoon
1 large onion, diced
3 small carrots, chopped
6 cloves garlic, finely chopped
1" piece fresh ginger, peeled and finely grated
3 cans (15.5 oz) chickpeas
1 teaspoon cumin
1/2 teaspoon cayenne
1/2 teaspoon turmeric
1/2 teaspoon smoked paprika
1/4 teaspoon Kosher salt
1/4 teaspoon black pepper
1 can (14.5 oz) crushed tomatoes
1 can (14 oz) full fat coconut milk
4 cups vegetable broth
2 cups baby spinach, trimmed

Garnishes:
Plain Greek yogurt
Olive oil for drizzling on top

Serve with:
Wedges of pita bread

Directions:
1. In a large Dutch oven, heat 1/4 cup of olive oil over medium heat. Add the onion and carrots and sauté until the carrot is soft and the onion is translucent, roughly 5 minutes. Add the garlic and ginger and sauté for another 5 minutes.

2. Set aside 1 cup of the chickpeas. Add the remaining chickpeas to the Dutch oven with the onion, garlic, carrot, and ginger. Add the cumin, cayenne, turmeric, and paprika and continue cooking, stirring occasionally until the chickpeas begin to brown and break down, about 5 minutes. Use a potato masher to press and mash the chickpeas until about half of them they break down. This will nicely thicken the soup.

3. Add the crushed tomatoes, coconut milk, vegetable broth, salt, and pepper. Cover and simmer ingredients for about 30 minutes, until the soup thickens and the flavors are incorporated.

4. Meanwhile, heat 1 tablespoon of olive oil in a sauté pan over medium high heat. Add the reserved cup of chickpeas and cook until they begin to crisp, about 5-8 minutes, stirring occasionally to heat evenly. Season with a pinch of salt and pepper and set aside.
5. Once the soup has thickened, remove from heat and stir in the spinach. Add additional salt and pepper to taste. Garnish with Greek yogurt and a drizzle of olive oil. Sprinkle the crispy chickpeas on top of the soup, and serve with wedges of pita bread.

Easy Tikka Masala & Basmati Rice

In this recipe, we bring the wonderful flavors of chicken tikka masala to the table on any day of the week, thanks to the amazingly fast electric pressure cooker! Serve with fragrant basmati rice and generous sprinkles of chopped cilantro. YUM!

Easy Chicken Tikka Masala
Serves 4 - 6

Bring the wonderful flavors of this delicious dish home any day of the week thanks to the amazingly fast electric pressure cooker! This recipe calls for a lighter approach using slightly less butter than other recipes. A combination of Greek yogurt and coconut milk (instead of heavy whipping cream) adds a bit of extra tanginess to the global flavors. Savory spices mingle with fresh garlic, ginger, and tomatoes. The coconut milk creates a dreamy, silky sauce. Serve with fragrant basmati rice and generous sprinkles of chopped cilantro.

Ingredients:
4 large boneless chicken breasts, cut into 1” chunks
5 cloves garlic, finely minced
1-1/2 tablespoons fresh ginger, finely grated
3 tablespoons tomato paste
1 (28 oz.) can crushed tomatoes
2-1/2 teaspoons Garam Masala, divided
1 tablespoon ground cumin
1 tablespoon paprika
1/2 teaspoon cayenne pepper
1 teaspoon ground coriander
2 teaspoons Kosher salt
1/2 teaspoon ground black pepper
1 cup coconut milk
1 cup plain Greek yogurt
4 tablespoons butter, sliced into tablespoons
1 tablespoon cilantro, minced, plus additional for garnish

Electric Pressure Cooker Directions:
1. Prepare the garlic and ginger. Mince the garlic finely and grate the ginger into a fine paste.

2. Place the cut chicken in the bottom of an electric pressure cooker and then toss with the garlic and ginger.

3. In a large bowl, whisk together the tomato paste and crushed tomatoes until well combined.

4. Add the spices to the tomato mixture: 2 teaspoons Garam Masala, cumin, paprika, cayenne, coriander, Kosher salt, and black pepper. Stir until well combined.

5. Pour the spiced tomato mixture over the chicken. Toss until coated.

6. Cover, and cook on high pressure for 10 minutes.

7. Carefully release the pressure according to your appliance’s instructions. Check that the chicken is fully cooked and is at 165 degrees F. If the chicken needs more time, continue to cook on the simmer function until the chicken reaches 165 degrees in the center.

8. Once the chicken is fully cooked, add the coconut milk, yogurt, butter, 1/2 teaspoon Garam Masala and minced cilantro. Stir until combined and a sauce begins to form. If the sauce needs additional time to thicken, switch to the simmer function, and stir and simmer until the sauce thickens to your desired consistency.

9. Serve warm over basmati rice. Garnish with additional minced cilantro.
Basmati Rice:
1 tablespoon butter
2 tablespoons shallot, minced
2 cups basmati rice, rinsed
1/2 teaspoon Kosher salt
3-1/2 cups water

Rice Directions:
1. Rinse rice with cold water until the water runs clear.

2. Using a heavy-bottomed pot with a lid, sauté the shallot in the butter until the the shallot becomes translucent. Add the rice, and stir it until coated and every grain has a sheen.

3. Add the water and salt, and bring to a boil. Stir occasionally to make sure that the rice doesn't stick to the bottom. Once boiling, turn the heat to low and cover with a tight-fitting lid. Simmer the rice on low for 18-20 minutes or until the rice becomes tender.

4. Remove from heat, and let set for 10 minutes with the lid still on. Fluff with a fork before serving.

Fresh Inspiration! Huevos Rancheros for Breakfast

Huevos Rancheros

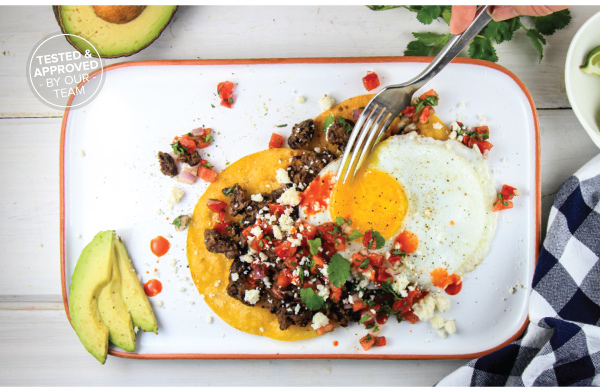
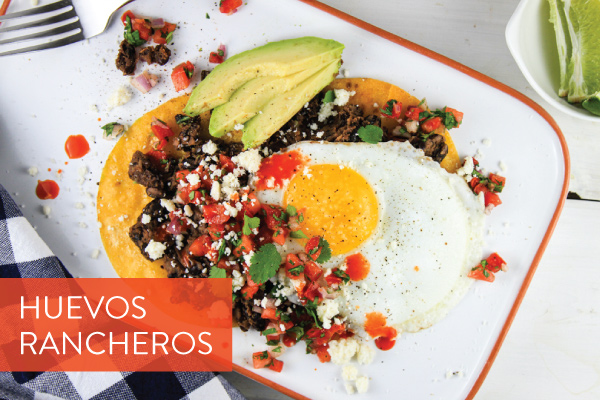
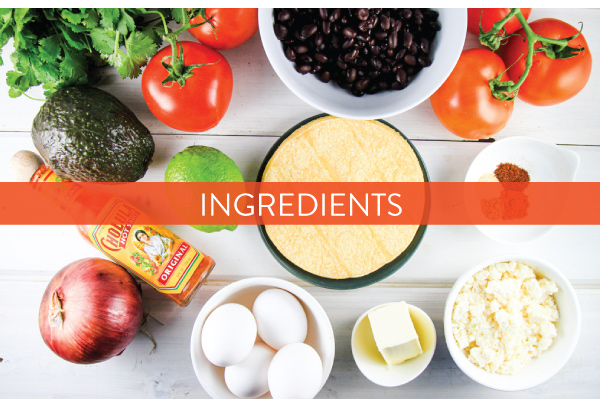
This classic Mexican breakfast translates to “ranch eggs” and highlights a perfectly fried egg served on a warm tortilla with black beans, cotija cheese, and fresh pico de gallo.

Featured Products
Huevos Rancheros
Huevos Rancheros
Huevos Rancheros
Huevos Rancheros
Huevos Rancheros
Huevos Rancheros
Huevos Rancheros
Huevos Rancheros
Huevos Rancheros

Huevos Rancheros
Serves 4

Ingredients:
1 can (15 oz) black beans, drained
1 tablespoon olive oil, plus 4 tablespoons olive oil for cooking the tortillas
1/4 teaspoon chili powder
1/4 teaspoon garlic powder
1/4 teaspoon cayenne
1/4 teaspoon cumin
4 small fresh corn tortillas
4 tablespoons butter or bacon fat
4 eggs
1/4 cup cotija cheese, crumbled
1 avocado, sliced
Hot sauce to taste
Black pepper to taste

Pico De Gallo Ingredients:
1 cup roma tomatoes, finely diced
1/4 cup red onion, finely diced
2 teaspoons fresh lime juice
2 tablespoons cilantro, chopped
1/4 teaspoon kosher salt

Directions:
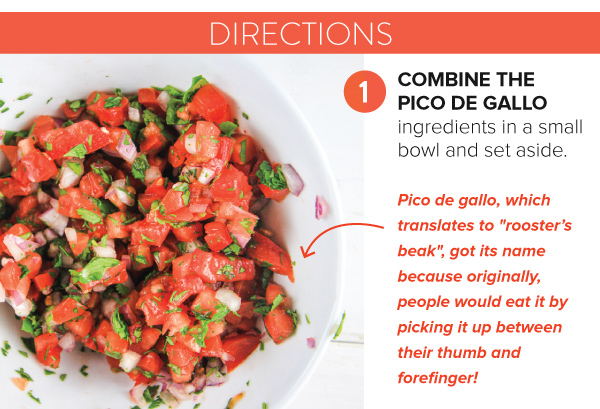
1. Combine pico de gallo ingredients in a small bowl and set aside.

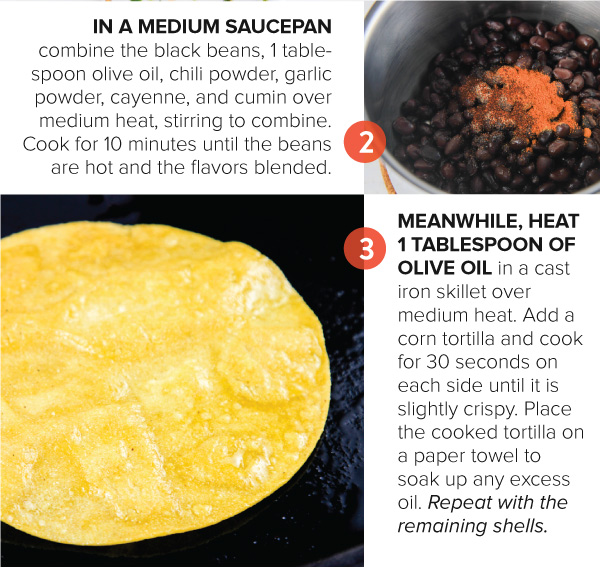
2. In a medium saucepan combine black beans, 1 tablespoon olive oil, chili powder, garlic powder, cayenne, and cumin over medium heat, stirring to combine. Cook for 10 minutes until beans are hot and the flavors blended.

3. Meanwhile, heat 1 tablespoon of olive oil, in a cast iron skillet over medium heat. Add a tortilla and cook for 30 seconds on each side until the tortilla is slightly crispy. Place the cooked tortilla on a paper towel to soak up any access oil. Repeat with the remaining tortillas.

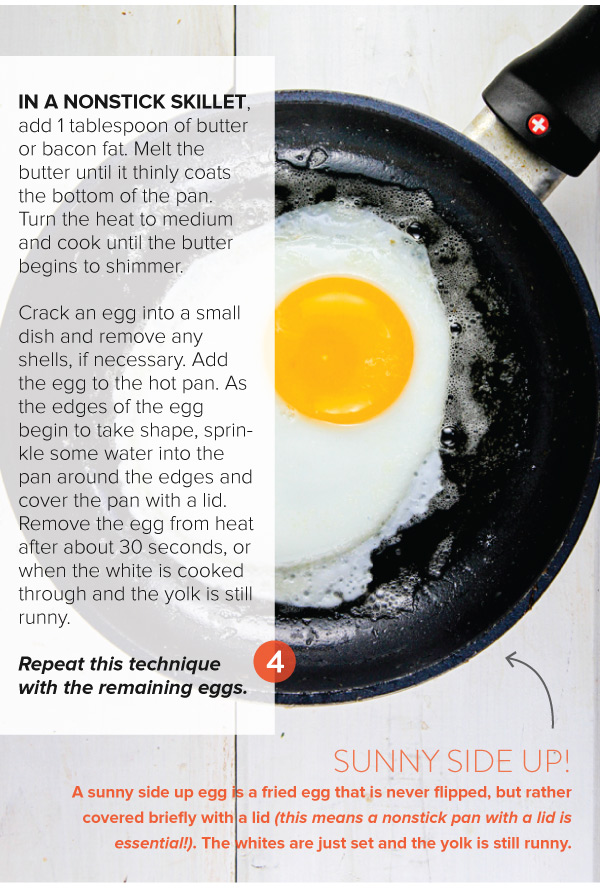
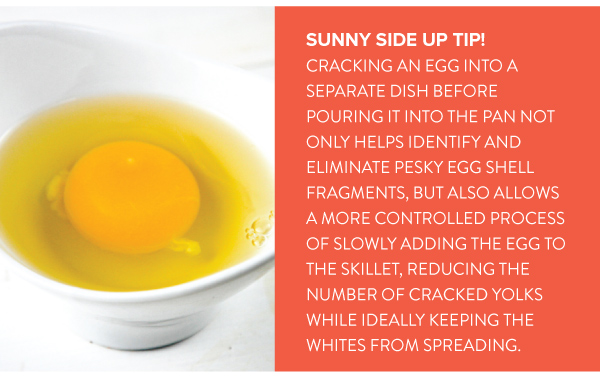
4. In a nonstick skillet, add 1 tablespoon of butter (or bacon fat). Melt the butter until it thinly coats the bottom of the pan. Turn the heat to high until the butter begins to shimmer. Crack an egg into a small dish and remove any shells, if necessary. Add the egg to the hot pan. As the edges of the egg begin to take shape, sprinkle some water into the pan around the edges and cover the pan with the lid. Remove the egg from heat after about 30 seconds, or when the white is cooked through and the yolk is still runny. Repeat this technique with the remaining eggs.

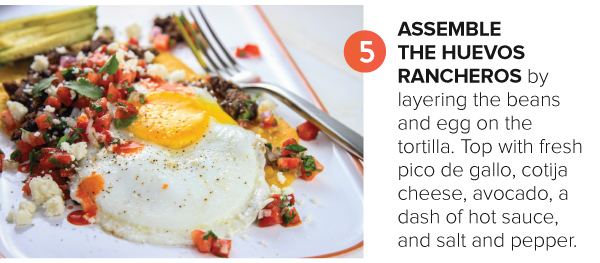
5. Assemble the huevos rancheros by layering the beans and egg on the tortilla. Top with fresh pico de Gallo, cotija cheese, avocado, and a dash of hot sauce. Enjoy!

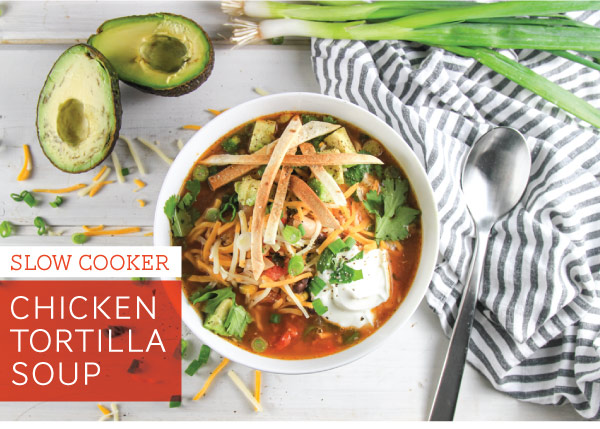
Slow Cooker Chicken Tortilla Soup

Slow Cooker Chicken Tortilla Soup

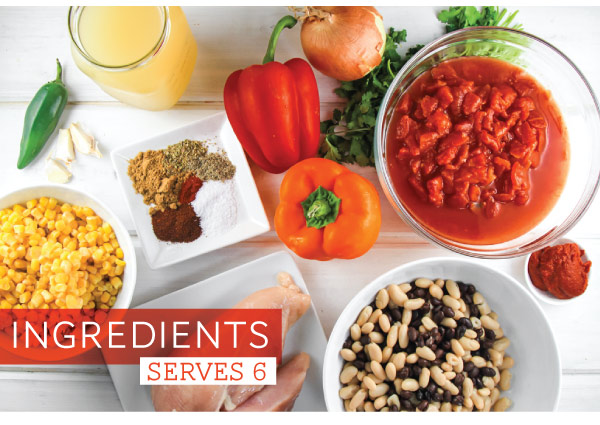
Ingredients:
2 tablespoons olive oil
1 onion, diced 3 cloves garlic, minced
1 jalapeño, seeded and minced
1 yellow bell pepper, diced
1 red bell pepper, diced
1 (28oz) can diced tomatoes
2 tablespoons tomato paste
1 (15oz) can of black beans
1 (15 oz) can of white beans
4 cups chicken broth
1-1/3 lb chicken breasts (2 large breasts)
4 teaspoons ground cumin
4 teaspoons chili powder
1/2 teaspoon paprika.
1/2 teaspoon dried oregano
1 teaspoon garlic powder
1-1/2 teaspoon Kosher salt
1/2 teaspoon freshly ground pepper
1/4 cup chopped fresh cilantro
12 ounces frozen corn

Garnishes:
1/4 cup chopped fresh cilantro
6 Green onions, sliced
Avocado, diced
cheddar cheese, grated
Sour cream

Directions:
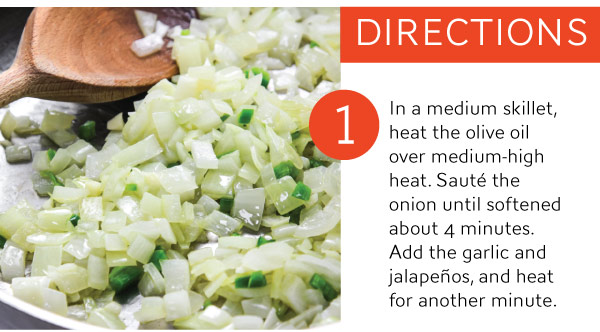
1. In a medium skillet, heat the olive oil over medium-high heat. Sauté the onion until softened about 4 minutes. Add the garlic and jalapeños, and heat for another minute.
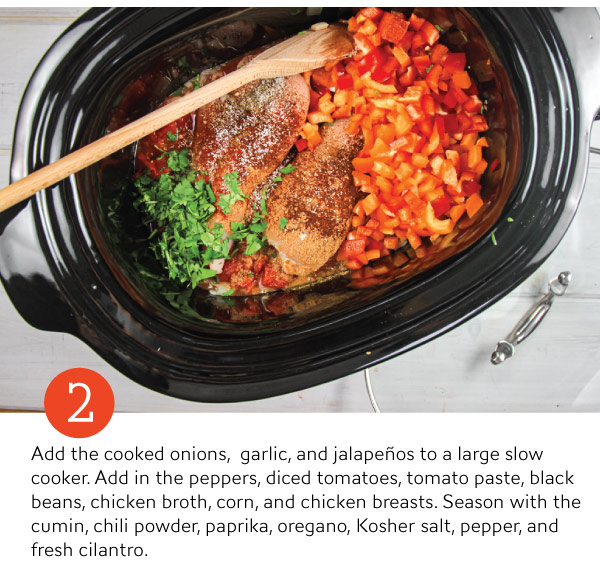
2. Add the cooked onions, garlic, and jalapeños to a large slow cooker. Add in the peppers, diced tomatoes, tomato paste, black beans, chicken broth, corn, and chicken breasts. Season with the cumin, chili powder, paprika, oregano, Kosher salt, pepper, and fresh cilantro.
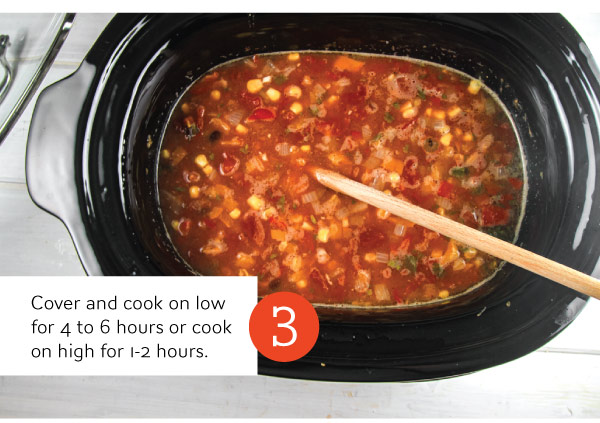
3. Cover and cook on low for 4 to 6 hours or cook on high for 1-2 hours.
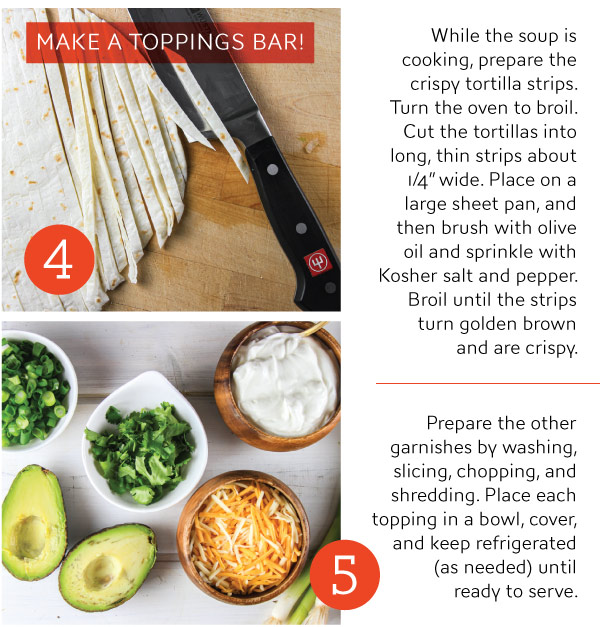
4. While the soup is cooking prepare the crispy tortilla strips. Turn the oven to broil. Cut the tortillas into long, thin strips about 1/4” wide. Place on a large sheet pan, and then brush with olive oil and sprinkle with Kosher salt and pepper. Broil until the strips turn golden brown and are crispy.
5. Prepare the other garnishes by washing, slicing, chopping, and shredding. Place each topping in a bowl, cover, and keep refrigerated (as needed) until ready to serve.
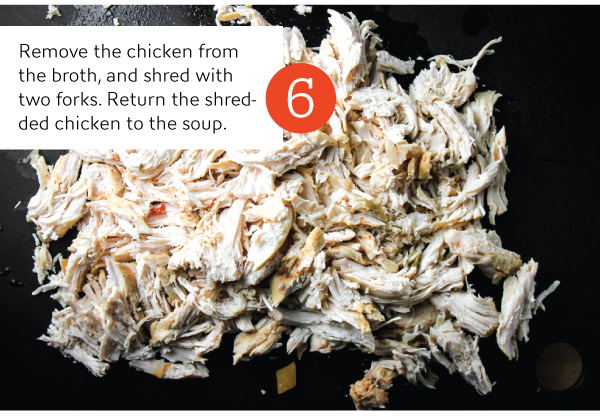
6. Remove the chicken and shred with two forks. Add the frozen corn to the soup while you are shredding the chicken. Return the shredded chicken to the soup.
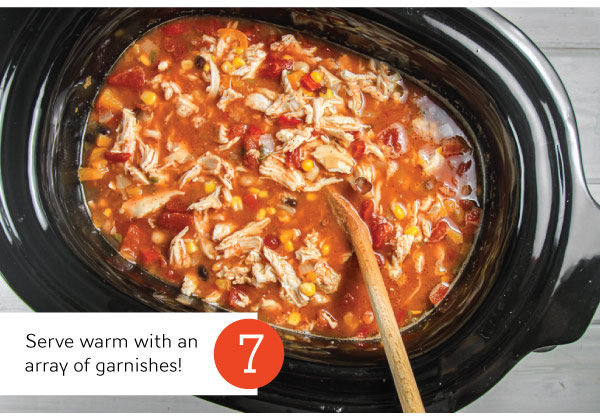
7. Serve warm with an array of garnishes!

Slow Cooker Chicken Tortilla Soup

Beef Ragu with Pappardelle

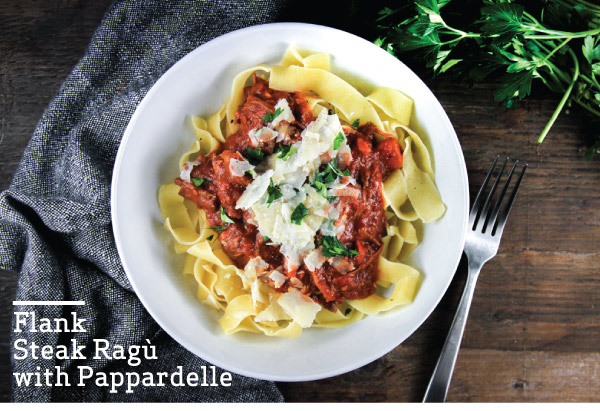
Flank Steak Ragu with Pappardelle

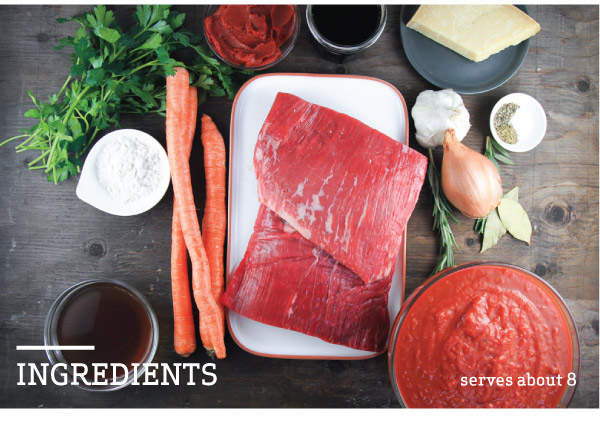
Try this decadent flank steak ragu for dinner! This dish delivers on flavor - the hearty, tender bites of beef are bathed in a rich, red sauce which pairs perfectly with silky pappardelle noodles. Try it -- you’ll love it! Serves about 8.

Ingredients:
2-1/2 to 3 lb flank steak
1/2 teaspoon Kosher Salt
1/2 teaspoon black pepper
1/2 teaspoon dried thyme
2 tablespoons canola oil
1 large shallot, diced (about 1/2 cup)
6 cloves garlic
3 carrots, sliced into half moons
2 tablespoons flour
1 cup red wine
2 (28 oz) cans crushed tomato
1 ( 6oz) can tomato paste
1 cup beef broth
2 sprigs fresh rosemary
2 bay leaves
2 lbs pappardelle pasta
fresh parsley, for garnish
shaved parmesan, for garnish

Directions:
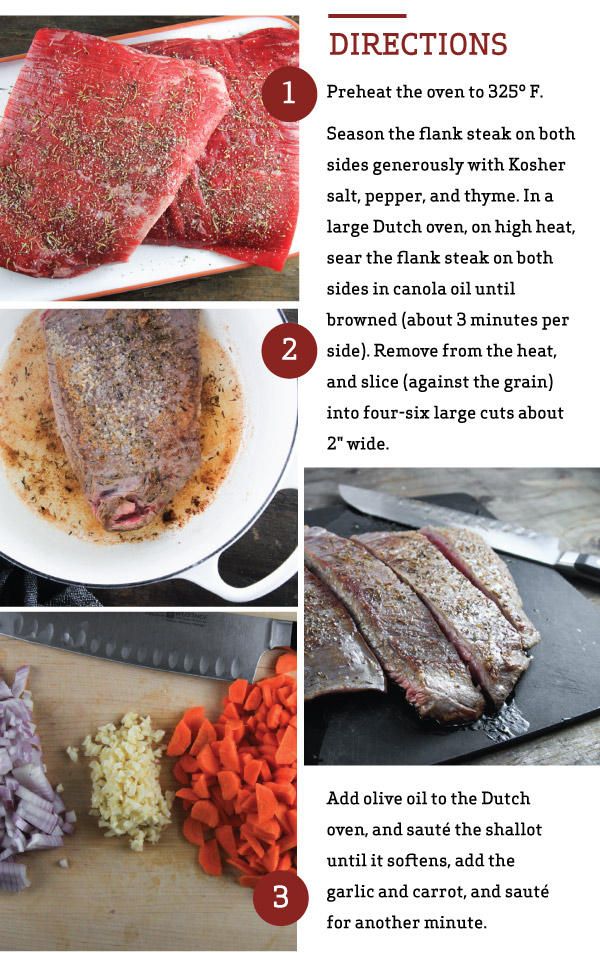
1. Preheat the oven to 325 degrees F.
2. Season the flank steak on both sides generously with kosher salt, pepper, and thyme. In a large Dutch oven, on high heat, sear the flank steak on both sides in the canola oil until browned (about 3-5 minutes per side). Remove from the heat, and then slice (against the grain) into four-six large cuts about 2" wide.
3. Add olive oil to the Dutch oven, and sauté the shallot until it softens, add the garlic and carrot, and sauté for another minute.
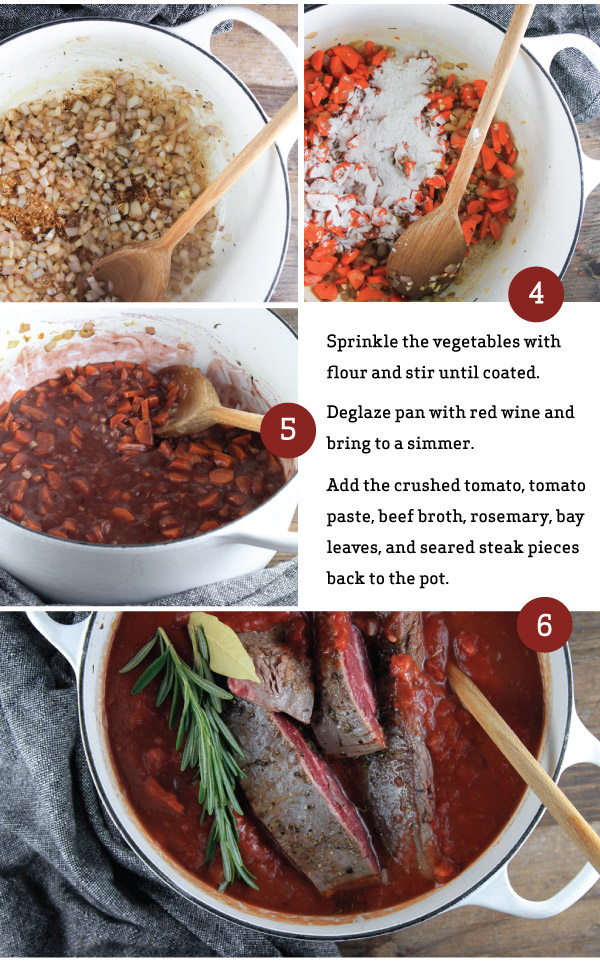
4. Sprinkle the vegetables with flour and stir until coated.
5. Deglaze pan with red wine and bring to a simmer.
6. Add the crushed tomato, tomato paste, beef broth, rosemary, bay leaves, and seared steak pieces back to the pot.
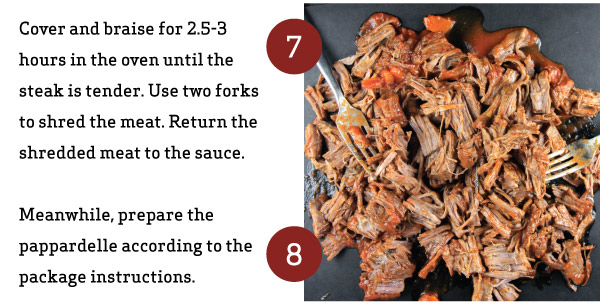
7. Cover and braise for 2.5-3 hours in the oven until the steak is tender. Use two forks to shred the meat. Return the shredded meat to the sauce.
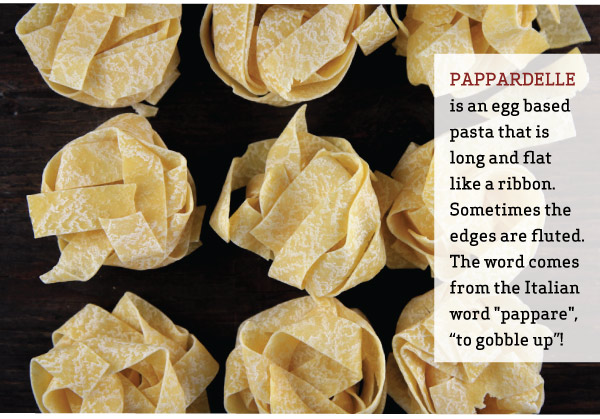
8. Meanwhile, prepare the pappardelle according to the package instructions.
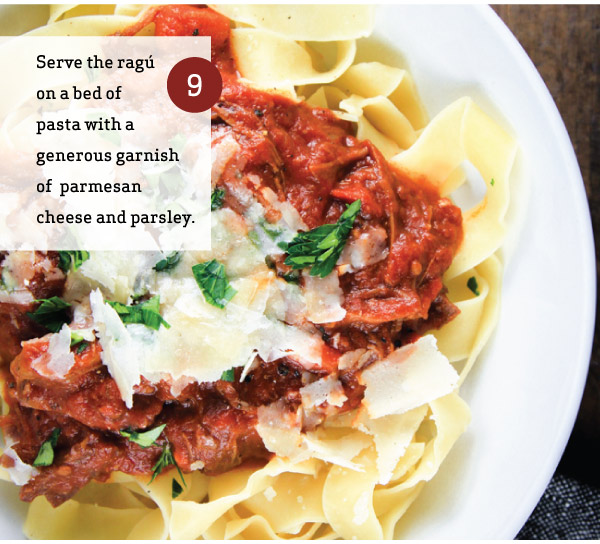
9. Serve the ragu on a bed of noodles with a garnish of parmesan cheese and parsley.

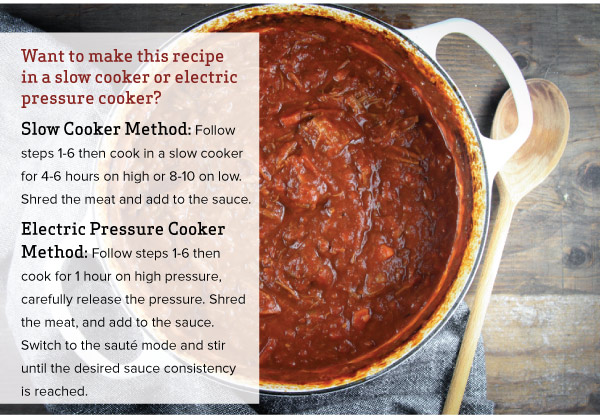
Slow Cooker Method: Follow steps 1-6 then cook in a slow cooker for 4-6 hours on high or 8-10 on low. Shred the meat and add to the sauce. Electric Pressure

Cooker Method: Follow steps 1-6 then cook for 1 hour on high pressure, carefully release the pressure. Shred the meat, and add to the sauce. Switch to the sauté mode and stir until the desired sauce consistency is reached.

Flank Steak Ragu with Pappardelle

Savory Breakfast Tarts

Savory Breakfast Tarts

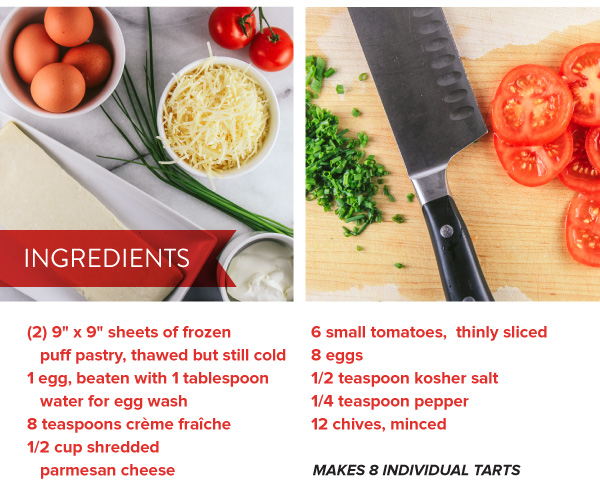
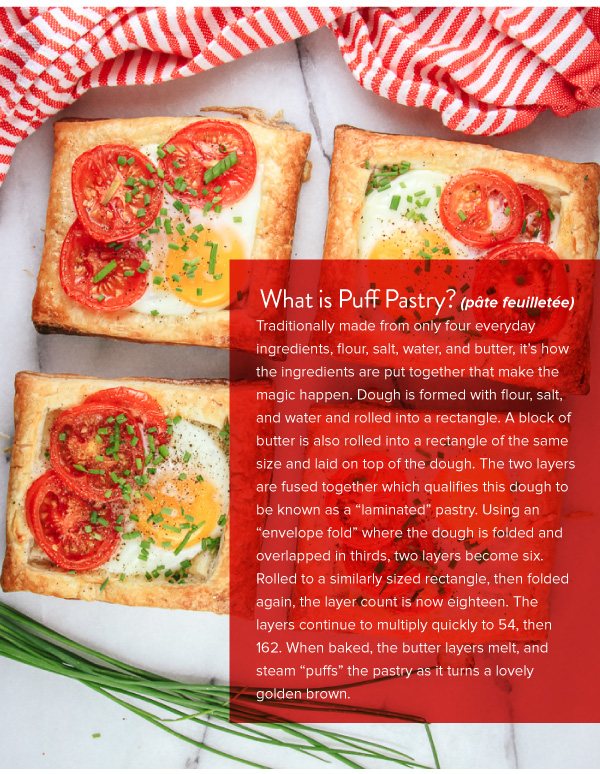
These savory breakfast tarts look impressive, taste delicious, and are easy to pull o for a crowd of holiday guests! Simply score and pre-bake the puff pastry base with a dollop of crème fraîche and a pinch of parmesan. Add an egg, a few thin tomato slices, bake a little longer - and finish with a garnish of chives - a MERRY GOOD MORNING! Makes 8 tarts.

Ingredients:
(2) 9" x 9" sheets frozen puff pastry, thawed
1 egg, beaten with 1 tablespoon water for egg wash
8 teaspoons crème fraîche
1/2 cup shredded parmesan cheese
6 small tomatoes, thinly sliced
8 eggs
1/2 teaspoon Kosher salt
1/4 teaspoon pepper
12 chives, minced

Directions:
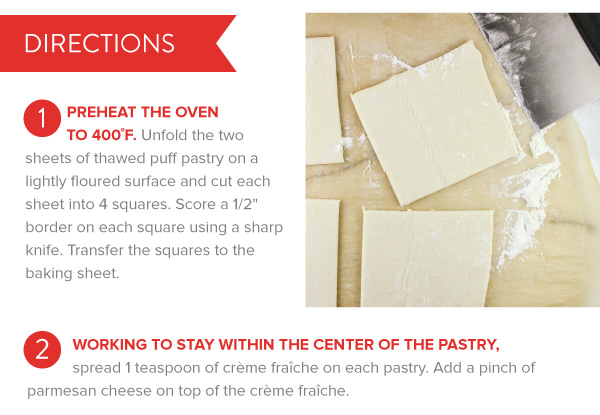
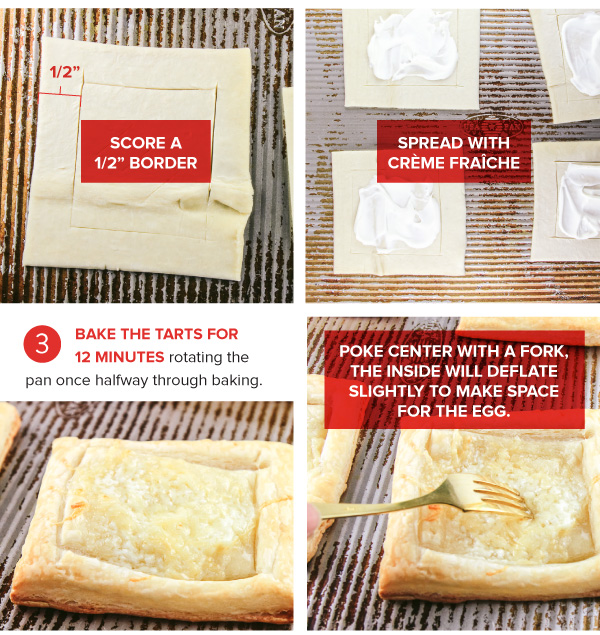
1. Preheat the oven to 400 degrees F. Unfold the two sheets of thawed puff pastry on a lightly floured surface and cut each sheet into 4 squares. Score a 1/2" border for each square using a sharp knife. Transfer the squares to the baking sheet.
2. Working to stay within the center of the pastry, spread 1 teaspoon of crème fraîche on each pastry. Add a pinch of parmesan cheese on top of the crème fraîche.
3. Bake the tarts for 12 minutes, rotating the pan once halfway through baking.
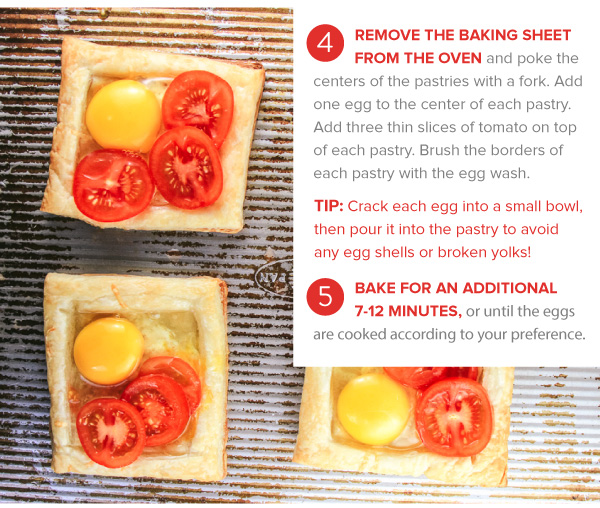
4. Remove the baking sheet from the oven and poke the centers of the pastries with a fork. Add one egg to the center of each pastry. Add three thin slices of tomato on top of each pastry. Brush the borders of each pastry with the egg wash. TIP: Crack the egg into a bowl, then pour it into the pastry to avoid any egg shells or broken yolks!
5. Bake for an additional 7-12 minutes, or until the eggs are cooked according to your preference.
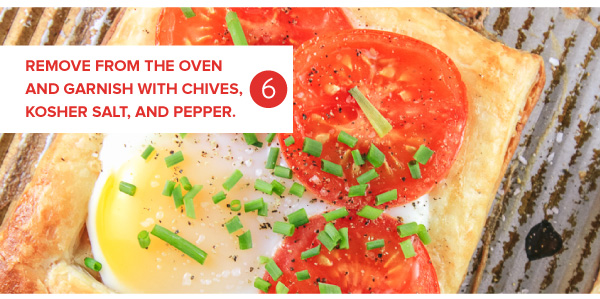
6. Remove from the oven and garnish with chives, Kosher salt, and pepper.

Savory Breakfast Tarts

Lunch Time Wraps

Lunchtime Wraps
Introduction
Lunchtime Wraps
Lunchtime Wraps
Lunchtime Wraps
Lunchtime Wraps
Lunchtime Wraps
Lunchtime Wraps
Lunchtime Wraps
Lunchtime Wraps

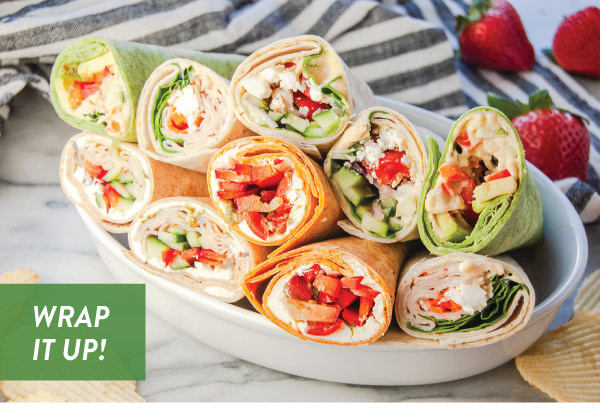
Packing lunch doesn’t have to be a drag! It also doesn’t need to require a lot of planning or prep time. Wraps are a delicious way to include nutritious veggies and lean proteins into your day. Prep vegetables on Sunday so that you’re ready to eat these five healthy, simple, and filling wraps all week long! Makes 5 lunches for 2 people.

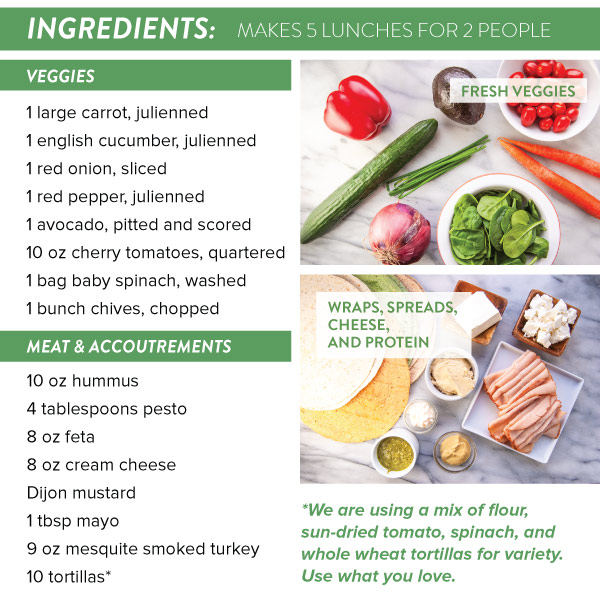
Veggie Ingredients:
1 large carrot, julienned
1 english cucumber, julienned
1 red onion, sliced
1 red pepper, julienned
1 avocado, pitted and scored
10 oz cherry tomatoes, quartered
1 bag baby spinach, washed
1 bunch chives, chopped

Meat & Accoutrements:
10 oz hummus
4 tablespoons pesto
8 oz feta
8 oz cream cheese
Dijon mustard
1 tbsp mayo
9 oz mesquite smoked turkey
10 tortillas*

Directions:
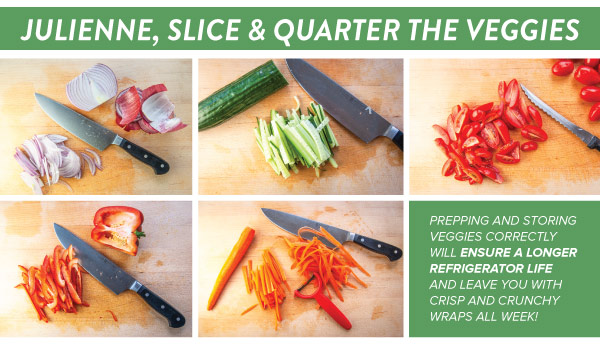
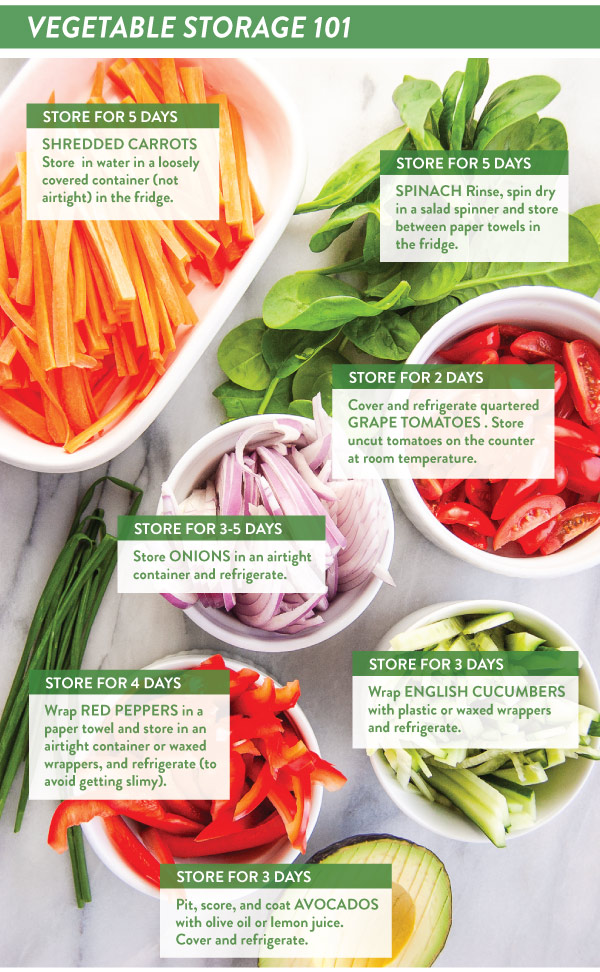
1. JULIENNE, SLICE & QUARTER the veggies. Once prepped, wrap or place in an airtight container, and store in the refrigerator.
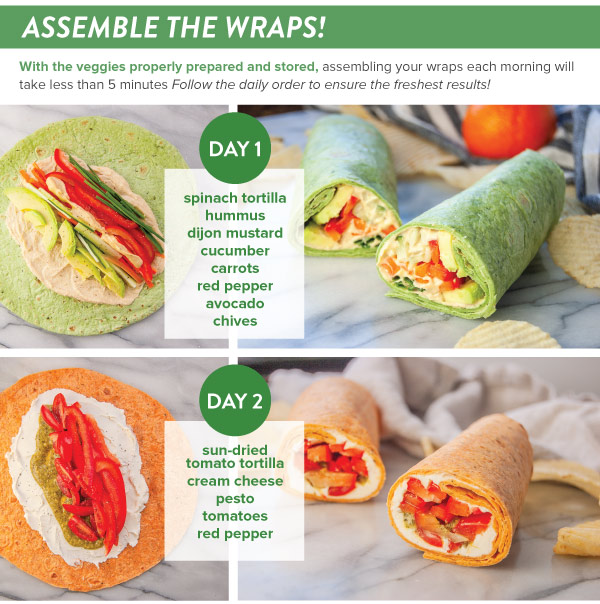
2. ASSEMBLING the wraps each morning is a breeze with all the prep done ahead!
Day 1: Spinach tortilla w/ hummus, Dijon mustard, cucumber, carrots, red pepper, avocado, chives.
Day 2: Sun-dried tomato tortilla, cream cheese, pesto, tomatoes, red pepper
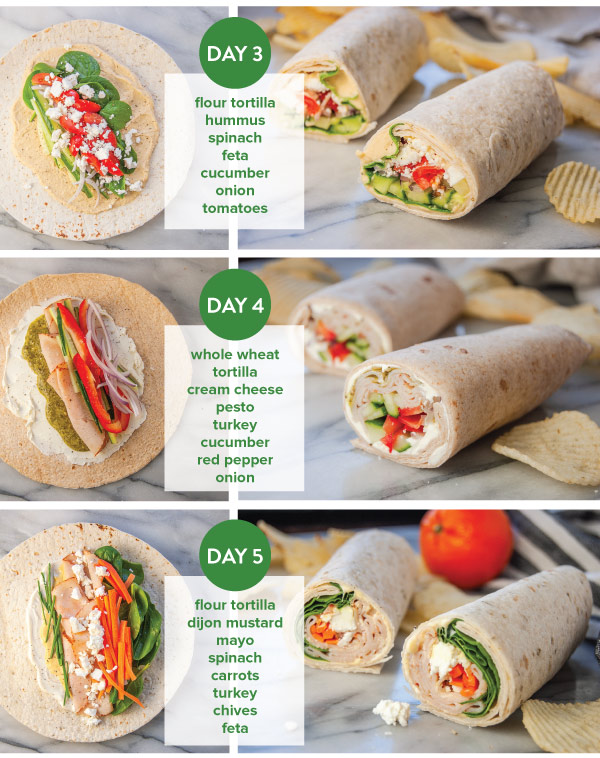
Day3: Flour tortilla, hummus, spinach, feta, cucumber, onion tomatoes
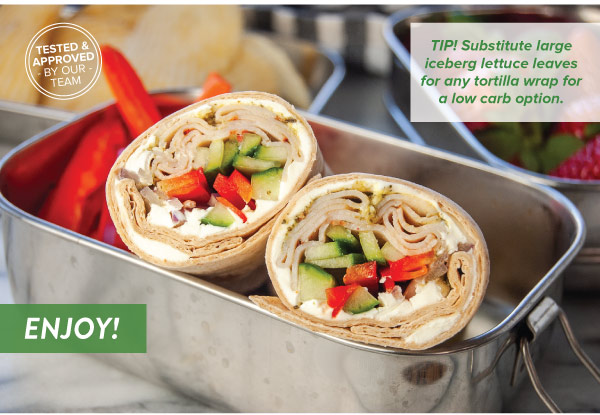
Day 4: Whole wheat tortilla, cream cheese pesto, turkey, cucumber, red pepper, onion Day 5: Flour tortilla, Dijon mustard, mayo, spinach, carrots, turkey, chives, feta
3. WRAP and pack into lunch boxes using a stay cool pack to maintain freshness.

Summer Farro Salad

Summer Farro Salad
Introduction
Summer Farro Salad
Summer Farro Salad
Summer Farro Salad
Summer Farro Salad
Summer Farro Salad
Summer Farro Salad
Summer Farro Salad

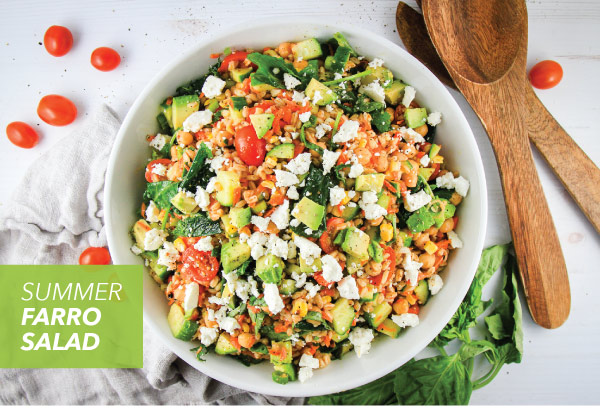
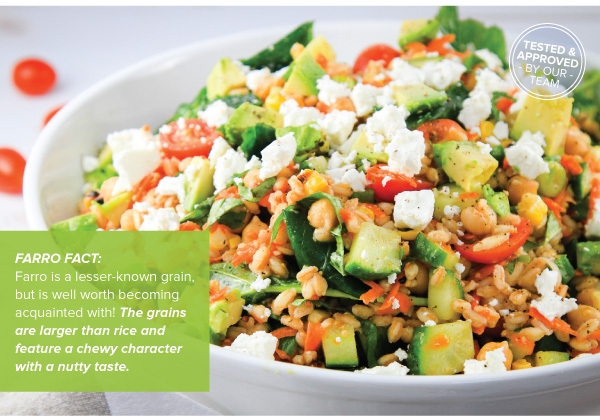
This hearty salad is our go-to dish when we arrive home from the farmers’ market with loads of beautiful, fresh vegetables. The farro base and mustard dressing combine delightfully with any combination of chopped veggies, but we’ve included our favorites here. Enjoy! Serves 4-6.

Ingredients:
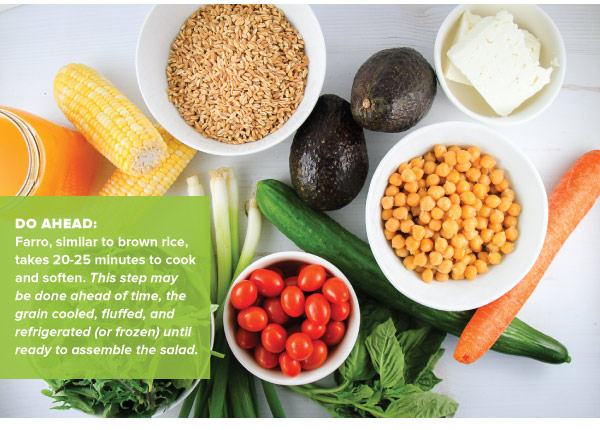
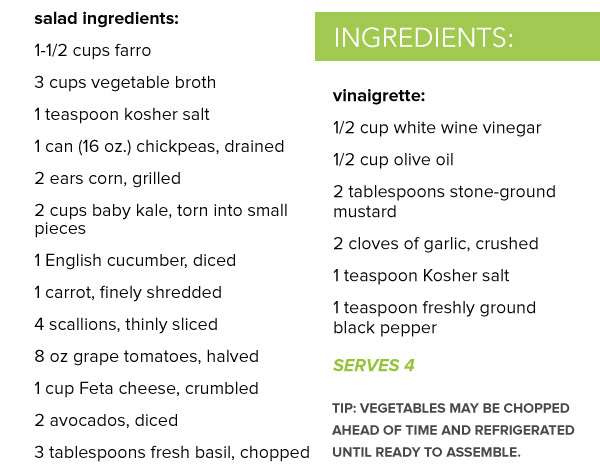
1-1/2 cups farro
3 cups vegetable broth
1 teaspoon kosher salt
1 can (16 oz.) chickpeas, drained
2 ears corn, grilled
2 cups baby kale, torn into small pieces
1 English cucumber, diced
1 carrot, finely shredded
4 scallions, thinly sliced
8 oz grape tomatoes, halved
1 cup Feta cheese, crumbled
2 avocados, diced
3 tablespoons fresh basil, chopped

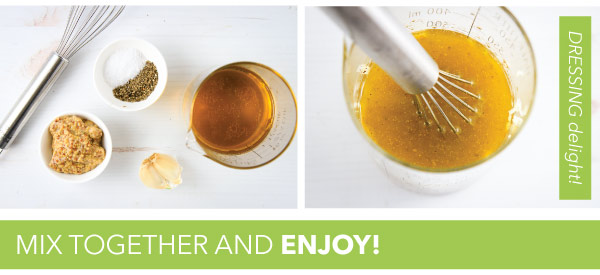
Dressing:
1/2 cup white wine vinegar
1/2 cup olive oil
2 tablespoons stone-ground mustard
2 cloves of garlic, crushed
1 teaspoon Kosher salt
1 teaspoon freshly ground black pepper

Directions:
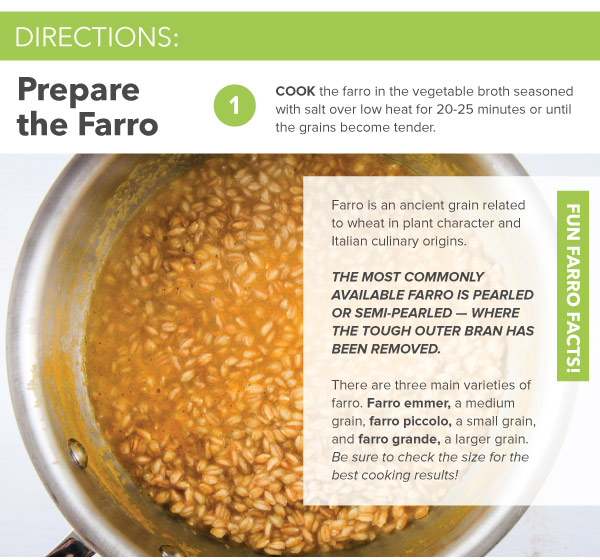
1. COOK the farro in the vegetable broth seasoned with salt over low heat for 20 minutes or until the grains become tender.
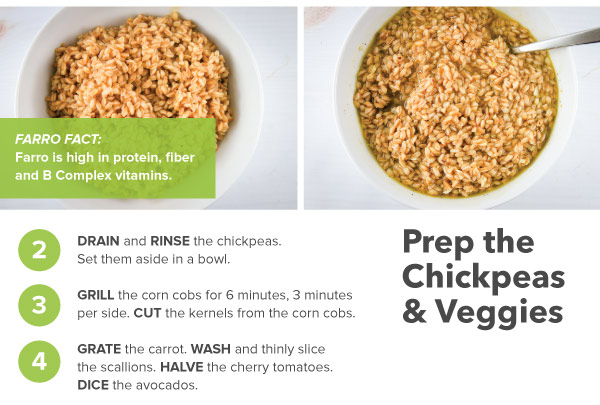
2. DRAIN and RINSE the chickpeas, set aside in a bowl.
3. GRILL the corn ears for 12 minutes, 3 minutes per side. CUT the kernels from the corn cobs.
4. GRATE the carrot. WASH and thinly slice the scallions. Halve (or quarter) the cherry tomatoes.
5. CRUMBLE the feta cheese. Dice the avocados.
6. MIX the dressing ingredients together with an immersion blender or by whisking vigorously. POUR the mixed dressing over the cooked farro. Allow the farro to cool before adding the remainder of the ingredients.
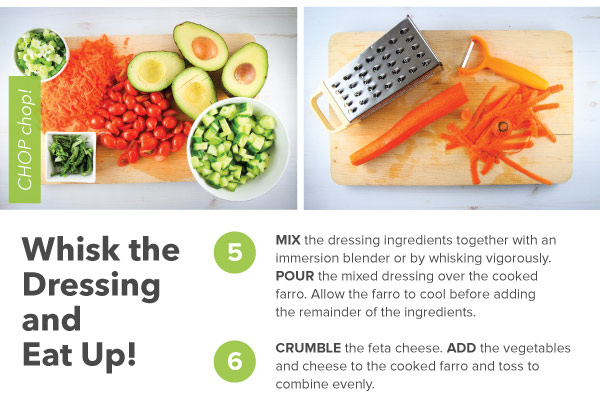
7. ADD the vegetables and cheese to the cooked farro and toss to combine evenly. Enjoy, or refrigerate if serving later.
Summer Farro Salad