dinner

Scallops with Lemon Pasta

A classic romantic dinner for two, scallops and pasta make a great “date-night in”! Scallops are often referred to as the 'candy of the sea' — and for good reason! When cooked correctly, these beautiful morsels have the most delicate, sweet flavor. This issue showcases how to properly select and cook scallops — a presentation featuring a caramelized crust on the outside and a slightly-sweet, buttery-soft inside. Served on a bed of lemon-enhanced angel hair pasta, this meal is just as filling as it is fancy. 

Sugar-Seared Scallops with Lemon Pasta
Makes 2 generous servings

Sugar-Seared Scallop Ingredients:
10 sea scallops
1/4 teaspoon Kosher salt
1/4 teaspoon black pepper
2 tablespoons butter
2 tablespoons sugar
1 cup dry white wine

Lemon Pasta Ingredients:
1/2 lb angel hair pasta
5 tablespoons butter
5 cloves garlic, thinly sliced
1/2 teaspoon crushed red pepper flake
1-1/2 cup vegetable stock
1 tablespoon fresh lemon juice
1/2 tablespoon lemon zest
2 tablespoons fresh parsley, chopped
1/2 cup shredded parmesan
1/4 teaspoon salt
1/4 teaspoon pepper

Directions:
This is a great recipe to make with two chefs working together for a romantic meal! The first chef can focus on the pasta and sauce, while the second can sugar-sear the scallops. With both chefs working simultaneously, this dinner comes together quickly!

CHEF ONE PREPARE THE PASTA:
1. Prepare the pasta sauce by melting the butter over medium heat. Add the garlic and cook for 1 minute until fragrant. Add the crushed red pepper and cook for another minute. Add the vegetable stock, lemon juice, and lemon zest, and cook for 5 minutes to allow the flavors to get friendly.

2. Meanwhile, prepare the pasta by bringing a large pot of water to a rolling boil. Add a healthy dose of salt and add the pasta, cooking until al dente, about 2-3 minutes. Strain the pasta from the water and set aside until the scallops have seared.

CHEF TWO PREPARE THE SCALLOPS:
3. While Chef One makes the pasta, Chef Two can prepare the scallops. Gently rinse the scallops and pat dry with a paper towel. Gently remove the side muscle that secures the scallop to the shell, if necessary. Sprinkle the scallops with salt and pepper. Prepare a plate with a layer of sugar.

4. Sear the scallops. Heat the butter in a skillet on medium-high. While the butter heats, coat both sides of each scallop in sugar. Once the skillet is hot, work in two batches to cook the scallops. Place the scallops sugar-side down on the skillet, spacing them at least 1 inch apart, making sure not to crowd the pan. The scallops should sizzle on contact with the pan. If they start to brown too quickly, reduce the heat. Use tongs to gently flip and cook scallops for 2-3 more minutes. Scallops should release easily from the pan when they are ready to be turned. Remove the first batch of scallops from the pan and cook the second batch, reserving the pan juices. Deglaze the pan by adding the wine, and continue to cook the scallop juices and wine for another minute. Remove from the heat and set aside.

WORK TOGETHER TO PLATE THE DINNER:
5. Just as the scallops finish searing, have Chef One stir the cooked pasta into the sauce. Use tongs to make sure the sauce fully coats the pasta. Sprinkle with parsley and parmesan and toss.

6. Artfully plate the pasta and have Chef Two add the seared scallops on top. Drizzle the seared scallops with any remaining scallop pan juices. Sprinkle with additional salt and pepper and serve immediately. Enjoy!

Creamy Butternut Squash Pasta with Sausage and Crispy Sage

Fall flavors unite in a most delightful way in this creamy, dreamy pasta!

IN THIS ISSUE, butternut squash is transformed into a tasty sauce. The naturally sweet sauce is balanced with spicy sausage, then generously topped with savory cheese and crispy sage leaves. It’s a wonderful kind of deliciousness!

Creamy Butternut Squash Pasta with Sausage and Crispy Sage 
Serves 8 - 10 

Fall flavors unite in a most delightful way in this creamy, dreamy pasta! Butternut squash is transformed into a tasty sauce. The naturally sweet sauce is balanced with spicy sausage, then generously topped with savory cheese and crispy sage leaves. It’s a wonderful kind of deliciousness! 

Ingredients: 
1 medium butternut squash, peeled, cut in half, seeds removed 
4 tablespoons butter 
20-25 fresh sage leaves 
1 lb hot Italian ground sausage 
2 tablespoons olive oil 
1 large shallot, finely diced 
2 cloves garlic, minced
1/2 cup white wine 
1 cup heavy whipping cream 
1 teaspoon Kosher salt 
1/2 teaspoon black pepper 
2 lbs pasta, ziti or another tube pasta 

Garnish: 
crispy sage leaves parmesan cheese, shaved or grated

Directions: 
1. Prep the butternut squash: Wash the squash well, cut both ends o the squash to create a flat surface. Peel the squash with a peeler. Slice in half length-wise and scoop out the seeds. 

2. Using a large pasta pot with a steamer basket, steam the butternut squash until it is fork tender, about 30-35 minutes. 

3. Remove the squash and purée with a blender or immersion blender until it is smooth. 

4. Meanwhile, in a large Dutch oven, sauté the sausage into bite-sized chunks until nicely browned. Remove the sausage from the pot. Set aside. Reserve the pot and drippings for the shallots, garlic, and the next steps in sauce making. 

5. Next, in a nonstick skillet, prepare the crispy sage leaves. Melt the butter, then sizzle the sage leaves on each side until just crisp. Place the leaves on a paper towel-lined plate to cool. Reserve the sage butter to sauté the shallot and garlic, and for adding to the sauce. 

6. Using the Dutch oven, add any remaining butter from the sage. Sauté the shallot and garlic until translucent. Add additional olive oil to sauté, as needed. 

7. Once the aromatics are softened, add 1/2 cup of white wine and simmer until the wine is reduced by half. 

8. Add the blended squash to the aromatics and stir until combined. Stir in the heavy cream. Gently simmer the sauce until the pasta is ready. Season with salt and pepper, to taste. 

9. Meanwhile, cook the pasta until al dente, reserve at least 1 cup of the pasta water, then drain well. 

10. Add the pasta to the sauce. Add up to 1 cup of reserved pasta water until the sauce reaches a silky consistency. 

11. Add the sausage to the pasta. Dish the pasta, and garnish with a hearty portion of freshly shaved or grated parmesan cheese. Top each serving with several crispy sage leaves.

Orange & Thyme Pork Tenderloin

Pork tenderloins are perfectly primed for adapting to flavorful marinades. This marinade features fresh orange juice, thyme leaves and a few other classic marinade flavormakers like Dijon mustard, soy sauce, brown sugar, and garlic powder. It’s an easy and delicious recipe!

Orange & Thyme Pork Tenderloin
Serves 4 - 6

Ingredients:
2 pork tenderloins

Marinade:
1 tablespoon Dijon mustard
2 cloves garlic, minced
2 tablespoons brown sugar
2 tablespoons orange juice
3 tablespoons soy sauce
2 tablespoons olive oil
1/2 teaspoon Kosher salt
1/2 teaspoon freshly ground black pepper
1/2 teaspoon garlic powder
4 sprigs of thyme, leaves only

Directions:
1. Prepare the marinade in a medium bowl by whisking all of the ingredients together.

2. Add the pork tenderloins to the marinade, cover, and refrigerate for at least one hour for the flavors to infuse into the meat.

3. Fire up the grill! Let the marinated tenderloins warm to room temperature for 20 minutes before grilling. Place the marinated tenderloins on the hot, well-oiled grill, and sear for 3-4 minutes on each side. Turn until all sides have seared and browned, and then, turn o one burner (or turn to low) to create a direct/indirect environment. Place the seared tenderloins on the cooler, indirect side, and continue to cook until their internal temperature reaches 145 degrees F.

4. Once the pork tenderloins reach 145 degrees F, place on a clean plate, and cover loosely with a tinfoil "tent" for about 10 minutes. This allows the meat to rest, and the juices to soak back into the meat.

5. Slice the grilled tenderloins, and serve warm.

Fresh Inspiration! Huevos Rancheros for Breakfast

Huevos Rancheros

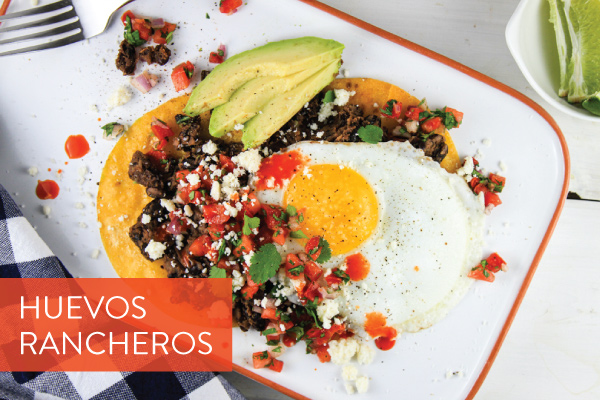
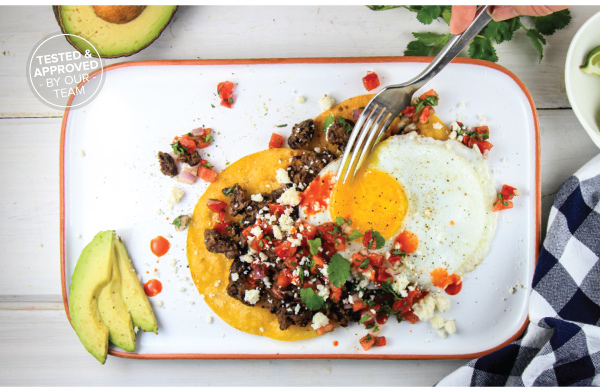
This classic Mexican breakfast translates to “ranch eggs” and highlights a perfectly fried egg served on a warm tortilla with black beans, cotija cheese, and fresh pico de gallo.

Featured Products
Huevos Rancheros
Huevos Rancheros
Huevos Rancheros
Huevos Rancheros
Huevos Rancheros
Huevos Rancheros
Huevos Rancheros
Huevos Rancheros
Huevos Rancheros

Huevos Rancheros
Serves 4

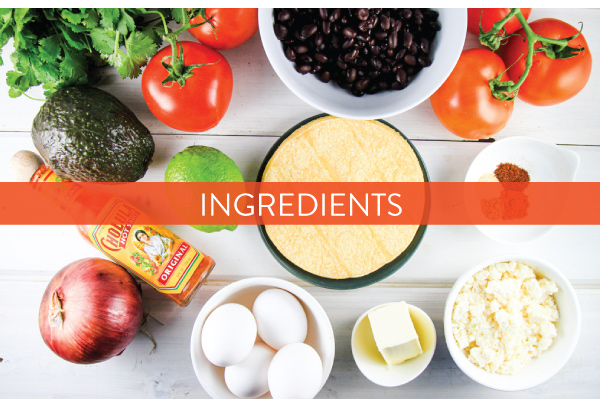
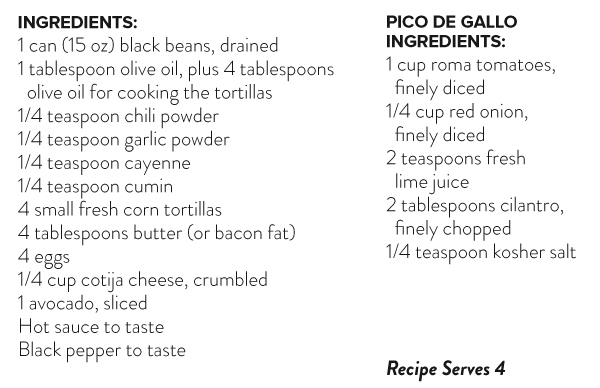
Ingredients:
1 can (15 oz) black beans, drained
1 tablespoon olive oil, plus 4 tablespoons olive oil for cooking the tortillas
1/4 teaspoon chili powder
1/4 teaspoon garlic powder
1/4 teaspoon cayenne
1/4 teaspoon cumin
4 small fresh corn tortillas
4 tablespoons butter or bacon fat
4 eggs
1/4 cup cotija cheese, crumbled
1 avocado, sliced
Hot sauce to taste
Black pepper to taste

Pico De Gallo Ingredients:
1 cup roma tomatoes, finely diced
1/4 cup red onion, finely diced
2 teaspoons fresh lime juice
2 tablespoons cilantro, chopped
1/4 teaspoon kosher salt

Directions:
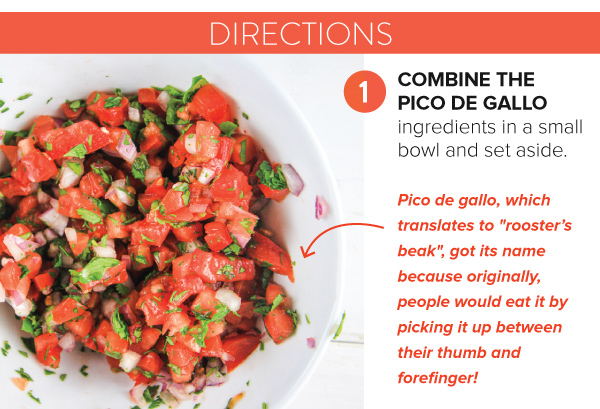
1. Combine pico de gallo ingredients in a small bowl and set aside.

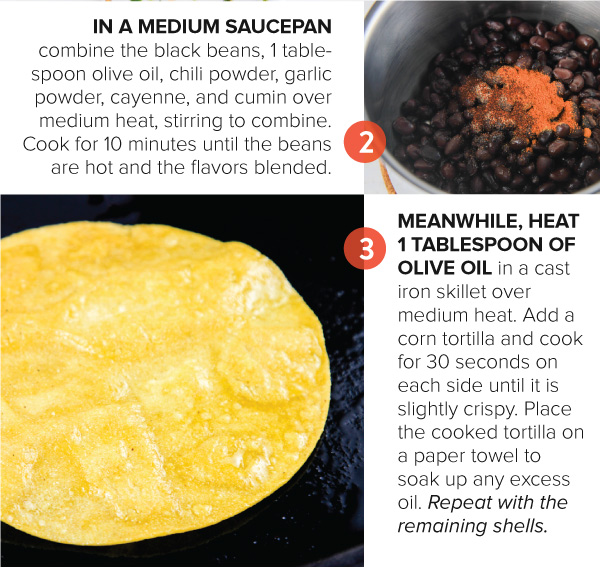
2. In a medium saucepan combine black beans, 1 tablespoon olive oil, chili powder, garlic powder, cayenne, and cumin over medium heat, stirring to combine. Cook for 10 minutes until beans are hot and the flavors blended.

3. Meanwhile, heat 1 tablespoon of olive oil, in a cast iron skillet over medium heat. Add a tortilla and cook for 30 seconds on each side until the tortilla is slightly crispy. Place the cooked tortilla on a paper towel to soak up any access oil. Repeat with the remaining tortillas.

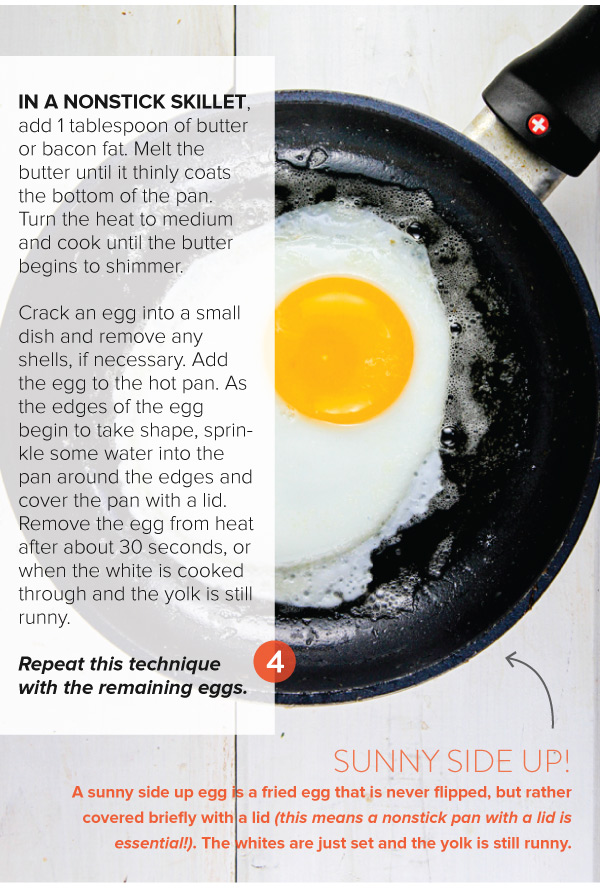
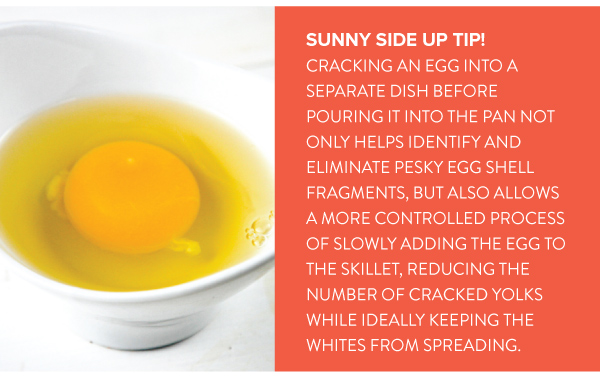
4. In a nonstick skillet, add 1 tablespoon of butter (or bacon fat). Melt the butter until it thinly coats the bottom of the pan. Turn the heat to high until the butter begins to shimmer. Crack an egg into a small dish and remove any shells, if necessary. Add the egg to the hot pan. As the edges of the egg begin to take shape, sprinkle some water into the pan around the edges and cover the pan with the lid. Remove the egg from heat after about 30 seconds, or when the white is cooked through and the yolk is still runny. Repeat this technique with the remaining eggs.

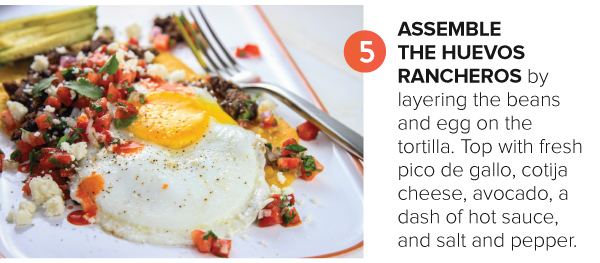
5. Assemble the huevos rancheros by layering the beans and egg on the tortilla. Top with fresh pico de Gallo, cotija cheese, avocado, and a dash of hot sauce. Enjoy!