sour cream

Chicken Green Enchiladas

Cheesy and creamy, these green enchiladas are one great definition of comfort food! The green enchilada sauce is enhanced with a filling of grilled and diced chicken, white beans, green chilies, cheese, onion, garlic, herbs, and a little sour cream. After stuffing and rolling the enchiladas, add another layer of sauce on top. Don’t forget to finish with a hearty layer of cheese. After baking, garnish with fresh cilantro. So tasty!

Chicken Green Enchiladas
Makes 8 enchiladas

Enchiladas:
2 garlic & lime chicken breasts (marinated, grilled, and sliced)
2 tablespoons olive oil
1 onion, diced
2 cloves garlic, minced
1 teaspoon dried oregano
1 teaspoon dried cumin
1/2 teaspoon
Kosher salt
1/2 teaspoon freshly ground pepper
1 can (4 oz) diced green chilies
1 can white beans, rinsed and drained
2 cups Monterey Jack cheese, shredded
1 can (28 oz) green enchilada sauce
1 cup sour cream

Garnishes:
Lime wedges, Fresh cilantro leaves, Pickled jalapeños, Hot sauce

Garlic & Lime Grilled Chicken:
6 chicken breasts - some now, some later

Marinade:
1 tablespoon lime zest (about two small limes)
2 tablespoons chili powder
2 tablespoons garlic powder
1 tablespoon paprika
1 tablespoon cumin
1 tablespoon sugar
1 teaspoon pepper
1 teaspoon Kosher salt
1/2 cup vegetable oil
2 tablespoons fresh lime juice

Directions:
1. Preheat the oven to 400 degrees F.

2. Sauté the onion and garlic in a large skillet until the onion is translucent. Season the onions with oregano, cumin, salt, and pepper.

3. Add the green chilies, white beans, 1 cup of grated cheese, 1 cup green enchilada sauce, and 1 cup of sour cream. Stir to combine. Add the diced chicken and fold together until combined.

4. Spoon 1 cup of enchilada sauce around the bottom of the pan. This recipe makes about 8 enchiladas which can fit into a standard 9x12 casserole pan, or individual sized dishes that fit 2 enchiladas each.

5. Fill the tortillas with a scoop of the chicken mixture and roll up tightly. Place the stuffed tortillas seam side down in the pan. Pack the pan tightly.

6. Spoon more enchilada sauce on top of the rolled tortillas. Sprinkle one more cup of grated cheese on top.

7. Bake for 20-25 minutes or until the cheese has started to brown and the enchiladas are bubbling hot. 8. Serve warm with your choice of garnishes.

Garlic & Lime Grilled Chicken Directions:
1. In a small bowl, combine the lime zest and the marinade spices: chili powder, garlic powder, paprika, cumin, sugar, pepper, and salt. Stir together until evenly mixed.

2. Place the chicken breasts in a large bowl or in a sealable bag inside of a large bowl.

3. Pour the vegetable oil and lime juice over the chicken, then sprinkle with the spice mixture.

4. Rub the chicken with the spices until it is completely coated.

5. Cover the chicken and refrigerate. Marinate the chicken in the refrigerator for 3-4 hours or overnight.

6. Fire up the grill! Heat the grill; ensure your grill grates are clean and well-oiled.

7. Grill the chicken over direct heat until the internal temperature reaches 165 degrees F, turning as needed.

8. Remove the chicken from the grill and let it rest for 10 minutes.

9. Enjoy the chicken immediately or slice, dice, or shred to use in future recipes.

Chicken Fajitas

Fajitas are a colorful, delicious, and healthy option for getting dinner on the table quickly! With the chicken already marinated and grilled, simply grill onions and peppers to add to the chicken. Complete the tasty fajitas with an array of toppings! Some of our favorite fajita toppings include sour cream, cilantro, salsa, hot sauce, a squeeze of lime, salsa, and a little guacamole!

Chicken Fajitas
Serves 4

Fajitas:
2 chicken breasts (marinated, grilled, and diced)
4 flour tortillas, warmed
1 red pepper, sliced into strips
1 green pepper, sliced into strips
1 sweet onion, sliced pole to pole
2 tablespoons olive oil
1/2 teaspoon Kosher salt
1/2 teaspoon pepper

Toppings:
Sour cream
Avocado
Lime wedges
Fresh cilantro leaves
Salsa, and/or hot sauce

Garlic & Lime Grilled Chicken:
6 chicken breasts - some now, some later

Marinade:
1 tablespoon lime zest (about two small limes)
2 tablespoons chili powder
2 tablespoons garlic powder
1 tablespoon paprika
1 tablespoon cumin
1 tablespoon sugar
1 teaspoon pepper
1 teaspoon Kosher salt
1/2 cup vegetable oil
2 tablespoons fresh lime juice

Directions:
1. Prepare the chicken breasts according to the Garlic & Lime Chicken directions below.

2. Prepare the veggies. In a large bowl, toss the sliced peppers and onion with the olive oil, Kosher salt, and pepper. Grill the peppers and onion in a grill basket over direct heat or sauté in a skillet on the stovetop. Stir the vegetables often and cook until slightly charred in spots and cooked to your desired tenderness.

3. Toss the cooked vegetables with the grilled chicken slices.

4. Serve with warmed tortillas and a variety of your favorite toppings.

Garlic & Lime Grilled Chicken Directions:
1. In a small bowl, combine the lime zest and the marinade spices: chili powder, garlic powder, paprika, cumin, sugar, pepper, and salt. Stir together until evenly mixed.

2. Place the chicken breasts in a large bowl or in a sealable bag inside of a large bowl.

3. Pour the vegetable oil and lime juice over the chicken, then sprinkle with the spice mixture.

4. Rub the chicken with the spices until it is completely coated.

5. Cover the chicken and refrigerate. Marinate the chicken in the refrigerator for 3-4 hours or overnight.

6. Fire up the grill! Heat the grill; ensure your grill grates are clean and well-oiled.

7. Grill the chicken over direct heat until the internal temperature reaches 165 degrees F, turning as needed.

8. Remove the chicken from the grill and let it rest for 10 minutes.

9. Enjoy the chicken immediately or slice, dice, or shred to use in future recipes.

Loaded Chicken Quesadillas

These quesadillas are loaded with grilled and diced chicken, black beans, spinach, corn, and plenty of cheese. We love quesadillas for lunch or dinner. Everyone can customize their order to their own preference. Add additional flavor with a variety of toppings!

Loaded Chicken Quesadillas
Serves 4

Quesadillas:
2 chicken breasts (marinated, grilled, and diced)
8 tortillas
8 oz pepper jack cheese, grated
1 can (15 oz) black beans, rinsed and drained
8 oz frozen corn, thawed
4 oz spinach leaves

Toppings:
Sour cream
Avocado
Lime wedges
Fresh cilantro leaves
Salsa
Pickled jalapeños
Hot sauce

Garlic & Lime Grilled Chicken:
6 chicken breasts - some now, some later

Marinade:
1 tablespoon lime zest (about two small limes)
2 tablespoons chili powder
2 tablespoons garlic powder
1 tablespoon paprika
1 tablespoon cumin
1 tablespoon sugar
1 teaspoon pepper
1 teaspoon
Kosher salt
1/2 cup vegetable oil
2 tablespoons fresh lime juice

Directions:
1. Prepare the chicken breasts according to the Garlic & Lime Chicken directions below.

2. Use a panini press or a skillet on the stovetop to cook the quesadillas.

3. Load a tortilla with a layer of pepper jack cheese, then add all of the quesadilla ingredients: diced chicken, black beans, corn, and spinach leaves. Finish with another layer of cheese, then top with another tortilla.

4. If cooking on the stovetop use low heat and practice patience while the cheese melts! Using a large spatula, flip the quesadilla after the cheese has melted enough to hold it together.

5. Cut the quesadilla into wedges and enjoy warm with an array of toppings.

Garlic & Lime Grilled Chicken Directions:
1. In a small bowl, combine the lime zest and the marinade spices: chili powder, garlic powder, paprika, cumin, sugar, pepper, and salt. Stir together until evenly mixed.

2. Place the chicken breasts in a large bowl or in a sealable bag inside of a large bowl.

3. Pour the vegetable oil and lime juice over the chicken, then sprinkle with the spice mixture.

4. Rub the chicken with the spices until it is completely coated.

5. Cover the chicken and refrigerate. Marinate the chicken in the refrigerator for 3-4 hours or overnight.

6. Fire up the grill! Heat the grill; ensure your grill grates are clean and well-oiled.

7. Grill the chicken over direct heat until the internal temperature reaches 165 degrees F, turning as needed.

8. Remove the chicken from the grill and let it rest for 10 minutes.

9. Enjoy the chicken immediately or slice, dice, or shred to use in future recipes.

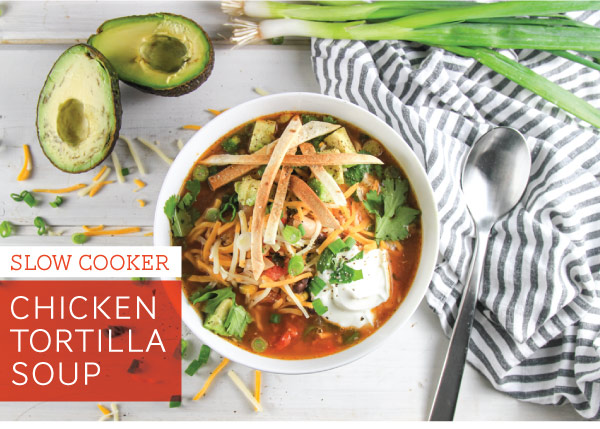
Slow Cooker Chicken Tortilla Soup

Slow Cooker Chicken Tortilla Soup

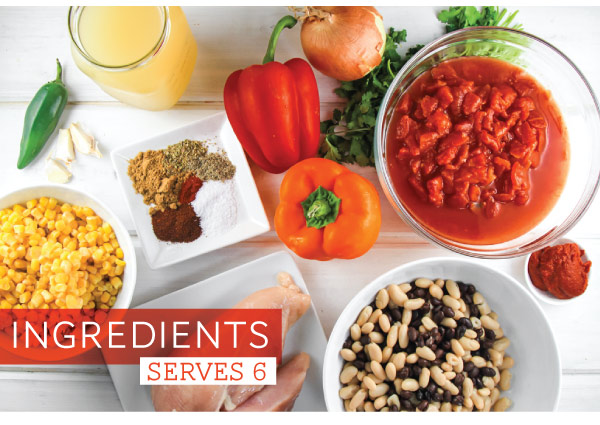
Ingredients:
2 tablespoons olive oil
1 onion, diced 3 cloves garlic, minced
1 jalapeño, seeded and minced
1 yellow bell pepper, diced
1 red bell pepper, diced
1 (28oz) can diced tomatoes
2 tablespoons tomato paste
1 (15oz) can of black beans
1 (15 oz) can of white beans
4 cups chicken broth
1-1/3 lb chicken breasts (2 large breasts)
4 teaspoons ground cumin
4 teaspoons chili powder
1/2 teaspoon paprika.
1/2 teaspoon dried oregano
1 teaspoon garlic powder
1-1/2 teaspoon Kosher salt
1/2 teaspoon freshly ground pepper
1/4 cup chopped fresh cilantro
12 ounces frozen corn

Garnishes:
1/4 cup chopped fresh cilantro
6 Green onions, sliced
Avocado, diced
cheddar cheese, grated
Sour cream

Directions:
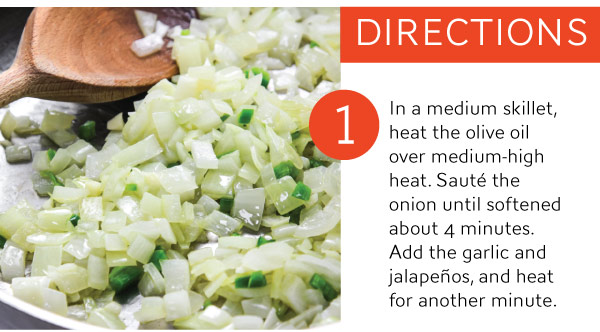
1. In a medium skillet, heat the olive oil over medium-high heat. Sauté the onion until softened about 4 minutes. Add the garlic and jalapeños, and heat for another minute.
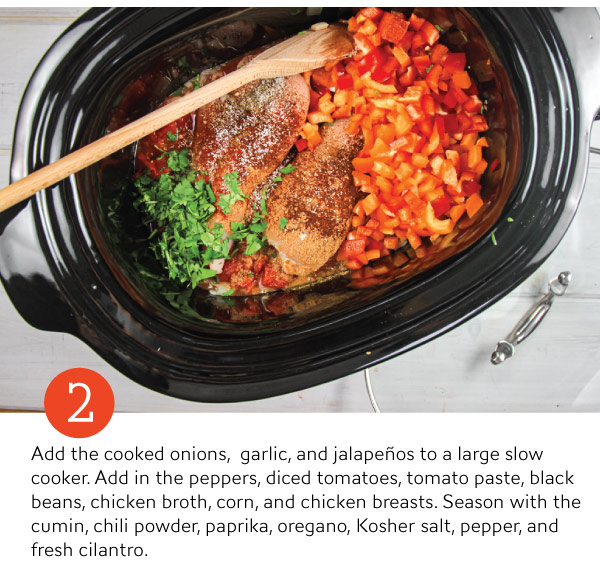
2. Add the cooked onions, garlic, and jalapeños to a large slow cooker. Add in the peppers, diced tomatoes, tomato paste, black beans, chicken broth, corn, and chicken breasts. Season with the cumin, chili powder, paprika, oregano, Kosher salt, pepper, and fresh cilantro.
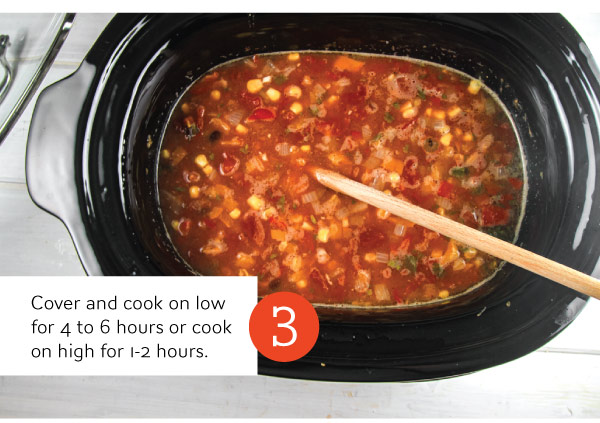
3. Cover and cook on low for 4 to 6 hours or cook on high for 1-2 hours.
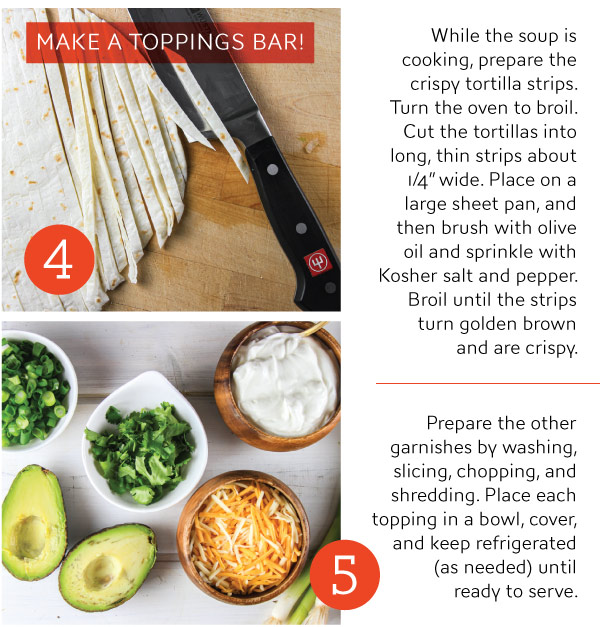
4. While the soup is cooking prepare the crispy tortilla strips. Turn the oven to broil. Cut the tortillas into long, thin strips about 1/4” wide. Place on a large sheet pan, and then brush with olive oil and sprinkle with Kosher salt and pepper. Broil until the strips turn golden brown and are crispy.
5. Prepare the other garnishes by washing, slicing, chopping, and shredding. Place each topping in a bowl, cover, and keep refrigerated (as needed) until ready to serve.
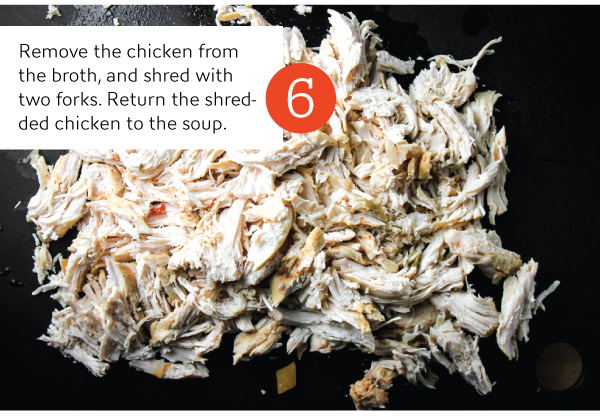
6. Remove the chicken and shred with two forks. Add the frozen corn to the soup while you are shredding the chicken. Return the shredded chicken to the soup.
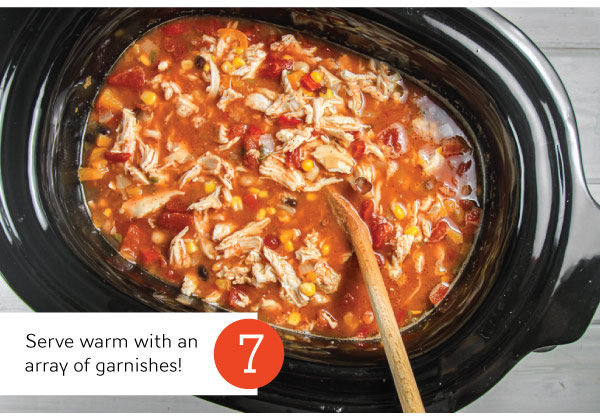
7. Serve warm with an array of garnishes!

Slow Cooker Chicken Tortilla Soup

Hot Artichoke Dip

Hot Artichoke Dip with Roll Ring
Fall Flavors Entree Salad
Hot Artichoke Dip with Roll Ring

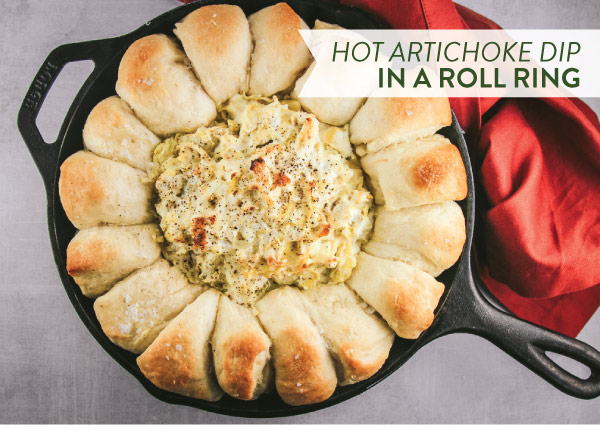
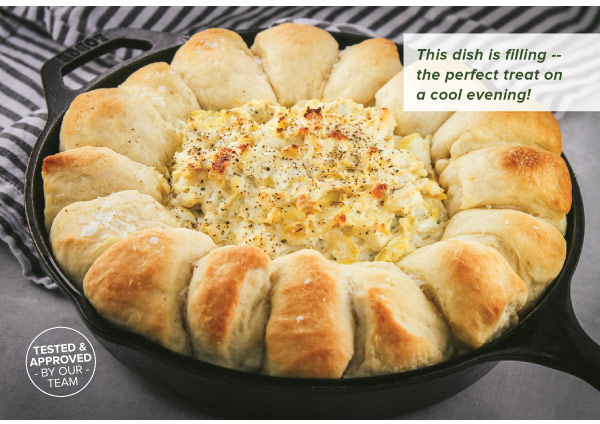
Looking for an easy and filling appetizer? This hot artichoke dip in a roll ring is sure to be a hearty crowd pleaser this holiday season! The super cheesy and flavorful dip is surrounded by warm, buttery rolls ready for dipping and enjoying. Makes one 10”-skillet, serves about 8-10.

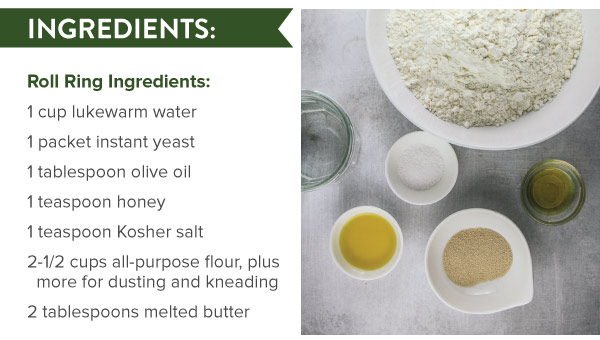
Roll Ring Ingredients:
1 cup lukewarm water
1 packet instant yeast
1 tablespoon olive oil
1 teaspoon honey
1 teaspoon Kosher salt
2-1/2 cups all-purpose flour, plus more for dusting and kneading
2 tablespoons melted butter for dipping rolls.

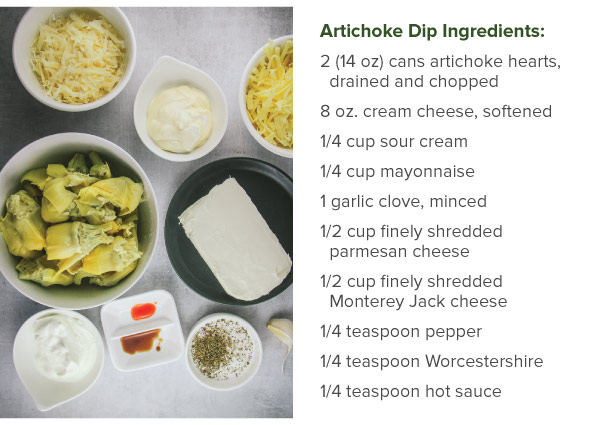
Artichoke Dip Ingredients:
2 (14 oz) cans artichoke hearts, drained and chopped
8 oz. cream cheese, well softened
1/4 cup sour cream
1/4 cup mayonnaise
1 garlic clove, minced
1/2 cup finely shredded parmesan cheese
1/2 cup finely shredded Monterey Jack cheese
1/4 teaspoon pepper 1/4 teaspoon Worcestershire
1/4 teaspoon hot sauce.

Directions:
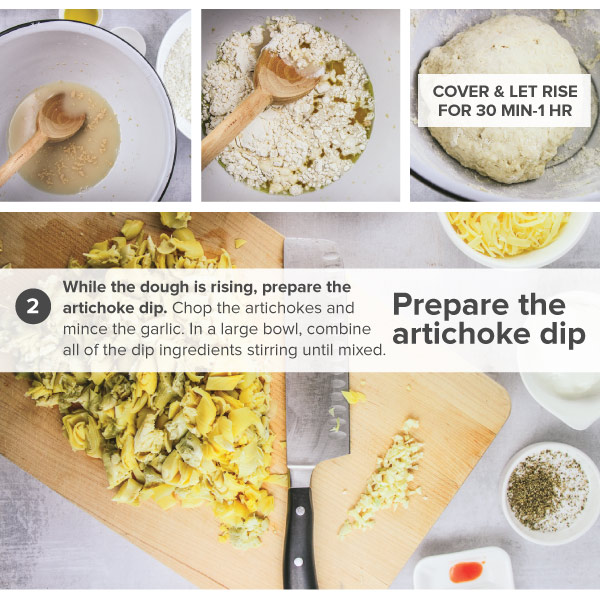
1. Prepare the roll ring dough. Add the yeast to warm water, and proof for 2 minutes (until a few bubbles begin to appear). Then add in the olive oil, honey, salt, and one cup of the flour. Mix together, then slowly add in the remaining flour; mix until a rough dough ball is formed. Transfer the dough to a floured surface. With the heel of your hand, knead the dough, adding flour as necessary to keep it from sticking. Knead until the dough turns into a smooth ball; place in an oiled bowl. Cover the bowl with a towel and let rise at room temperature until doubled in size, about 30 - 60 minutes.
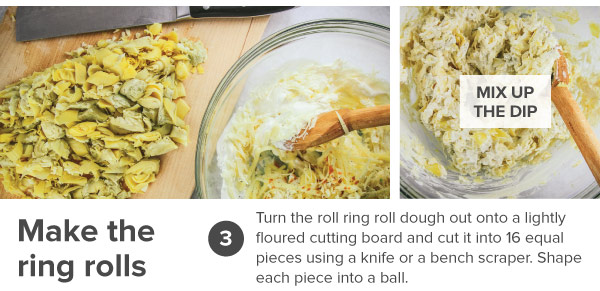
2. While the dough is rising, prepare the artichoke dip. Chop the artichokes and mince the garlic. In a large bowl, combine all of the dip ingredients and stir until well-mixed.
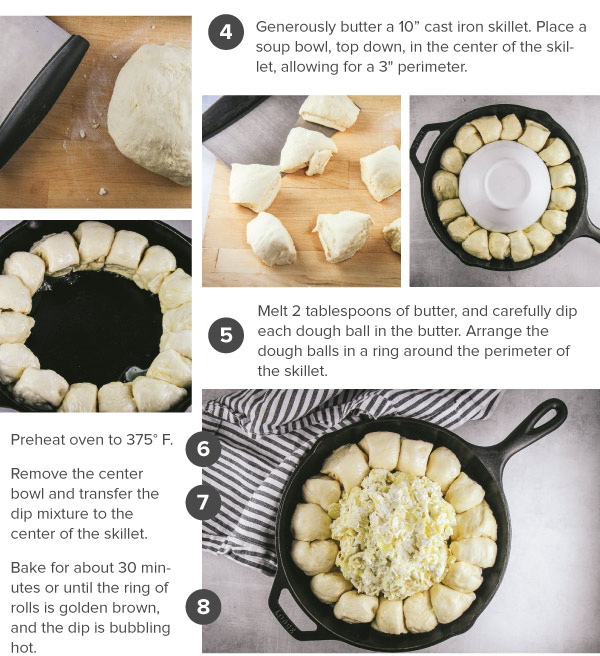
3. Turn the ring roll dough out onto a lightly floured cutting board and cut it into 16 equal pieces using a knife or a bench scraper. Shape each piece into a ball.
4. Generously butter a 10” cast iron skillet. Place a soup bowl, top down, in the center of the skillet, allowing for about a 3" perimeter around the sides.
5. Melt 2 tablespoons of butter, and carefully dip each dough ball in the butter. Arrange the dough balls in a ring around the perimeter of the skillet. Cover with a towel and let the dough rise until it has doubled in size, roughly 30 minutes.
6. Preheat the oven to 375° F. Remove the center bowl and transfer the mixed dip mixture to the center of the cast iron skillet. Bake for about 30 minutes or until the ring of rolls is golden brown, and the dip is bubbling hot. Remove from the oven and serve while warm.

Hot Artichoke Dip with Roll Ring

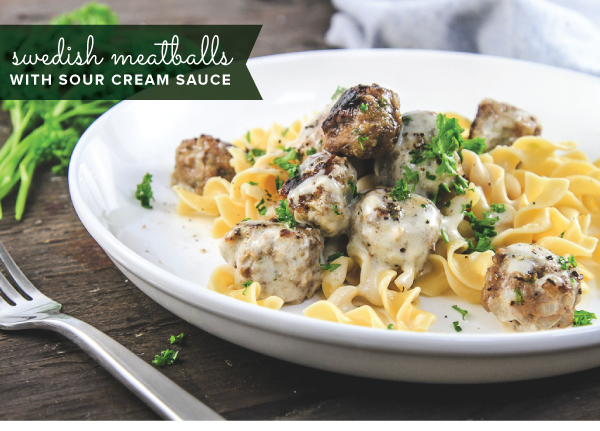
Swedish Meatballs with Sour Cream Sauce

Swedish Meatballs with Sour Cream Sauce
Introduction
Swedish Meatballs with Sour Cream Sauce

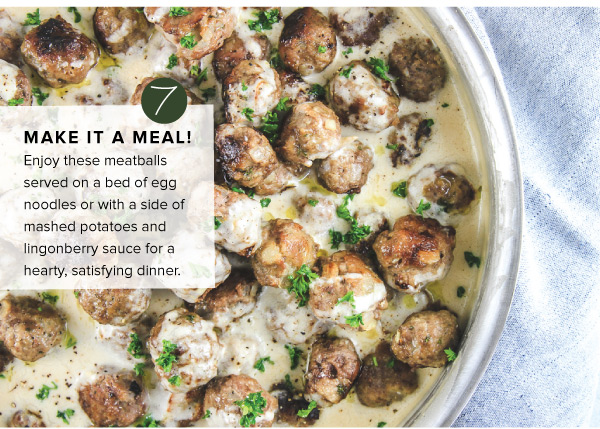
Make Swedish Meatballs for a delicious and hearty dinner -- perfect for a cool fall day! Serve these warm, savory meatballs bathed in their rich, creamy sauce on top of a bed of buttered egg noodles, and a garnish of fresh parsley. Or, serve them with a side of mashed potatoes and some lingonberry sauce. These meatballs are a great do-ahead meal -- make some now, freeze some for later. Makes about 70 1-inch meatballs.

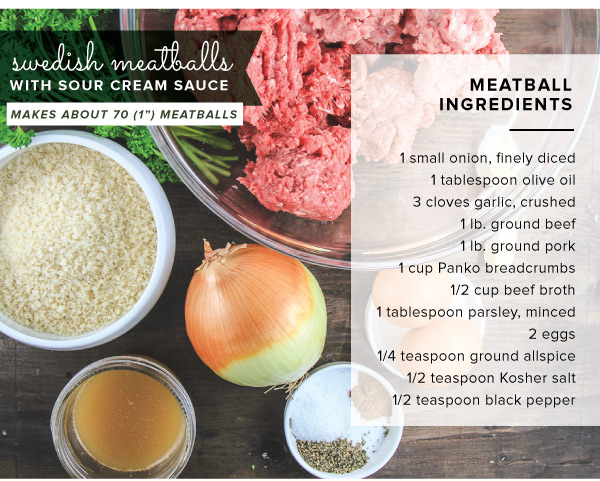
Meatball Ingredients:
1 small onion, finely diced
1 tablespoon olive oil
3 cloves garlic, crushed
1 lb. ground beef
1 lb. ground pork
1 cup Panko breadcrumbs
1/2 cup beef broth
1 tablespoon parsley, minced
2 eggs
1/4 teaspoon ground allspice
1/2 teaspoon Kosher salt
1/2 teaspoon black pepper

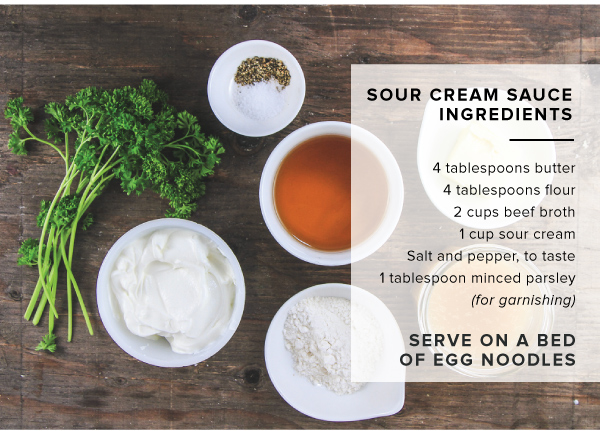
Sour Cream Sauce Ingredients:
4 tablespoons butter
4 tablespoons flour
2 cups beef broth
1 cup sour cream (additional for garnishing, if desired)
Salt and pepper, to taste
1 tablespoon minced parsley (for garnishing)

Serve with egg noodles, or mashed potatoes.

Directions:
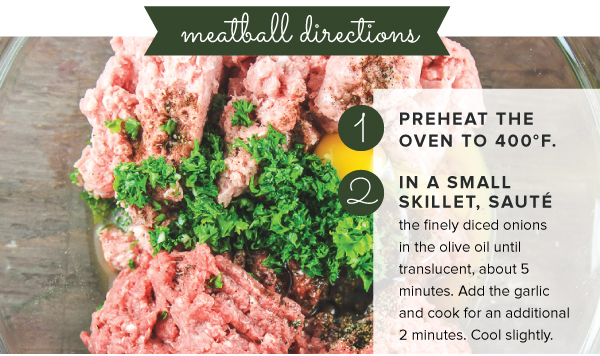
1. Preheat the oven to 400°F.
2. In a small skillet, sauté the finely dice onions in the olive oil until translucent, about 5 minutes. Add the garlic and cook for an additional 2 minutes. Cool slightly.
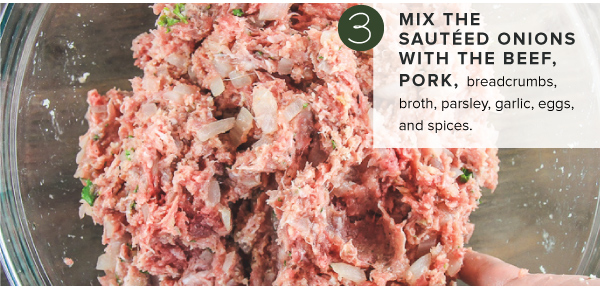
3. Mix the sautéed onions with the beef, pork, breadcrumbs, broth, parsley, garlic, eggs, and spices.
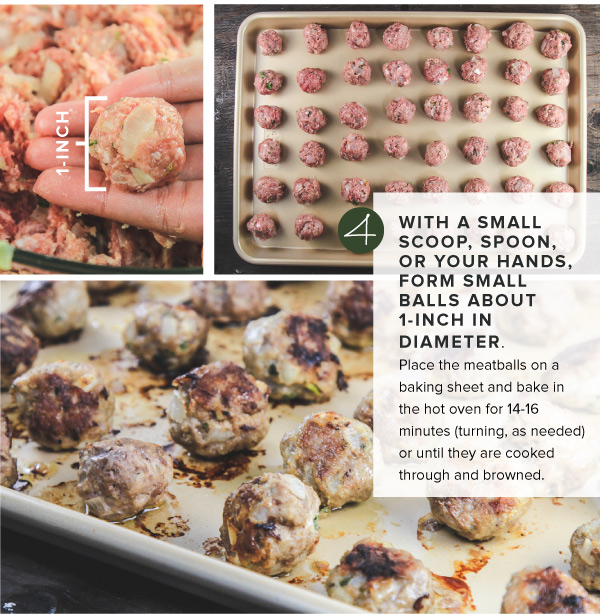
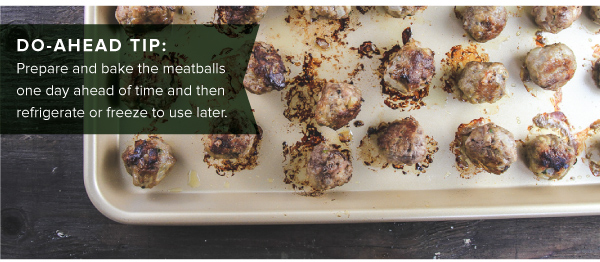
4. With a small scoop, spoon, or your hands, form small balls about 1-inch in diameter. Place the meatballs on a baking sheet and bake in the hot oven for 14-16 minutes or until they are cooked through and browned. (DO-AHEAD TIP: Prepare and bake the meatballs one day ahead of time and then refrigerate or freeze to use later.)
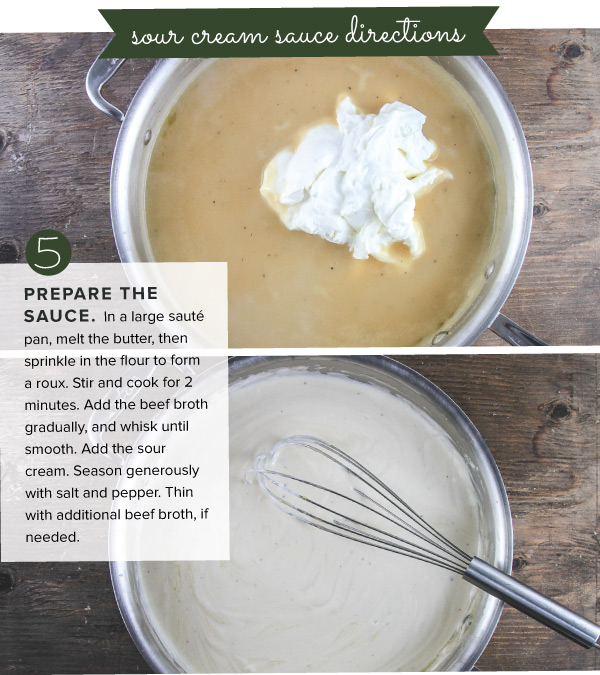
5. Prepare the sauce. In a large sauté or saucier pan, melt the butter and then sprinkle in the flour to form a roux. Stir and cook for 2 minutes. Add the beef broth and whisk until smooth. Add the sour cream. Season generously with salt and pepper. Thin with additional beef broth, as needed.
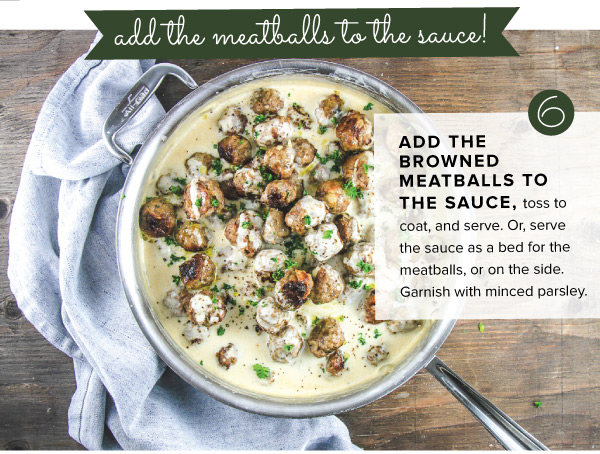
6. Add the browned meatballs to the sauce, toss to coat, and serve. Or, serve the sauce as a bed for the meatballs, or on the side. Garnish with minced parsley (and maybe an extra dollop of sour cream).
7. Enjoy these meatballs served on a bed of egg noodles or with a side of mashed potatoes for a hearty dinner.

Swedish Meatballs with Sour Cream Sauce

Chili & Cheese Empanadas

Grilled Anaheim Chiles and Monterey Jack Empanadas
Introduction
Grilled Anaheim Chiles and Monterey Jack Empanadas
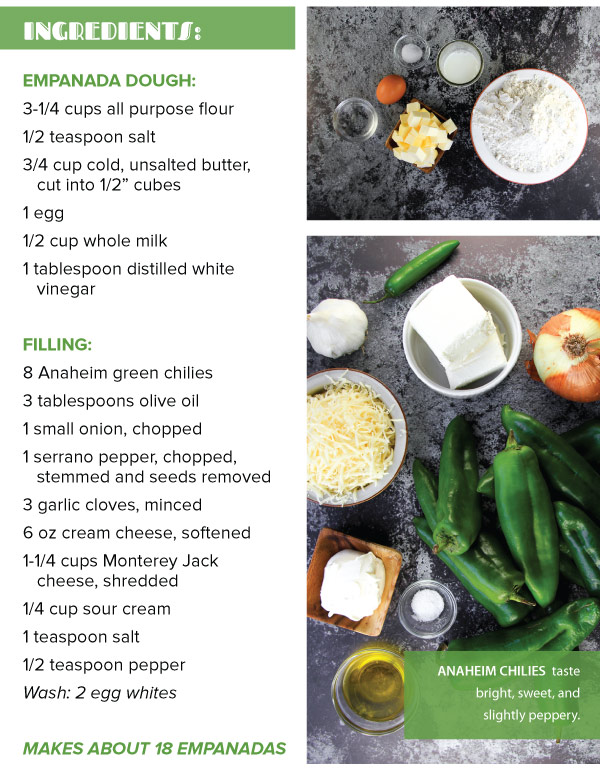
Ingredients
Directions
Grilled Anaheim Chiles and Monterey Jack Empanadas

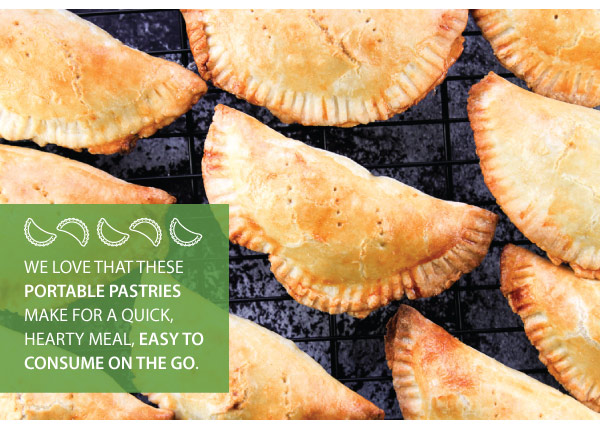
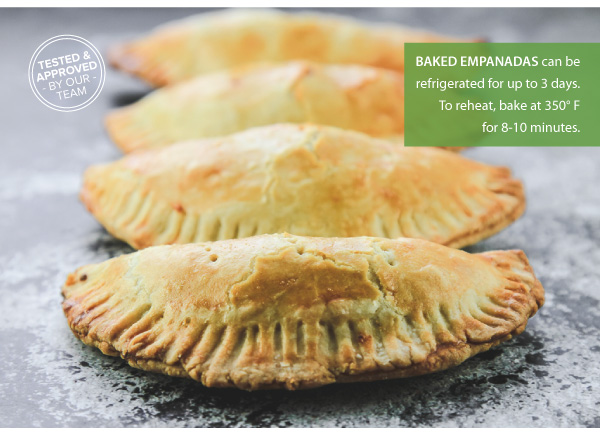
Empanadas are a delicious, savory meal that can be enjoyed for breakfast, lunch, or dinner. Perfectly grilled Anaheim green chilies and creamy Monterey Jack cheese make these empanadas extra satisfying. Devour them on the go, as an appetizer, or as the main event for dinner. There’s no wrong way to enjoy an empanada! Makes 16.

Empanada Dough:
3-1/4 cups all purpose flour
1/2 teaspoon salt
3/4 cup cold, unsalted butter, cut into 1/2” cubes
1 egg
1/2 cup whole milk
1 tablespoon distilled white vinegar

Filling:
8 Anaheim green chilies
3 tablespoons olive oil
1 small onion, chopped
1 Serrano pepper, chopped, stemmed and seeds removed
3 garlic cloves, minced
6 oz cream cheese, softened
1-1/4 cups Monterey Jack cheese, shredded
1/4 cup sour cream
1 teaspoon salt
1/2 teaspoon pepper
Wash: 2 egg whites

DIRECTIONS:
1. IN A STAND MIXER WITH A PADDLE ATTACHMENT, mix the flour and salt on a medium-low speed. Add the butter and mix until the dough resembles coarse meal. Add the egg, milk, and vinegar to the flour mixture and continue to mix on low until just incorporated. Gather the dough on a lightly floured surface and knead gently to bring the dough together. Form the dough into a flat disc, wrap in plastic wrap, and chill for 30 minutes.
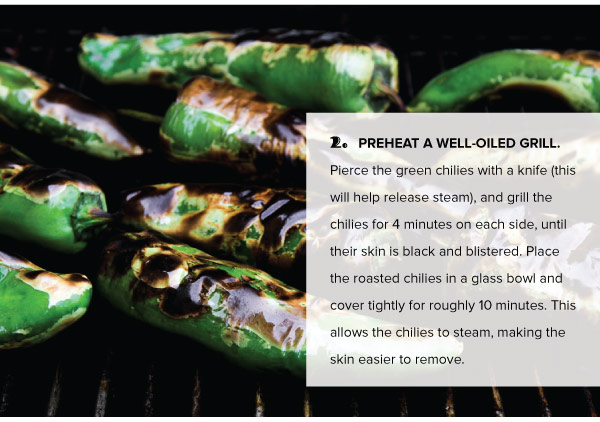
2. PREHEAT A WELL-OILED GRILL. Pierce the green chilies with a knife (this will help release steam), and grill the chilies for 4 minutes on each side, until their skin is black and blistered. Place the roasted chilies in a glass bowl and cover tightly for roughly 10 minutes. This allows the chilies to steam, making the skin easier to remove.
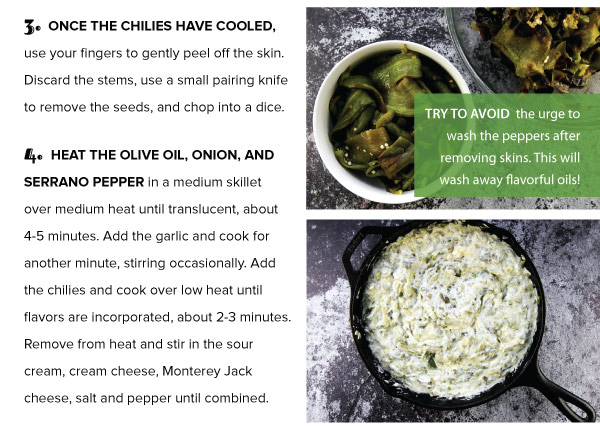
3. ONCE THE CHILIES HAVE COOLED, use your fingers to gently peel off the skin. Discard the stems, use a small pairing knife to remove the seeds, and chop into a dice.
4. HEAT THE OLIVE OIL, ONION, AND SERRANO PEPPER in a medium skillet over medium heat until translucent, about 4-5 minutes. Add the garlic and cook for another minute, stirring occasionally. Add the chilies and cook over low heat until flavors are incorporated, about 2-3 minutes. Remove from heat and stir in the sour cream, cream cheese, Monterey Jack cheese, salt and pepper until combined.
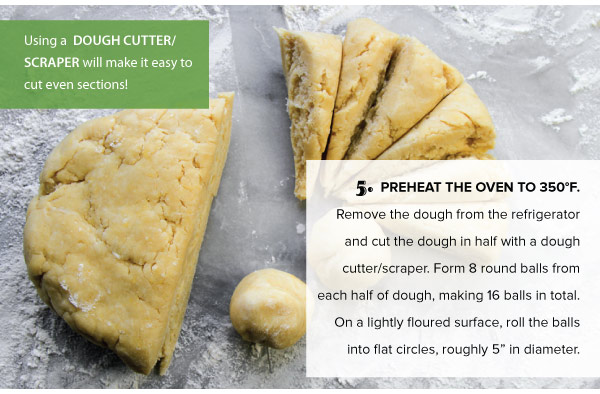
5. PREHEAT THE OVEN TO 350°F. Remove the dough from the refrigerator and cut the dough in half with a dough cutter/scraper. Form 8 round balls from each half of dough, making 16 balls in total. On a lightly floured surface, roll the balls into flat circles, roughly 5” in diameter.
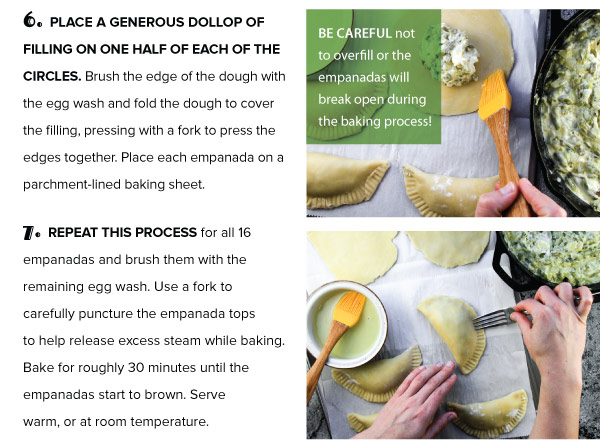
6. PLACE A GENEROUS DOLLOP OF FILLING ON ONE HALF OF EACH OF THE CIRCLES. Brush the edge of the dough with the egg wash and fold the dough to cover the filling, pressing with a fork to press the edges together. Place each empanada on a parchment-lined baking sheet.
7. REPEAT THIS PROCESS for all 16 empanadas and brush them with the remaining egg wash. Use a fork to carefully puncture the empanada tops to help release excess steam while baking. Bake for roughly 30 minutes until the empanadas start to brown. Serve warm, or at room temperature.