Fresh Strawberry Pie

Fresh strawberry pie is hard to beat! Unlike most fruit pies where the fruit cooks and changes character during baking, this chilled pie celebrates strawberries in fresh form. All the goodness of these red gems is held in a flaky crust that bakes quickly and perfectly complements the strawberries’ starring role. It’s a pie best eaten within a day or two – but accomplishing that is usually not a problem!

Fresh Strawberry Pie
Makes a 9-inch pie

Pie Crust Ingredients:
2 cups flour
1 teaspoon salt
1 tablespoon sugar
2/3 cup shortening
6-8 tablespoons cold water

Whipped cream or vanilla ice cream for serving

Prepare the Pie Crust

Filling Ingredients
3 tablespoons corn starch
1/2 cup cold water
1 cup sugar
1/2 package or 3 tablespoons strawberry gelatin
2 quarts fresh strawberries, sliced,about 5 cups, hulled and sliced

1. In a food processor, add the flour, salt, and sugar. pulse a few times to combine.

2. Add the shortening, and pulse to cut the shortening into the flour mixture. The mixture should be coarse with some pea-sized pieces of shortening remaining.

3. Slowly add water a tablespoon at a time to the dough while pulsing in short bursts until a dough ball is just formed. Test the readiness by pinching together -- if it holds together, enough water has been added. If it crumbles apart, add another tablespoon of water. Be sure to not over mix; this will ensure that a flakier crust is achieved. Wrap the dough in plastic wrap, and refrigerate for 30 minutes.

4. Roll the dough ball into a rough 12-inch circle, about 1/8-inch thick.

5. Using a rolling pin to help lift the dough, place the crust into a 9-inch pie dish. Trim off excess crust around the edge, and pinch the edge into your favorite edge finish style.

6. Dock the pie crust with a fork to make steam holes for the crust. Line the crust with pie weights and bake in a 450 degree F oven for 10 to 12 minutes, or until golden brown. Allow to cool completely.

Prepare the Strawberry Filling:
7. Dissolve the cornstarch in three tablespoons of the cold water. Set aside.

8. In a saucepan, combine the sugar and remaining water. Heat and stir until the sugar has dissolved and the mixture is clear. Gradually pour the cornstarch mixture into the sugar mixture. Increase the heat and with continuous stirring, allow the mixture to reach the simmering stage and begin to thicken. Continue cooking and stirring until nicely thickened.

9. Remove the saucepan from the heat and stir in the gelatin.

Assemble and Serve the Pie;
10. Add the sliced strawberries to the baked and cooled pie crust. Pour the strawberry filling over the strawberries.

11. Cover and refrigerate the pie until the filling has set, about 2-4 hours. 12. Serve with whipping cream or vanilla ice cream and enjoy immediately.

Summer Peach-Almond Galettes

Sweet, ripe peaches are nearly synonymous with summer! These amazing fruits develop their sweet flavor and tangy taste on petite trees over several months – a test of patience amply rewarded when picking time arrives! Botanically related, this peach preparation features a pairing with almonds and almond flavoring. The combination creates fabulous complementary flavors in both the crust and filling. This recipe makes four individual galettes, or one larger rustic pie. The crust is sweeter and richer than a typical pie crust – we think you’ll love it!

Summer Peach-Almond Galettes
Makes 4 individual servings

Pâte Sucrée Crust Ingredients
3 cups all-purpose flour
1 cup sugar
2 teaspoons Kosher salt
1 cup unsalted butter (2 sticks), well chilled
2 egg yolks
1 teaspoon pure vanilla extract
1/2 teaspoon almond extract
4-6 tablespoons heavy cream

Crust Topping:
2 tablespoons flour
2 tablespoons sugar
2 tablespoons butter
2 tablespoons sliced almonds
2 tablespoons heavy cream, for brushing on crust
1 tablespoon coarse sugar for crust topping

Peach-Almond Filling:
4-6 ripe peaches, peeled and sliced (or 4 cups sliced)
3 tablespoons sugar
1 tablespoon cornstarch

The crust may be mixed by hand or with a food processor. Choose your preferred method, then continue forming the galette at Step 7.

Directions:

Mixing by Hand:

1a. MIX the flour, sugar, and salt together in a large bowl with a whisk until evenly distributed.

2a. CUT the butter into 1/2-inch cubes. Use a little of the flour mixture to keep the butter pieces from sticking together. CHILL the cut butter cubes for 15 minutes.

3a. PLACE the butter cubes in the flour mixture. Using a simple pastry blender, cut the butter and flour mixture together until a coarse texture is reached with some pea-sized pieces of butter remaining.

4a. BEAT the two egg yolks together with the vanilla and almond extracts. ADD to the flour-butter mixture and cut several times with the pastry blender.

5a. ADD 2 tablespoons of the heavy cream by sprinkling on top of the flour and butter mixture. With a fork, gently toss the mixture. CONTINUE adding cream one tablespoon at a time tossing after each addition until a rough ball of dough forms. (Avoid adding too much cream.)

6a. FLATTEN the dough ball into a disk about a half-inch thick, and wrap in plastic wrap.

Mixing with a Food Processor:

1b. PLACE the flour, sugar, and salt in the bowl of the food processor. PULSE a few times to distribute the sugar and salt.

2b. CUT the butter into 1/2-inch cubes. Use a little of the flour mixture to keep the butter pieces from sticking together. CHILL the cut butter cubes for 15 minutes.

3b. PLACE the butter cubes in the food processor with the flour mixture. PULSE 4-5 times to cut the butter into the flour. The flour-butter mixture will be coarse with some pea-sized pieces of butter remaining. (Resist the urge to keep pulsing.) 4b. BEAT the two egg yolks with the vanilla and almond extracts. ADD to the flour-butter mixture, PULSE 3-4 times.

5b. ADD 2 tablespoons of the cream by sprinkling on top of the flour and butter mixture. PULSE twice. CONTINUE adding cream by the tablespoon pulsing after each addition until a rough dough is formed. Test the dough by pinching together – if it holds together, enough cream has been added. If it crumbles apart, add another tablespoon of cream. (Avoid adding too much cream or pulsing too much.)

6b. REMOVE the dough from the work bowl, forming a rough ball. DIVIDE into four pieces. FORM into individual balls, then FLATTEN each into a disk about a half-inch in thickness and wrap in plastic wrap.

Forming the Galettes:

7. CHILL the wrapped dough disks for an hour or overnight.

8. REMOVE the dough from the refrigerator when ready to bake the galettes and let set for 10 minutes on the countertop while the filling is mixed.

9. STIR the cornstarch and sugar together, then sprinkle over the fresh peach slices. Gently toss the fruit to distribute the cornstarch/sugar mixture. Set aside while finishing crust preparation.

10. ROLL out one disk of dough into a rough 8-inch circle, about 3/16-inch in thickness, on a lightly floured surface. Repeat with the remaining three dough pieces. Leave the edges rough, or if you prefer, use a plate to cut a neat circle of dough.

11. TRANSFER the rolled dough to a baking sheet lined with parchment paper. The sides of the dough may temporarily drape over the edges.

12. PLACE the prepared peach slices in the center of the crust circle arranging the wedges evenly. Leave a 1- to 1-1/2 inch perimeter of crust free of filling.

13. FOLD the edges of the crust over the filling pleating or overlapping as you go.

14. MIX equal parts of flour, sugar and butter (2 tablespoons each) together until combined and a crumbly texture is formed. SPRINKLE the crumb mixture and sliced almonds over the exposed fruit portion of the galettes.

15. BRUSH the crust’s surfaces with heavy cream. SPRINKLE with coarse sugar. CHILL the galettes in the refrigerator for 10 minutes while the oven preheats.

16. BAKE the galettes in a 400° oven for 20-25 minutes, or until the crust is golden brown and the filling bubbly and slightly thickened. It will continue to thicken as is cools.

17. SERVE warm or cooled to room temperature with a side of vanilla bean ice cream, or sweetened whipped cream.

Fresh Strawberry and Mango Salad and Creamy Balsamic Dressing

Fresh Strawberry and Mango Salad and Creamy Balsamic Dressing
Makes 2 Salads

Both savory and sweet, this balanced salad celebrates fresh summer fruits and crisp greens. The creamy balsamic vinaigrette, fresh strawberries, and sliced mango add color and a touch of sweetness to the heartier elements of red onion, avocado, and pecans. This salad is a true delight!

Salad Ingredients:
2 cups gem lettuce or bibb lettuce, rinsed and dried
2 cups baby spinach, rinsed and dried
1 mango, peeled, pitted, and halved
1 cup strawberries, hulled and sliced
1 avocado, sliced
1/4 red onion, thinly sliced 1/2 cup pecans, toasted

Directions:

Creamy Balsamic Dressing Ingredients:
1/4 cup balsamic vinegar
1/4 cup olive oil
1-2 tablespoons sour cream
1 teaspoon sugar
1/2 teaspoon Kosher salt
1/4 teaspoon freshly ground pepper
1 clove garlic, minced

1. Whisk together the creamy balsamic dressing ingredients and set aside.

2. Create mango rosettes by slicing each half into very thin pieces. Fan out the slices of one half by slowly moving the slice at an angle on a large cutting board. Do not fully separate slices. Continue moving the slices until one long strip is created and the slices are slightly overlapping. Starting at one end, carefully roll the end slice tightly onto itself (this is the center of the rosette). Continue wrapping the long section of slices into itself until you reach the other end.

3. In a large bowl, use tongs to lightly toss the salad dressing with the lettuce and spinach. Add the remain- ing salad ingredients and toss once more (be careful not to over toss or avocados may begin to break down).

4. Use a large spatula to lift mango rosettes from the cutting board and onto the top of the salad and serve.

Spicy Kale & Grilled Chicken Caesar Salad

Spicy Kale & Grilled Chicken Caesar Salad
Makes 4 salads

This salad highlights fresh kale, grilled chicken in a lemony, salty Caesar dressing. We love the charred flavors that only a summer grill can create. And, the buttery, herbed croutons add both great flavors and wonderful crunch. Bright, grape tomatoes and a squeeze of lemon bring this showstopper home.

Salad Ingredients:
2 bunches Lacinato kale, torn
2 tablespoons olive oil, plus 1 tablespoon 2 chicken breasts, grilled, thinly sliced
2 tablespoons fresh lemon juice
2 cups grape tomatoes, halved
4 oz parmesan cheese, finely grated Fresh lemon wedges for serving

Homemade Crouton Ingredients:
4 tablespoons butter
4 cups cubed baguette (slightly stale is best) 1/2 teaspoon garlic powder
1/2 teaspoon dried oregano
1/4 teaspoon salt
1/4 teaspoon pepper

Directions:
Spicy Caesar Dressing Ingredients:
1 clove garlic, minced
2 tablespoons fresh lemon juice
1 teaspoon anchovy paste
1 teaspoon Dijon mustard
1 small jalapeño pepper, ribs and seeds removed, finely diced
1 teaspoon Worcestershire sauce
1/4 cup whole milk greek yogurt
3 tablespoons mayonaise
3 tablespoons olive oil
1/4 teaspoon Kosher salt
1/4 teaspoon black pepper

1. Preheat the grill. Marinate the chicken in olive oil, salt, pepper, and lemon for 15-20 minutes.

2. In a large mixing bowl, use your hand to massage the kale with 1 tablespoon of olive oil until the leaves begin to break down and the kale becomes softer in texture, roughly 2 minutes.

3. Grill the chicken breast for 4-5 minutes and flip with grill tongs. Continue grilling the chicken until the thickest part of the breast reaches 165° F. Remove chicken from the grill, and let it rest for 5 minutes, then cut into 1/2-inch slices.

4. Make the croutons by melting butter in a large skillet over medium-low heat. Add the cubed bread to the butter and toss the bread in the butter, coating the edges. Add the garlic powder, oregano, salt and pepper and stir to evenly distribute. Continue cooking while tossing occasionally until the croutons are slightly golden in color, about 10 minutes.

5. Prepare the Caesar dressing by whisking all of the dressing ingredients into a salad dressing jar, or a wide-mouthed jar, or mixing bowl.

6. Toss the kale, dressing, and half of the parmesan until the kale is coated. On top, add the tomatoes, chicken breast, and croutons. Sprinkle with the remaining parmesan cheese.

Grilled Mushroom and Grana Padano Salad

Grilled Mushroom and Grana Padano Salad
Makes 4 salads

This salad is filled with rich, savory flavors! Earthy, grilled mushrooms absolutely shine when paired with bitter arugula, aromatic celery, and nutty grana padano cheese. Bright lemon flavors add a layer of piquancy, while the buttery pine nuts add a nice crunch. Your taste buds will be delighted and your hungry stomach satisfied.

Salad Ingredients:
24 baby Bella mushrooms, halved
24 fresh shiitake mushrooms
1/4 cup extra virgin olive oil
1/2 teaspoon kosher salt
8 cups arugula
1 cup peas
2 stalks celery, thinly sliced with a mandoline
1/2 cup pine nuts, toasted
1/2 cup thinly shaved Grana Padano

Directions:
Dressing Ingredients:
1 tablespoon fresh lemon juice
1/3 cup olive oil
1/4 teaspoon cayenne
1 teaspoon celery seed
1 tablespoon Dijon mustard
1 tablespoon shallot, minced
1 tablespoon fresh parsley, finely chopped
1/2 teaspoon salt
1/2 teaspoon pepper

1. Preheat the grill. In a large bowl, toss the mushrooms in 1/4 cup olive oil and 1/2 teaspoon salt. In two batches, place the mushrooms in a grill basket and grill until mushrooms are tender and lightly browned, using tongs to turn the mushrooms halfway through cooking. To prevent steaming, do not crowd the mushrooms or stack them on top of each other. Remove mushrooms from heat. Repeat with the second batch of mushrooms and set aside.

2. In a salad dressing shaker jar, or a wide-mouthed jar, or bowl, whisk the dressing ingredients together.

3. Toss the arugula, peas, and celery with the dressing.

4. Plate the mixture of greens. Top with the grilled mushrooms, toasted pine nuts, and Grana Padano.

Sweet Biscuit Strawberry Shortcakes

One of our favorite ways to enjoy fresh strawberries is as strawberry shortcake -- the biscuit kind, not the cake kind. We grew up with this treat, so its seasonal comeback revives all kinds of wonderful memories in addition to all the great tastes! In this recipe, chopped strawberries are added to the biscuit dough, which makes the biscuits sweeter, and the biscuit color a lovely shade of pink! 


Sweet Biscuit Strawberry Shortcake
Makes 8-10 shortcakes

SWEET STRAWBERRY BISCUITS:
2 cups all-purpose flour 
1 tablespoon baking powder 
1/4 teaspoon salt 
1/4 cup sugar
1 tablespoon lemon zest
1 pint strawberries (1 cup, finely chopped)
1/2 cup milk
1/2 cup buttermilk 
4 tablespoons butter, melted

STRAWBERRY FILLING:
1 tablespoon freshly squeezed lemon juice
1 tablespoon freshly squeezed orange juice
1 tablespoon honey
1 quart fresh strawberries, hulled and sliced

WHIPPED CREAM INGREDIENTS:
2 cups heavy whipping cream
1/2 teaspoon vanilla extract
1/4 cup confectioner’s sugar

Directions:
1. Preheat the oven to 375°F. Line a baking sheet with a silicone baking mat or piece of parchment paper. 

2. In a mixing bowl, whisk together the flour, baking powder, salt, sugar and lemon zest. Add the chopped strawberries, gently stirring to distribute. 

3. In large bowl, stir together the milk and buttermilk. Slowly add the milk to the flour mixture and stir a couple of times until barely combined.

4. Pour in the melted butter and continue to fold in until combined. Do not over mix. It will be a coarse dough, and rather sticky. 

5. Drop spoonfuls of the dough onto the prepared baking sheet in 8 equal portions. Bake biscuits for 18-20 minutes, or until baked through and the top and edges begin to turn golden brown. Cool on the pan for five minutes, then transfer to a cooling rack.

6. While the biscuits are baking, prepare the strawberries by hulling and slicing. Combine the citrus juices and honey in a small bowl, whisk until the honey is dissolved. 

7. Pour the honey-sweetened juice over the sliced strawberries and toss to evenly coat the berries. Let the sweetened strawberries stand and macerate while the biscuits bake.

8. In a stand mixer with the whisk attachment, whisk the whipping cream, vanilla extract, and powdered sugar until soft peaks form. Split the biscuits and add a layer of strawberries. Add the biscuit top, and place a generous dollop of whipped cream.


Comfort Flavors: Pan Fried Asian Noodles

A simple sauce, a little time to marinate, and some fast wok magic equals a delicious meal. IN THIS ISSUE, we feature pan-fried pork noodles with baby bok choy for a tasty dinner-at-home win.

Pan Fried Pork Noodles
Serves 4

Ingredients:
1 lb of dried or fresh egg lo mein noodles
1 lb pork loin, thinly sliced
1 tablespoon cornstarch
2 tablespoons peanut oil
4 small heads of baby bok choy, finely sliced
1 white onion, thinly sliced pole to pole

Garnish:
2-4 green onions, sliced


Directions:
1. Cook the dry noodles according to their package instructions. Remove from the water 1-2 minutes short of their time for an extra al dente noodle. The noodles will finish cooking in the wok. Rinse the noodles after draining, and set aside.
2. Whisk together the marinade ingredients in a small bowl or jar until combined.
3. Finely slice the pork and then dust the sliced pork with 1 tablespoon of cornstarch, and stir until fully coated with the cornstarch. Pour half of the marinade over the thinly sliced pork, and reserve the rest for later. Stir the pork and then cover, and let marinate for 30 minutes - 1 hour in the refrigerator.
4. Prepare the bok choy. The white and the green parts of the cabbage will take different amounts of time to cook. Because of this, slice the white parts of the cabbage into strips, and place together in a bowl. Roughly chop the green parts and place in a different bowl.
5. Slice the onion into thin slices pole to pole.
6. Once all ingredients are ready and prepared, mis en place, it’s time for some wok magic! In a large wok, heat the peanut oil until hot. Add the marinated pork and cook until fully cooked, stirring frequently. Remove the pork, and place in a bowl.
7. Add the onion to the wok, and cook until just tender. Add the white slices of bok choy , and sauté while stirring. Cook until just tender.
8. Add the pre-cooked noodles to the wok. Stir the noodles while adding the remainder of the sauce. Add the cooked pork back into the mix and the green parts of the bok ahoy and stir until combined and hot.
9. Enjoy warm with a garnish of green onions.

Roasted Garlic, Leek, and Potato Spring Soup

Perfect for a first course or a lovely lunch, this savory soup features the bold flavors of roasted garlic and tender spring leeks. The creamy texture is achieved not with cream or butter, but with Yukon gold potatoes and a powerful blender. The crispy bacon garnish adds the perfect salty crunch to each spoonful.

Serves 4

Soup Ingredients:
1 tablespoon olive oil
1 bulb garlic, roasted
4 large leeks, white parts only
3 tablespoons olive oil
4 cups vegetable stock
3-4 Yukon gold large potatoes, diced (about 2 cups) Kosher Salt and pepper, to taste
2 tablespoons fresh lemon juice

Garnishes:
4 pieces bacon, cooked and crumbled Chives, minced

Directions:
1. Preheat the oven to 400°F. Cut the top off of the garlic bulb and drizzle with 1 tablespoon of olive oil. Wrap the bulb in aluminum foil and place in a baking dish. Bake until the garlic is tender, golden brown, and fragrant, about 30 minutes.

2. Meanwhile, wash the leeks very well. (They are often sandy inside.) Slice the leeks into 1/4” slices.

3. In a large soup pot, sauté the sliced leeks in 3 tablespoons of olive oil over medium heat. Cook until very tender.

4. Add the vegetable stock and the potatoes and bring to a boil. Boil until the potatoes are fork tender, about 10 minutes.

5. Remove the roasted garlic cloves from the bulb with a tiny spoon or fork. Add about 5-6 cloves, or 1/2 of the bulb to the soup. (Use the remaining roasted garlic cloves for another recipe or smear directly on toast, or freeze for later use).

6. Carefully blend the soup in batches in a blender, or use a hand blender and blend until smooth.

7. Taste the soup and season with the lemon juice, Kosher salt, and pepper.

8. Adjust seasonings or add more roasted garlic, as desired.

9. Serve warm with a garnish of bacon crumbles and chives.

Savory Steak Kebabs with Garlic Butter

These steak kebabs with garlic butter might just be our favorite way to enjoy our suppertime deck. Tender bites of steak alternate with savory mushrooms, potatoes and charred red onions. It’s a complete meal on a stick! Makes about 8 kebabs.

Ingredients:
1 lb sirloin tip steak, cut into
1-1/2-to-2-inch cubes
8 oz baby bella mushrooms, whole
1/2 red onion, cut into
2-inch chunks
8 purple fingerling potatoes, parboiled and sliced into 1-inch slices
1 green pepper, sliced into 1-inch chunks
Olive oil, for grilling

Garlic Butter:
4 tablespoons butter
2 cloves garlic, minced
3 tablespoons parsley, minced

Steak & Mushroom Marinade:
1/4 cup soy sauce
1/4 cup Worcestershire Sauce
3 tablespoon olive oil
1 tablespoon Dijon mustard
Juice of one small lemon juice
2 cloves garlic, minced
1 teaspoon rosemary, minced
2 tablespoons honey
1 teaspoon salt
1 teaspoon pepper

Directions:
1. Mix all of the marinade ingredients together in a small bowl until combined.
2. Prepare the steak and the vegetables.
3. Add the steak and the mushrooms to the marinade, cover, and refrigerate. Marinate for 2-4 hours.
4. Meanwhile, boil the potatoes on the stovetop in a pot of boiling water for 5-7 minutes, or until barely tender to the tip of a knife. After the potatoes have cooled, cut into 1-inch slices.
5. If using wooden skewers, soak in water for 30 minutes before grilling. Metal skewers work well for the hearty ingredients in this combination. Skewer the marinated steak and mushrooms, alternating with the red onion, potato, and green peppers.
6. Meanwhile, prepare the garlic butter. Melt the butter in a small saucepan, add the garlic and cook until fragrant. Remove from heat and stir in the fresh parsley.
7. Prepare the grill until very hot. Make sure the grilling grate is clean and oiled. Brush the kebabs with olive oil. Grill for 3-4 minutes on each side or until the internal temperature of beef reaches 145 degrees F.
8. Brush the cooked kebabs with garlic butter.

Spicy Coconut & Lime Shrimp Kebabs

A marinade of spicy hot sauce, coconut milk, and lime propels these shrimp kebabs to a whole new level. The shrimp and marinade flavors pair well with juicy grilled pineapple. A generous garnish of scallions and cilantro make each bite a tropical treat! Makes about 6 kebabs.

Ingredients:
1/2 cup coconut milk
1 tablespoon Frank's Red Hot Sauce
1 jalapeño pepper, seeded and minced
3 cloves garlic, minced
1 tablespoon soy sauce
1 teaspoon Worcestershire sauce
1/4 cup freshly squeezed lemon juice
1/4 cup freshly squeezed lime juice
1 pound large shrimp (roughly 20 shrimp), peeled, deveined (tails on)
3/4 pound pineapple chunks, cut into 1 inch chunks (about 1 pineapple)
Canola oil, for grilling

Garnishes:
Fresh cilantro leaves
Green onion, sliced
Lime wedges

Directions:
1. Mix all of the marinade ingredients together in a small bowl.
2. Prepare the shrimp by removing the outer shell, deveining, and rinsing. Drain and pat dry. If you're using frozen shrimp, remove from the freezer and place in a colander. Run cold water over the shrimp until they are thawed. Pat dry.
3. Place the shrimp in a bowl, and pour the marinade over the shrimp. Toss lightly so that the marinade reaches all surfaces, Cover, and refrigerate. Marinate for 30 minutes.
4. Meanwhile, if using wooden skewers, soak them in water for 30 minutes.
5. Skewer the marinated shrimp, alternating with the pineapple chunks.
6. Prepare the grill to a medium-high temperature. Make sure that the grilling grate is clean and well-oiled. Grill for 2-3 minutes on each side, or until the shrimp is just cooked and turns opaque.
7. Garnish with fresh cilantro, slices of green onion, and a squeeze of lime.

Juicy Chicken Fajita Kebabs

Try these colorful chicken fajita kebabs tonight and instantly transport yourself to the beautiful beaches of Mexico. Juicy chicken and sweet peppers are drizzled in a spicy lime crema. The results are bite-sized morsels of deliciousness! Makes 6-8 kebabs.

Ingredients:
2 boneless and skinless chicken breasts (about 1 lb), cut into 2” cubes
1/2 red onion, cut into 1-inch chunks
1 yellow pepper, cut into 1-inch chunks
1 red pepper, cut into 1-inch chunks

Marinade:
2 tablespoons cilantro, minced
2 cloves garlic, minced
3 tablespoons freshly squeezed lime juice (about 3 limes)
3 tablespoons olive oil
2 teaspoons hot sauce
1/2 teaspoon cumin
1/2 teaspoon chili powder
1/4 teaspoon paprika
1/4 teaspoon cayenne
1/2 teaspoon kosher salt
1/2 teaspoon pepper

Garnish:
Cotija cheese, crumbled
Fresh cilantro leaves, chopped
Lime wedges

Spicy Crema:
1 cup sour cream
Juice of 1 lime
1 tablespoon hot sauce, or more to taste

Directions:
1. Mix all of the marinade ingredients together in a medium bowl and stir until combined.
2. Cut the chicken into 2" cubes and add to the marinade. Cover and refrigerate. Marinate the chicken for 1-4 hours.
3. Skewer the marinated chicken onto kebab sticks, alternating with pieces of onion and pepper. (If using wooden skewers, soak the skewers in water for 30 minutes before grilling. Metal skewers work well for this recipe.)
4. Prepare the grill until very hot. Make sure the grilling grate is clean and oiled. Grill the kabobs for 2-3 minutes on each side or until the internal temperature of the chicken reaches 165 degrees F.
5. Garnish the plated kebabs with cotija cheese and cilantro. Dip or drizzle with the spicy crema.

Cream Puffs with Berries

Cream Puffs with Berry Filling

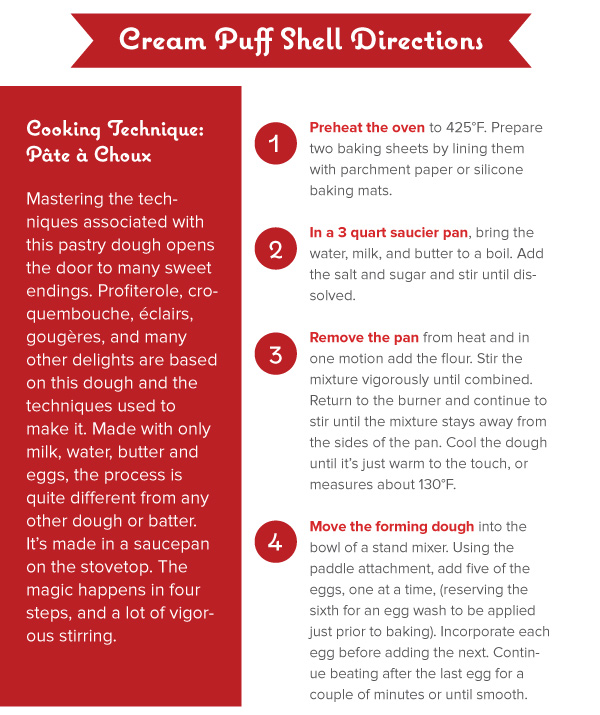
Expanding your repertoire of kitchen skills these days? Add cream puffs to your list of culinary mastery while celebrating the return of fresh berries. The light, delicate, cream puffs with sweet berry filling are perfect for Mother’s Day, too! This recipe starts with a classic French pâte à choux and finishes things off with bright, jammy berries, and homemade whipped cream.

Cream Puffs with Berry Filling

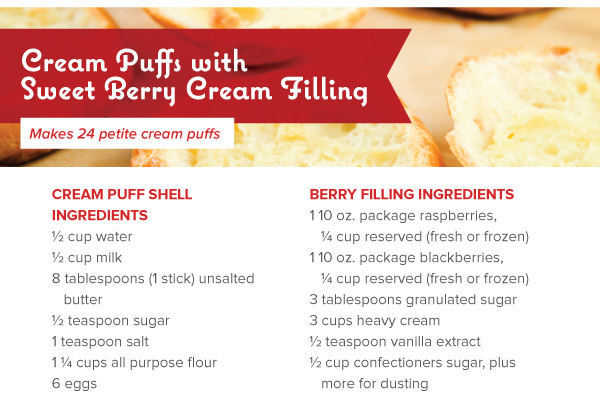
Cream Puffs with Sweet Berry Cream Filling
Makes 24 petite cream puffs

Cream Puff Shell Ingredients:
1/2 cup water
1/2 cup milk
8 tablespoons (1 stick) unsalted butter
1/2 teaspoon sugar
1 teaspoon salt
1-1/4 cups all purpose flour
6 eggs

Berry Filling Dressing:
1 package (10 oz) raspberries, fresh or frozen 1/4 cup reserved
1 package (10 oz) package blackberries, fresh or frozen, 1/4 cup reserved
3 tablespoons granulated sugar
3 cups heavy cream
1/2 teaspoon vanilla extract
1/2 cup confectioners sugar, plus more for dusting

1. Preheat the oven to 425°F. Prepare two baking sheets by lining them with parchment paper or silicone baking mats.

2. In a 3 quart saucier pan, bring the water, milk, and butter to a boil. Add the salt and sugar and stir until dissolved.

3. Remove the pan from heat and in one motion add the flour. Stir the mixture vigorously until combined. Return to the burner and continue to stir until the mixture stays away from the sides of the pan. Cool the dough until it’s just warm to the touch, or measures about 130°F.

4. Move the forming dough into the bowl of a stand mixer. Using the paddle attachment, add five of the eggs, one at a time, (reserving the sixth for an egg wash to be applied just prior to baking). Incorporate each egg before adding the next. Continue beating after the last egg for a couple of minutes or until smooth.

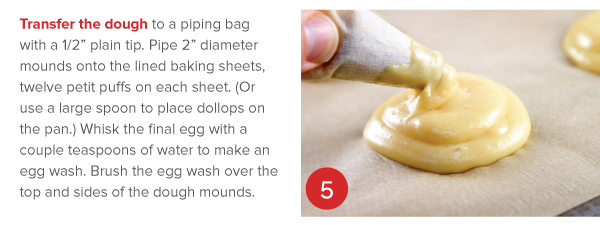
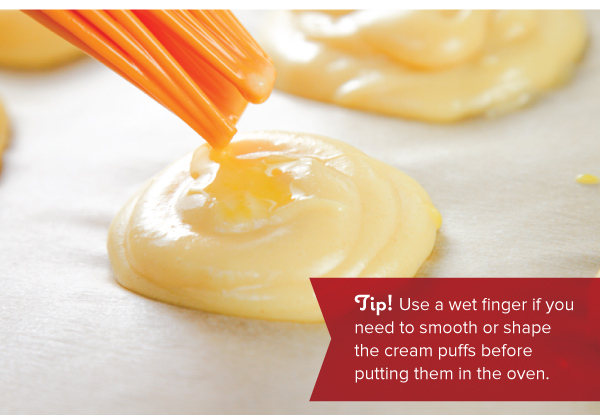
5. Transfer the dough to a piping bag with a 1/2” plain tip. Pipe 2” diameter mounds onto the lined baking sheets, twelve petit puffs on each sheet. (Or use a spoon to place dollops.) Whisk the final egg with a couple teaspoons of water to make an egg wash. Brush the egg wash over the top and sides of the dough mounds.

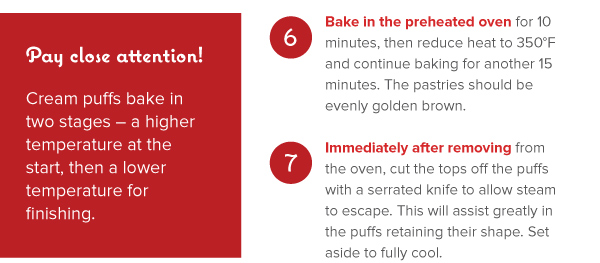
6. Bake in the preheated oven for 10 minutes, then reduce heat to 350°F and continue baking for another 15 minutes. The pastries should be evenly golden brown.

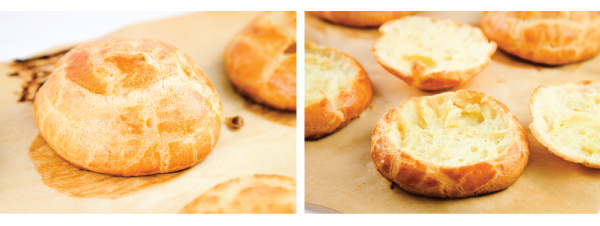
7. Immediately after removing from the oven, cut the tops off the puffs with a serrated knife to allow steam to escape. This will assist greatly in the puffs retaining their shape. Set aside to cool.

Filling Directions:

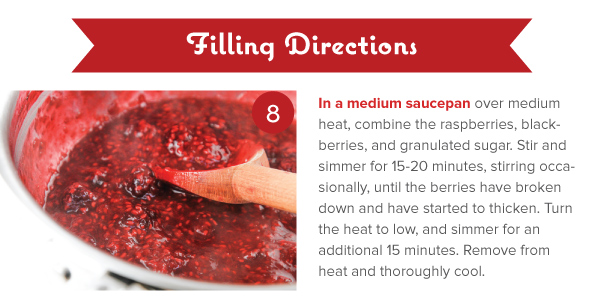
8. In a medium saucepan over medium heat, combine the raspberries, blackberries, and granulated sugar. Stir and simmer for 15-20 minutes, stirring occasionally, until the berries have broken down and begin to thicken. Turn the heat to low and simmer for an additional 15 minutes. Remove from heat and cool.

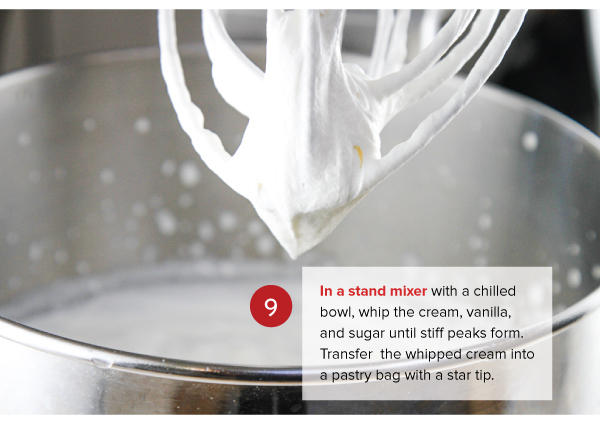
9. In a stand mixer with a chilled bowl, whip the cream, vanilla, and sugar until stiff peaks form. Transfer the whipped cream into a pastry bag with a star tip.

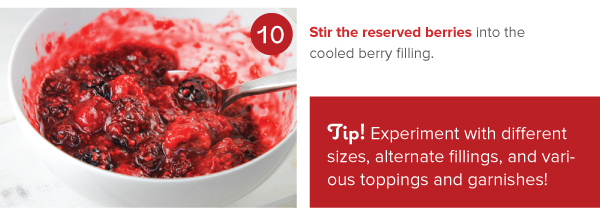
10. Stir reserved berries into cooled berry filling.

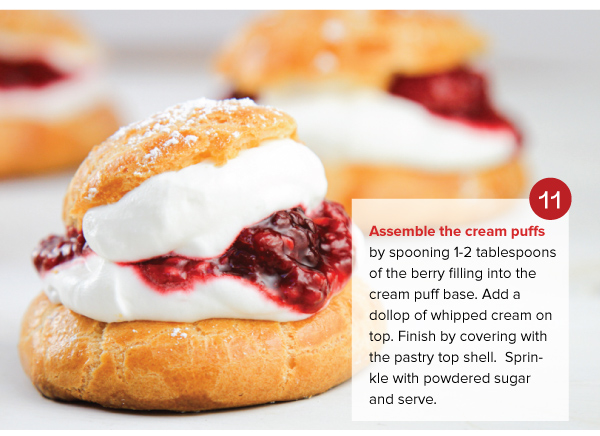
11. Assemble the cream puffs by spooning 1-2 tablespoons of the berry filling in the cream puff base. Add a dollop of whipped cream on top. Finish by covering with the pastry top shell. Sprinkle with powdered sugar and serve.

Salt & Vinegar Potato Salad

Potato salads are not always cold – they’re delicious when served warm as well. (And, they are all not laden with mayonnaise!) This potato salad is dresssed with a vinaigrette-style dressing that is delicious when served warm (or cold). Serves about 6.

Ingredients:
2 pounds fingerling potatoes
1 cup apple cider vinegar
2 tablespoons olive oil
2 teaspoons Old Bay Seasoning
1 teaspoon Kosher salt
1/2 teaspoon pepper

For Garnishing:
1/4 cup green onions, finely chopped
1/2 red onion, very thinly sliced
2 tablespoons chopped parsley

Vinaigrette Dressing:
1/4 cup apple cider vinegar
2 tablespoons olive oil
2 tablespoons honey
1/4 cup Dijon mustard
1/2 cup mayonnaise
2 tablespoons fresh dill
kosher salt and pepper to taste

Directions:
1. Scrub the potatoes well. In a large pot, boil the potatoes in water and 1 cup of apple cider vinegar until fork tender, roughly 15-20 minutes. depending on the size of the potatoes.
2. Preheat the grill to medium high heat. Cut the pre-cooked potatoes in 1" chunks and toss them in the olive oil, Old Bay Seasoning, salt, and pepper. Place the seasoned potatoes in a grill basket.
3. Grill the potatoes, stirring often, until they turn golden brown and begin to get crispy edges. Remove from the heat.
4. Whisk together the dressing ingredients and toss with the grilled potatoes while they are still warm until coated evenly.
5. Garnish with the green onions, chopped red onion, and parsley.

Beer Brats

Brats on the grill are a summertime classic! Our favorite method for grilling brats includes a pre-boil step in beer that adds both moistness and flavor. Grill the prepped brats until perfectly browned. Serve piping hot on a toasted bun with a variety of toppings and condiments that complement the meat. (You may need to have plenty of napkins available!) Serves 6.

Ingredients:
6 brats 1 (12 oz) lager beer
2 tablespoons butter
1 large sweet onion, sliced pole to pole
1 red pepper, sliced into strips
1 yellow pepper, sliced into strips
6 buns
Butter for buns

Condiment Suggestions:
Assortment of Mustards
Pickle Relish
Sauerkraut
Ketchup
Spicy Pickled Peppers

Directions:
1. In a saucepan, cover the brats with beer and bring to a simmer. Simmer for 10 minutes.
2. Meanwhile, in a large skillet, sauté the onions in the butter. Cook until softened and slightly caramelized. Add the peppers, and cook until limp and tender.
3. Fire up the grill! Grill the brats until golden brown on all sides. Test for doneness. The internal temperature of the brats should reach 160 degrees F.
4. If desired, butter the buns and grill over direct heat until lightly toasted and golden brown.
5. Enjoy the brats loaded with the sautéed onions and peppers, and an array of your favorite condiments.

Our Best Zipped Up Baked Beans

A great outdoor meal would be incomplete without the classic side dish, baked beans. But don’t be content with the common variety, make them something swoonworthy. This recipe uses a variety of beans, and may be easily adjusted to any desired levels of sweetness or spiciness. Loaded with bacon, onion, peppers, and properly seasoned, these beans are superior to most! Serves 8-10.

Ingredients:
1/2 lb bacon, fried and crumbled
1 sweet onion, diced
1 red bell pepper, finely diced
2 cloves garlic, minced
1/4 cup molasses
1/4 cup packed brown sugar
1 tablespoon Worcestershire sauce
1 tablespoon yellow mustard
2 tablespoons ketchup
2 tablespoons apple cider vinegar
1/2 teaspoon freshly ground black pepper
1 can (15 oz) butter beans, drained and rinsed
1 can (15 oz) red kidney beans, drained and rinsed
1 can (15 oz) pinto beans, drained and rinsed
2 cans (15 oz) pork and beans in tomato sauce (do not rinse)

Directions:
1. Preheat the oven to 325 degrees F.
2. Fry the bacon in a large skillet. Remove the bacon and cool on a paper towel-lined plate. Crumble into bite-sized pieces.
3. Reserve two tablespoons of the bacon grease to sauté the onion. Cook the onion until translucent. Add the red pepper, and cook until softened. Add the garlic, and cook for another two minutes.
4. Stir the molasses, brown sugar, Worcestershire sauce, mustard, ketchup, apple cider vinegar, and pepper into the onion mixture.
5. Combine the onion mixture with all of the beans and cooked bacon in a large casserole dish.
6. Cover with aluminum foil and bake for 1 hour, or until bubbling hot.

Fresh Inspiration! Huevos Rancheros for Breakfast

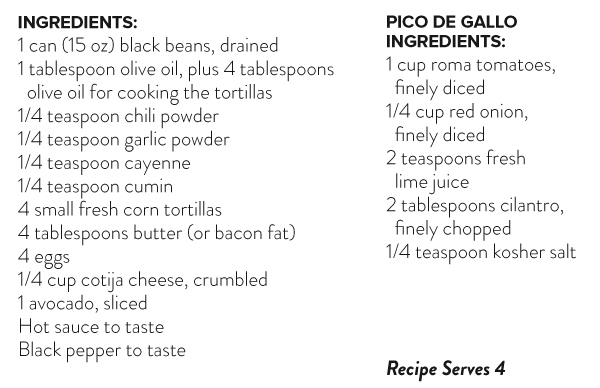
Huevos Rancheros

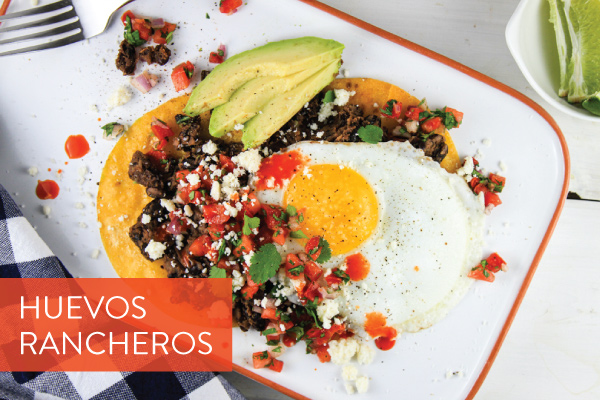
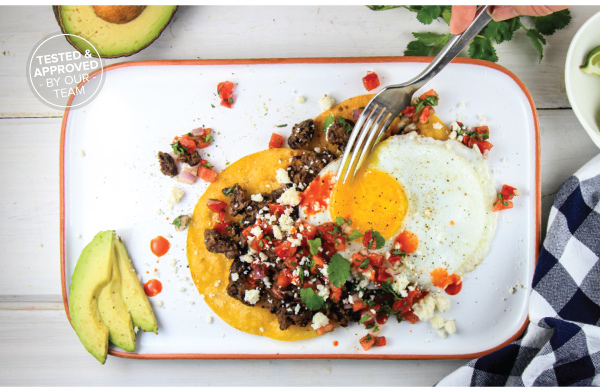
This classic Mexican breakfast translates to “ranch eggs” and highlights a perfectly fried egg served on a warm tortilla with black beans, cotija cheese, and fresh pico de gallo.

Featured Products
Huevos Rancheros
Huevos Rancheros
Huevos Rancheros
Huevos Rancheros
Huevos Rancheros
Huevos Rancheros
Huevos Rancheros
Huevos Rancheros
Huevos Rancheros

Huevos Rancheros
Serves 4

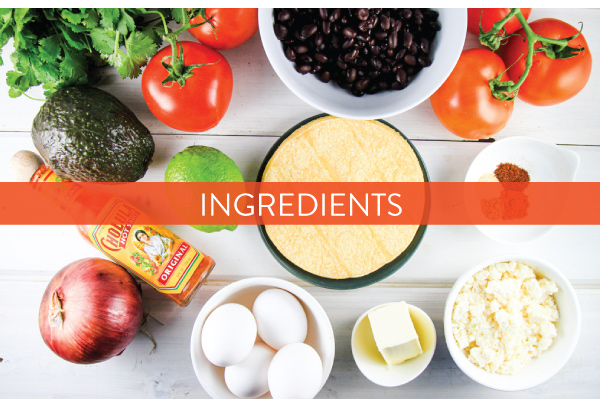
Ingredients:
1 can (15 oz) black beans, drained
1 tablespoon olive oil, plus 4 tablespoons olive oil for cooking the tortillas
1/4 teaspoon chili powder
1/4 teaspoon garlic powder
1/4 teaspoon cayenne
1/4 teaspoon cumin
4 small fresh corn tortillas
4 tablespoons butter or bacon fat
4 eggs
1/4 cup cotija cheese, crumbled
1 avocado, sliced
Hot sauce to taste
Black pepper to taste

Pico De Gallo Ingredients:
1 cup roma tomatoes, finely diced
1/4 cup red onion, finely diced
2 teaspoons fresh lime juice
2 tablespoons cilantro, chopped
1/4 teaspoon kosher salt

Directions:
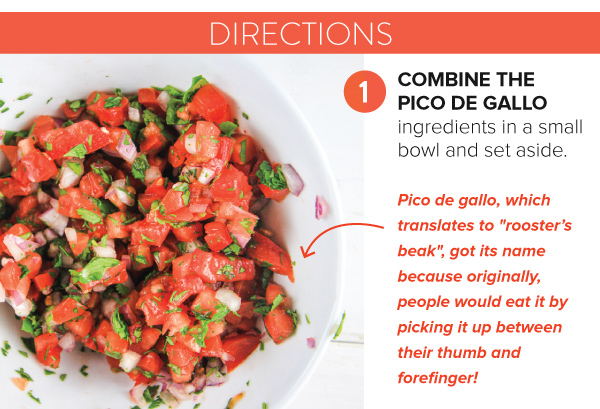
1. Combine pico de gallo ingredients in a small bowl and set aside.

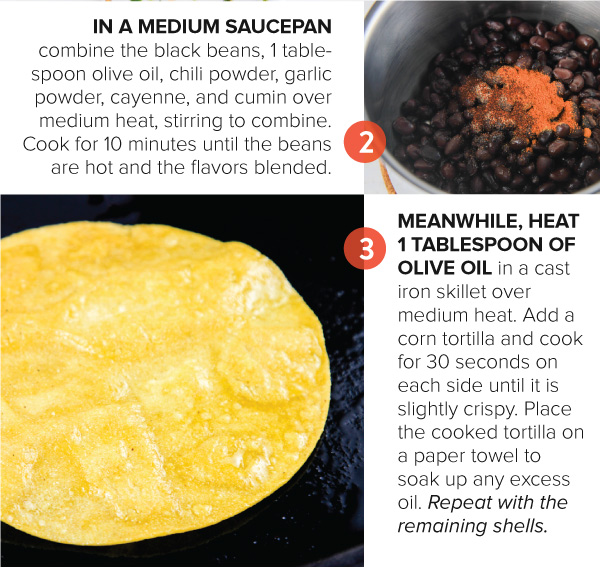
2. In a medium saucepan combine black beans, 1 tablespoon olive oil, chili powder, garlic powder, cayenne, and cumin over medium heat, stirring to combine. Cook for 10 minutes until beans are hot and the flavors blended.

3. Meanwhile, heat 1 tablespoon of olive oil, in a cast iron skillet over medium heat. Add a tortilla and cook for 30 seconds on each side until the tortilla is slightly crispy. Place the cooked tortilla on a paper towel to soak up any access oil. Repeat with the remaining tortillas.

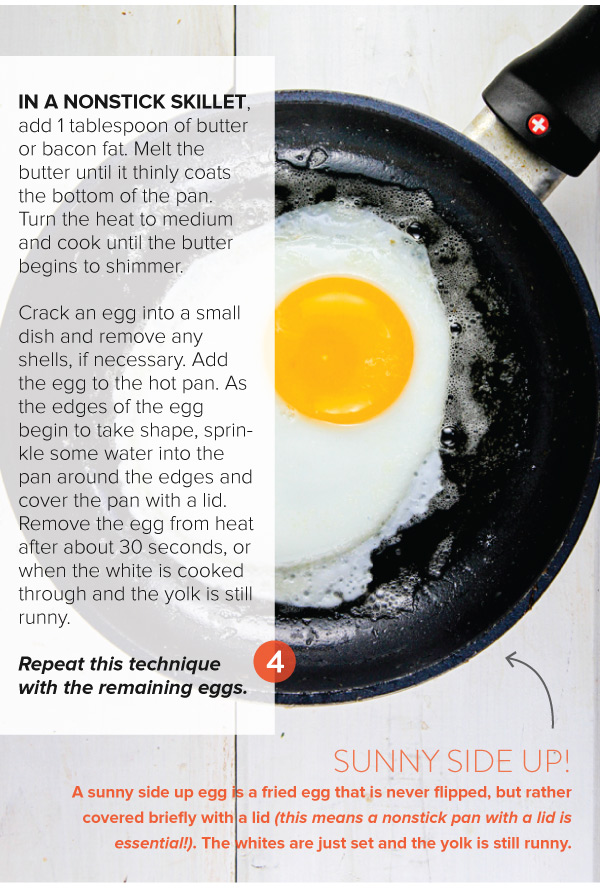
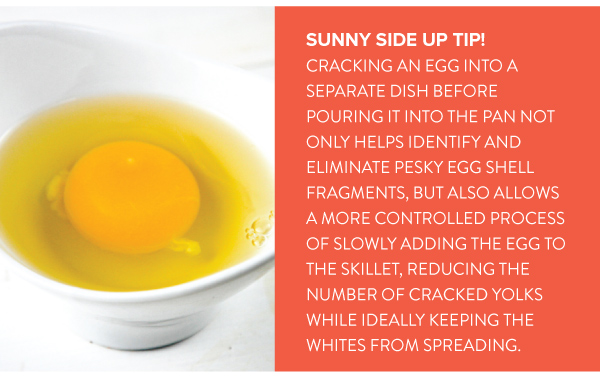
4. In a nonstick skillet, add 1 tablespoon of butter (or bacon fat). Melt the butter until it thinly coats the bottom of the pan. Turn the heat to high until the butter begins to shimmer. Crack an egg into a small dish and remove any shells, if necessary. Add the egg to the hot pan. As the edges of the egg begin to take shape, sprinkle some water into the pan around the edges and cover the pan with the lid. Remove the egg from heat after about 30 seconds, or when the white is cooked through and the yolk is still runny. Repeat this technique with the remaining eggs.

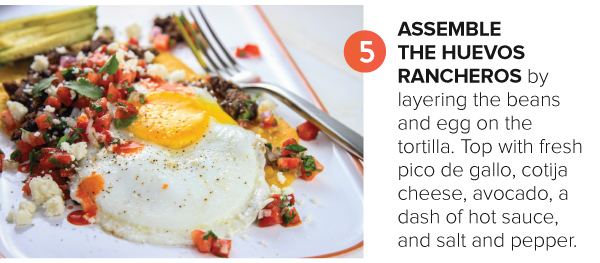
5. Assemble the huevos rancheros by layering the beans and egg on the tortilla. Top with fresh pico de Gallo, cotija cheese, avocado, and a dash of hot sauce. Enjoy!

Fresh Tomato Sauce Linguine

Fresh tomatoes shine in this easy recipe. Using thinly sliced garlic gives a depth of sweet flavor to the simple sauce. This is definitely one of those favorite recipes destined to be made again and again. Garnish generously with freshly shaved Parmesan cheese and basil for dinner perfection. Serves 4.

Ingredients:
1 pound linguine
1/4 cup olive oil
6 cloves garlic, thinly sliced
1/4 teaspoon crushed red pepper
3 pounds roma tomatoes
Kosher salt
Freshly ground pepper

For garnishing:
Shaved parmesan cheese
Fresh Basil leaves, julienned

Directions:
1. Sauté the garlic in 2 tablespoons of olive oil in a large sauté pan over medium heat.
2. Just as the garlic begins to smell fragrant. Add the crushed red peppers, and then add the cut tomatoes.
3. Simmer the sauce down until it thickens (about 20 minutes) stirring occasionally. Add the salt and pepper, to taste.
4. Meanwhile, in a pasta pot, boil the noodles in heavily salted water until they are cooked a little extra al dente. Reserve some of the pasta water (about 1 cup) to finish the sauce.
5. Using tongs, add the cooked pasta directly into the sauce. Add 1/2 to 1 cup of the reserved pasta water too thin and help the sauce coat the noodles. For a silky, “restaurant-style” texture add 2 more tablespoons of olive oil and stir vigorously until combined and the noodles are coated with sauce.
6. Garnish the pasta with a generous helping of shaved parmesan cheese and the basil shreds. Serve immediately.

Kale, Cashew, & Fresh Herb Pesto

Kale, cashews, and herbs make for a delicious and hearty pesto. The cashews do double duty by substituting for both the cheese and the pine nuts usually found in a classic pesto. Plenty of fresh basil, parsley, and kale pack a punch of healthy greens. This just might be our new favorite way to enjoy kale! Makes 2 cups of pesto, Serves 4.

Ingredients:
1 bunch of kale, about 2 cups of de-stemmed leaves
1 cup parsley leaves
1 cup basil leaves
1/2 cup cashews
2 cloves garlic
1 cup olive oil zest and juice of one lemon (about 1/4 cup juice)
1/4 teaspoon freshly ground black pepper
1/4 teaspoon kosher salt
1/4 teaspoon crushed red pepper
1/4 cup cold water, as needed to thin
1 lb pasta, cooked according to package instructions
cherry tomatoes, halved ciliegine mozzarella balls, halved

Directions:
1. Blend all of the pesto ingredients together in a food processor. Drizzle in additional olive oil until the pesto is smooth. Add water to thin, as needed.
2. Stir the fresh pesto with cooked pasta.
3. Top with the halved tomatoes and mozzarella. Serve immediately.

Cacio e Pepe (Pasta with Cheese and Pepper)

Cacio e Pepe is one our favorite classic Italian recipes! The best thing about this dish is how quickly it comes together with ingredients that we always like to keep on hand. Prepare all of the ingredients (mise en place) before the pasta is cooked, so that the final assembly may be accomplished quickly with the hot pasta. Serve immediately, and enjoy! Serves 4.

Ingredients:
1 lb buccatini or spaghetti
3 tablespoons butter
1 cup of Pecorino Romano, Parmesan cheese, or Grana Padano, finely grated or any combination of these cheeses
1 teaspoon or more freshly cracked pepper
Kosher salt, to taste
1 cup reserved pasta water, plus additional, as needed

Directions:
1. Cook the pasta in a large pot of very well-salted water until it is al dente.
2. Reserve 1 cup of the pasta cooking water.
3. In a large skillet melt the butter.
4. Add the pasta to the butter and stir with grated cheese, pepper, salt, and enough of the reserved pasta water until noodles are coated and silky! Stir until coated and a silky sauce is formed. Enjoy immediately.

Carrot Cake Cupcakes

Carrot Cake Cupcakes

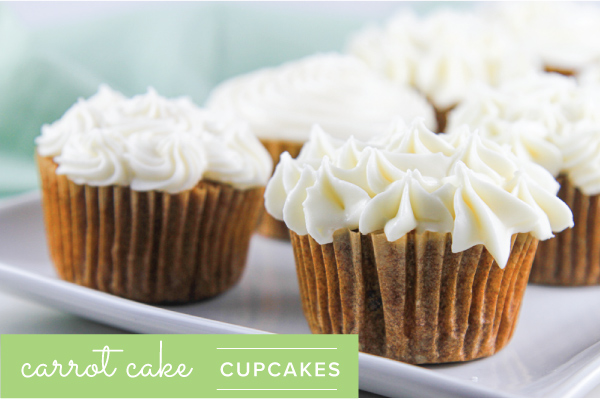
Treat yourrself to these flavorful carrot cake cupcakes topped with a decadent cream cheese frosting. The cupcake is moist and filled with comforting spices. The shredded carrots and hint of orange zest lend a sweet flavor while the walnuts add depth. These cupcakes assemble easily and are guaranteed to make the day just a little better!

Carrot Cake Cupcakes

Carrot Cake Cupcakes
Makes 12 cupcakes

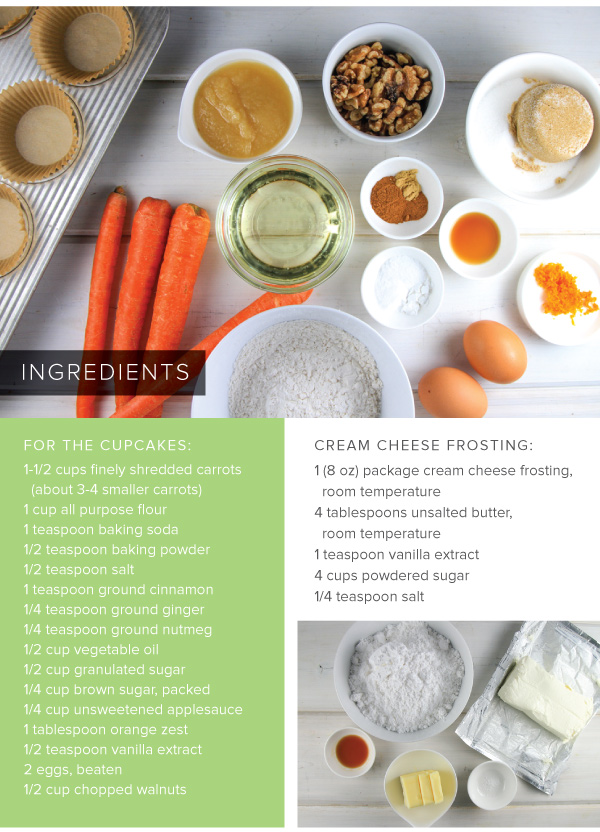
Cupcakes Ingredients:
1-1/2 cups finely shredded carrots (about 3-4 smaller carrots)
1 cup all purpose flour
1 teaspoon baking soda
1/2 teaspoon baking powder
1/2 teaspoon salt
1 teaspoon ground cinnamon
1/4 teaspoon ground ginger
1/4 teaspoon ground nutmeg
1/2 cup vegetable oil
1/2 cup granulated sugar
1/4 cup brown sugar, packed
1/4 cup unsweetened applesauce
1 tablespoon orange zest
1/2 teaspoon vanilla extract
2 eggs, beaten
1/2 cup chopped walnuts

Cream Cheese Frosting:
1 (8 oz) package cream cheese frosting, room temperature
4 tablespoons butter, room temperature
1 teaspoon vanilla extract
2 cups powdered sugar
1/4 teaspoon salt

Directions:
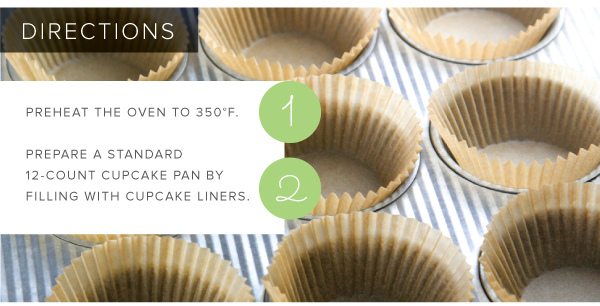
1. Preheat the oven to 350 degrees F.
2. Prepare a standard 12-count cupcake pan by filling with cupcake liners.
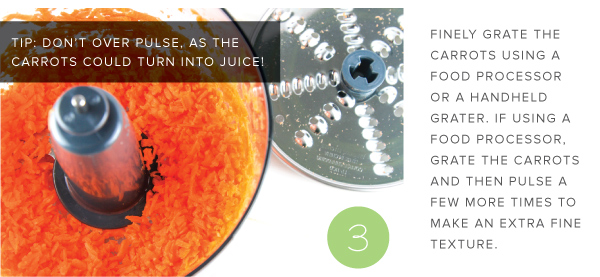
3. Finely grate the carrots using a food processor or a handheld grater. If using a food processor, grate the carrots and then pulse a few more times to make an extra fine texture. Don’t over pulse, as the carrots could turn into juice!
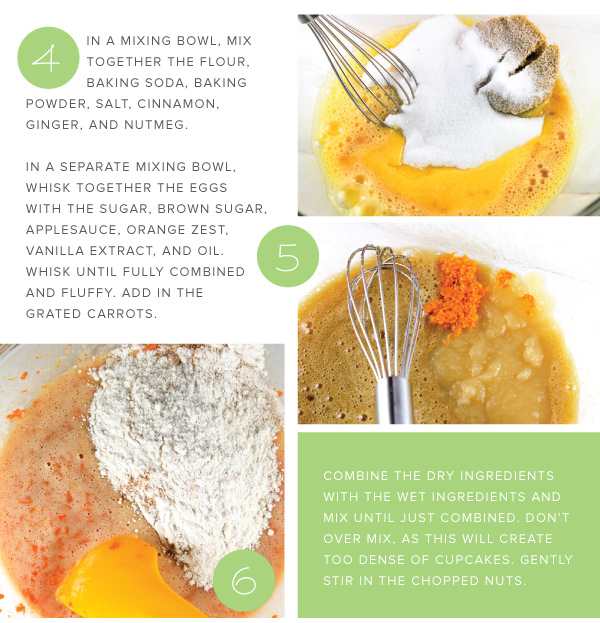
4. In a mixing bowl, mix together the flour, baking soda, baking powder, salt, cinnamon, ginger, and nutmeg.
5. In a separate mixing bowl, whisk together the eggs with the sugar, brown sugar, applesauce, orange zest, vanilla extract, and oil. Whisk until fully combined and fluffffy. Add in the grated carrots.
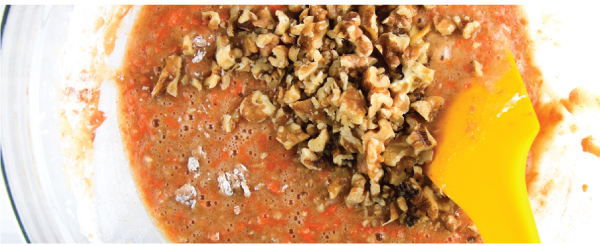
6. Combine the dry ingredients with the wet ingredients and mix until just combined. Don’t over mix; this will create too dense of cupcakes. Gently stir in the chopped nuts.
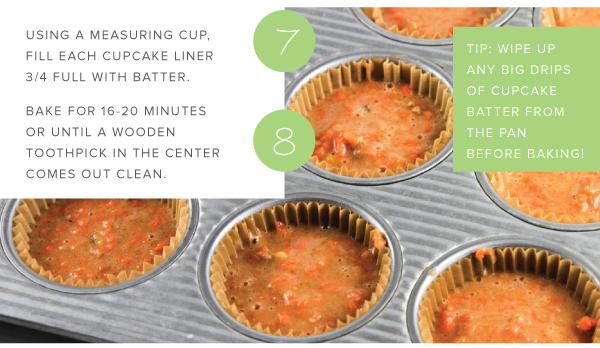
7. Using a measuring cup, fill each cupcake liner 3/4 full of batter.
8. Bake for 16-20 minutes or until a wooden toothpick pierced in the center comes out clean.
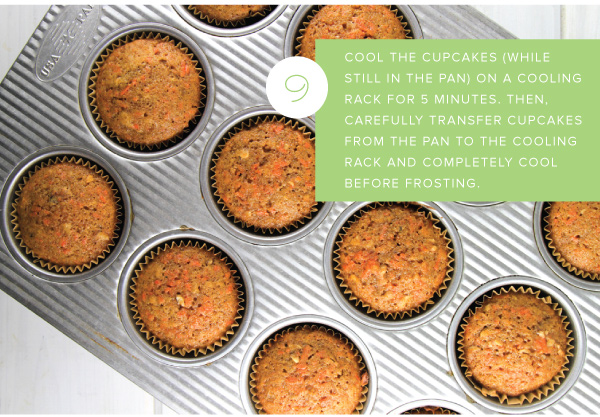
9. Cool the cupcakes in the pan for 5 minutes, then carefully transfer the cupcakes to a wire cooling rack to completely cool before frosting.
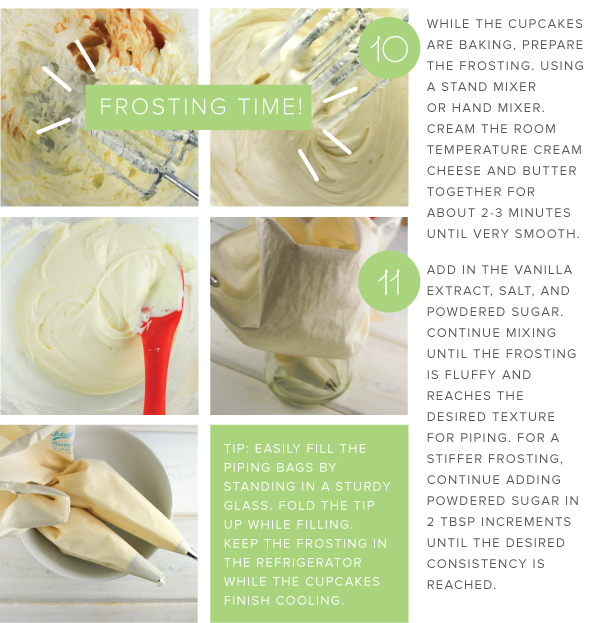
10. While the cupcakes are baking, prepare the frosting. Using a stand mixer or hand mixer, cream the room temperature cream cheese and butter together for about 2-3 minutes until it’s very smooth.
11. Add in the vanilla extract, salt, and powdered sugar. Continue mixing until the frosting is fluffffy and reaches the desired texture for piping. For a stiffffer frosting, continue adding powdered sugar in 2 tablespoon increments until the desired consistency is reached.
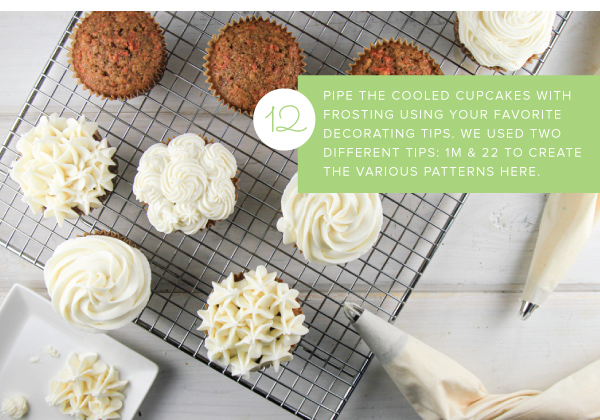
12. Pipe the cooled cupcakes with frosting using your favorite decorating tips. We used two difffferent decorating tips: 1m & 22 to create various patterns.
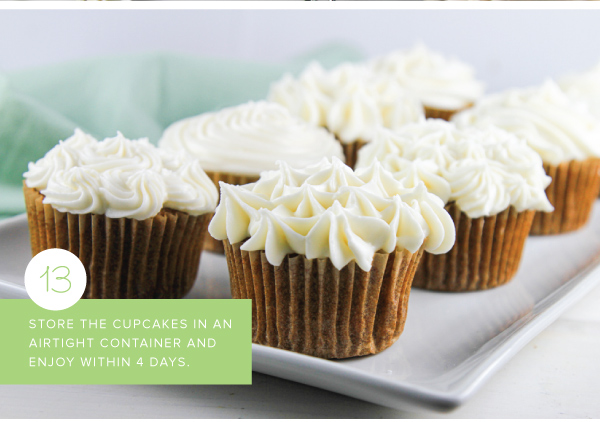
13. Store the cupcakes in an airtight container and enjoy within 4 days.