Salted Caramels

Everyone loves the captivating flavors of fresh homemade caramels! 

The little known secret? They are deceptively easy to make. Fresh, homemade caramels make great treats for sharing as little gifts in the holiday weeks ahead. IN THIS ISSUE, we show you, step-by-step, how to  master boutique caramels made in your own kitchen.

Handcrafted Caramels
Makes about 120 - 140 pieces, depending on size

Ingredients:
Vegetable oil (for coating pan)
3 cups heavy cream
3 cups granulated white sugar
1 cup brown sugar, packed
2 cups light corn syrup
1-1/2 teaspoons Kosher salt
1/2 cup (1 stick) unsalted butter
2 teaspoons vanilla extract

Directions:
1. Prepare a 9 x 13 rimmed pan prior to starting to cook. Oil the bottom and sides of the pan well using a tasteless vegetable oil, one that stays liquid at room temperature. Line the pan with a criss-cross of parchment paper cut to match the pan’s size with a little extra at the ends; avoid any wrinkles in the corners. Set aside.

2. Wipe the interior of a large saucepan or Dutch oven with a light coating of oil. Measure the heavy cream, sugars, light corn syrup and salt into the pan. Over medium-low heat, stir the ingredients together until well-combined and the sugar is dissolved.

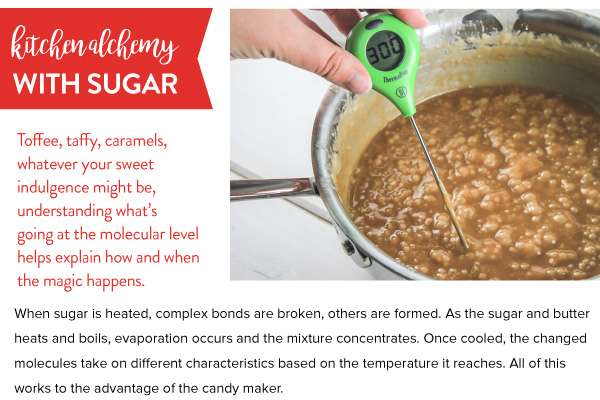
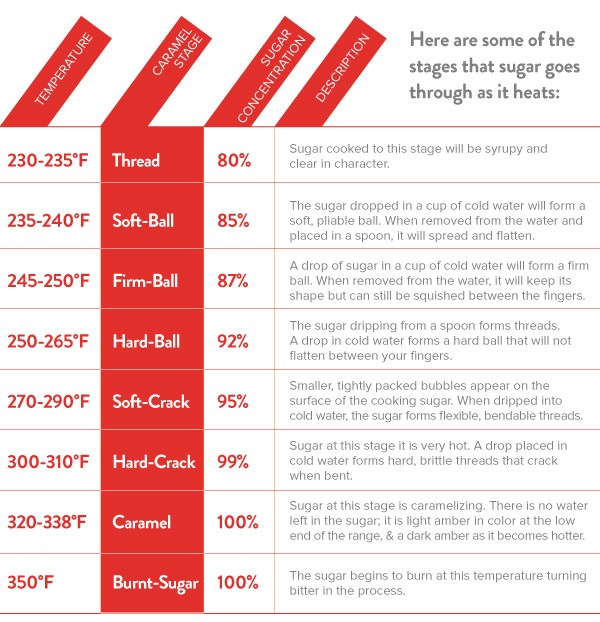
3. Increase the heat to medium. Continue stirring until the cream-sugar mixture reaches a boil. Stop stirring. Using a brush dipped in warm water, wash down any sugar crystals that may have formed on the edge of the pan. Allow the mixture to cook, without stirring, until it reaches the firm-ball stage, around 248°F as measured on a candy thermometer clamped to the side of the pan. (If you do not have a candy thermometer, use a water test to check for the appropriate sugar stage. A drop (approximately 1/4 teaspoon) of caramel in cold water should form a firm ball, yet be pliable.)

4. Remove the caramel from heat, add the butter and vanilla stirring until melted and well-combined with the cream-sugar mixture. (Cutting the butter into half-inch cubes will help to efficiently melt and distribute this key ingredient.)

5. Carefully pour the caramel into the prepared, lined pan. Allow the caramel to set and cool to room temperature. This will take several hours or overnight. (For evenly sized caramels, make sure the pan is setting on a level surface.)

6. Once cooled, lift the sheet of caramel from the pan to a safe cutting surface. The caramel should retain its shape. Neaten the edges of the caramel to remove the rounded edges. Cut the caramel slab vertically and horizontally in desired sizes and shapes with a long-bladed cook’s knife. We suggest 1-1/4-inch by 1/2-inch pieces, or 1-inch squares. Wrap the pieces in nonstick wrap such as parchment paper. Store at cool room temperatures for up to 2-3 weeks.

Wine Poached Pears

When we want to embrace the beauty of the season, we turn to wine poached pears. THIS ISSUE features poached pears, served alongside vanilla bourbon mascarpone whipped cream. The subtle sweetness of this dish is exactly what we need to offset any holiday sugar highs, and nothing looks more striking.

Wine Poached Pears with Bourbon Mascarpone Whipped Cream
Makes about 4 poached pears

When we want to embrace the beauty of the season, we turn to wine poached pears. This recipe features poached pears, served alongside vanilla bourbon mascarpone whipped cream. The subtle sweetness of this dish is exactly what we need to offset any holiday sugar highs, and nothing looks more striking.

Ingredients:
4 Bosch pears, peeled with stem in-tact
1 bottle of dry red wine (750ml)
1 cup water
1/4 cup sugar
3 sticks of cinnamon
1/4 teaspoon cardamom
1 vanilla bean pod, halved and seeds scraped

Bourbon Mascarpone Whipped Cream Ingredients:
4 oz Mascarpone cheese
1/4 cup powdered sugar
1 cup cold heavy whipping cream
1 tablespoon bourbon
1/2 teaspoon vanilla extract

Directions:
1. Peel the pears, carefully leaving the stems in place.

2. Combine the red wine, water, sugar, cinnamon, cardamom, and vanilla bean seeds in a sauce pan and bring to a simmer. Stir until the sugar dissolves. Add the peeled pears making sure they are covered in the liquid. Simmer for about 40 minutes, or until the pears are tender and red, then chill the pears. Cook the wine mixture down into a sauce by simmering for an additional 45 minutes - 1 hour, or until your desired sauce consistency is reached.

3. Attach a chilled mixing bowl to a stand mixer with a whisk attachment. Add the mascarpone cheese and sugar and mix together on high until fully combined, about 3 minutes. Add the cream, bourbon, and vanilla extract, and mix ingredients together, starting on low speed, then increasing to a high speed, whipping until soft peaks form, roughly 8 minutes.

4. Serve immediately alongside the chilled pears, drizzle with the reduced wine sauce, and sprinkle with cinnamon.

Chocolate Chip Pumpkin Cake with Brown Butter Cream Cheese Frosting

Biting into this cake signifies all of the things we love about the changing seasons. Warm notes of fall spices pleasantly mix with sweet chocolate and rich brown butter frosting. In this recipe, we highlight pumpkin in a cake that can be served both after dinner or alongside your morning coffee.

Chocolate Chip Pumpkin Cake with Brown Butter Cream Cheese Frosting
Makes 12 pieces

Biting into this cake signifies all of the things we love about the changing seasons. Warm notes of fall spices pleasantly mix with sweet chocolate and rich brown butter frosting. This recipe highlights pumpkin in a cake that can be served both after dinner or alongside your morning coffee.

Ingredients:
4 eggs
1/2 cup white sugar
1 cup light brown sugar, packed
1 cup vegetable oil
1 can (15 oz) pumpkin puree
2 cups all purpose flour
2 teaspoons baking powder
1 teaspoon baking soda
1-1/2 teaspoons ground cinnamon
1/4 teaspoon ground nutmeg
1/4 teaspoon ground ginger
1/4 teaspoon ground clove
1 teaspoon ground allspice
1/2 teaspoon Kosher salt
1-1/4 cup dark chocolate chips

Brown Butter Frosting Ingredients:
1/2 cup butter
8 oz cream cheese, softened
1 teaspoon vanilla
3 cups confectioners’ sugar
1/4 teaspoon cinnamon for sprinkling

Directions:
1. Preheat the oven to 350°F.

2. In a stand mixer on medium-low speed, mix the eggs, white sugar, brown sugar, oil and pumpkin puree until incorporated. In a separate bowl, sift together the flour, baking powder, baking soda, cinnamon, nutmeg, ginger, clove, allspice, and salt.

3. Slowly add the flour mixture to the pumpkin mixture and continue to mix until combined. Fold in the chocolate chips.

4. Pour the batter into a 10” x 10” ungreased baking dish. Bake for 40-45 minutes or until a toothpick comes out clean. If the top or edges brown before the rest of the cake has baked, tent aluminum foil over the top. Cool on a cooling rack.

5. Make the frosting: Melt the butter in a small saucepan. Continue cooking over medium heat, stirring often, until the butter turns a light golden brown, about 5 minutes. Be careful not to burn the butter! Remove from heat and let the butter cool. In a stand mixer, mix together the cream cheese and the browned butter until fluffy. Add the vanilla and mix. Gradually add the confectioners’, sugar continuing to mix until smooth.

6. Once the cake has completely cooled, generously spread the frosting over the top of the cake in a thick layer. Dust with cinnamon and enjoy!

Sweet Potato Doughnut Holes

Did someone say fresh, warm, doughnut holes? IN THIS ISSUE, we feature doughnut making tips and techniques! We love making these bite-sized treats at home because we can enjoy them by the handful and not feel guilty in front of anyone. Now you can too!

Sweet Potato and Cardamom Doughnut Holes
Makes about 30 doughnut holes

Did someone say fresh, warm, doughnut holes? These lovely morsels feature warm, autumn spices including allspice, cinnamon, and cardamom. And, since they are made with sweet potatoes, they’re almost healthy, right? We love making these bite-sized treats at home because we can enjoy them by the handful and not feel guilty in front of anyone. Now you can too!

Ingredients:
2-1/2 cups all-purpose flour
1/4 cup sugar
1 tablespoon baking powder
1/4 teaspoon allspice
1/4 teaspoon cardamom
3/4 teaspoon salt
5 tablespoons chilled butter
3/4 cup buttermilk
1/2 cup sweet potato, cooked and pureed (roughly 1 small sweet potato)
1/2 teaspoon vanilla
4 cups canola oil for frying

Cinnamon Sugar Topping:
1/3 cup granulated sugar (or powdered sugar)
1 teaspoon cinnamon

Directions:
1. In a large bowl, combine the flour, sugar, baking powder, allspice, cardamom, and salt. Whisk the ingredients together until evenly incorporated. Cut the butter into the flour until it resembles a crumb-like mixture.

2. Add the buttermilk, mashed sweet potato, and vanilla, Fold the dough together until all the ingredients are combined. The dough will be sticky to the touch.

3. Scoop out pieces of the dough and roll them into balls roughly 1-1/2" in diameter. Set aside.

4. in a separate, shallow dish, stir together the cinnamon and sugar. Set aside.

5. Add the oil to a medium-sized saucepan and warm the oil over medium-high heat until it reaches 350°F. Drop the doughnut holes in about 6 at a time.

6. Fry the doughnut holes, very carefully, for about 3-4 minutes, occasionally turning them in the oil to ensure all sides are getting cooked and browning evenly.

7. Use a slotted spoon, skimmer, or spider to transfer the doughnut holes to a paper towel-lined plate. After cooling the doughnuts for about 30 seconds, roll them in the cinnamon-sugar mix until they are fully covered. Enjoy immediately!

Peach-Blueberry Cobbler

Fresh, ripe blueberries and peaches are truly one of the best parts of summer. The window is short; enjoy both in as many ways as you can! Definitely include this cobbler on your culinary bucket list a couple of times before the season is over. There are many types of cobbler - some cake-like, others with a more biscuit-like character. This time around, we’re featuring a fabulous biscuit-type topping. Slightly sweetened biscuits bake atop a pan of bubbling fruit. The only thing left to do is scoop your favorite vanilla ice cream on top!

Peach & Blueberry Cobbler
Serves 4 - 6

Fresh, ripe blueberries and peaches are truly one of the best parts of summer. The window is short; enjoy both in as many ways as you can! Definitely include this cobbler on your culinary bucket list a couple of times before the season is over. There are many types of cobbler – some cake-like, others with a more biscuit-like character. This time around, we’re featuring a fabulous biscuit-type topping. Slightly sweetened biscuits bake atop a pan of bubbling fruit. The only thing left to do is scoop your favorite vanilla ice cream on top!

Filling:
6 peaches, pitted, peeled, sliced
2 cups blueberries, washed and destemmed
1 tablespoon lemon juice, freshly squeezed
1/8 cup white sugar
1/8 cup brown sugar
1 tbsp cornstarch
1/8 teaspoon cinnamon
1/8 teaspoon salt

Topping:
1-2 tablespoons butter, melted
1 tablespoon white sugar
1/8 teaspoon cinnamon

Biscuit Topping:
2 cups all-purpose flour (plus 1/4 cup extra)
1/4 cup white sugar
1 tablespoon baking powder
1 teaspoon Kosher salt
1/2 cup chilled butter, diced into
1/2-inch cubes
3/4 cup milk (plus 2-3 tbsp more)
2 teaspoons vanilla extract

Serve with:
Vanilla ice cream

Directions:
1. Preheat the oven to 425°F. Prepare a ceramic baking dish (about a 2-quart capacity) by lightly buttering.

2. Prepare the filling. Prepare the peaches by peeling, pitting, and slicing into thin, crescent-shaped slices.

3. In a large bowl, add the blueberries to the peach slices. Sprinkle with the white sugar, brown sugar, cornstarch, cinnamon, and salt. Stir until combined.

4. Place the peaches and blueberries in the prepared baking dish and place in the oven for 20 minutes to jumpstart the baking process.

5. Meanwhile, prepare the biscuit topping. In a large mixing bowl, mix together the flour, sugar, baking powder, and salt. Stir to evenly combine the ingredients.

6. Add half of the diced butter to the flour mixture and combine well with a pastry blender or fork. Add the remaining diced butter and continue to blend leaving pea-sized pieces of butter.

7. Add the vanilla extract to the milk. Add the milk mixture to the flour-butter mixture, and stir together until a rough dough is formed. Turn out the dough onto a lightly floured board and gather the dough together. Knead 2-3 times to form a dough ball. Flatten the dough ball to about a 1/2-inch thickness.

8. Using a 2-inch biscuit cutter, cut circles of dough.

9. Place the biscuits on top of the hot fruit in the baking dish. Brush the tops of each dough piece with melted butter. Extra biscuit dough? Simply bake in the oven on a baking sheet until golden brown.

10. In a small bowl, stir together the sugar-cinnamon topping. Sprinkle the mixture on top of the entire dish.

11. Continue baking in a 425°F oven until the biscuit dough is cooked through and the tops nicely golden brown, about 15 more minutes. Remove from the oven and allow to cool for 30 minutes.

12. Serve warm (not hot) with your favorite vanilla ice cream.

Make Your Own Summer Blueberry Hand Pies

SUMMER BLUEBERRIES burst with a flavor that only happens when truly in season. One of our favorite ways to celebrate these little nutritional powerhouses is to place them in hand pies. The berries’ diminutive size fit neatly into petite packets, which highlight the rich cream cheese-based crust — a truly mouth-watering match!

Summertime Blueberry Hand Pies
Makes 6 - 8 hand pies

Cream Cheese Crust Ingredients:
2 cups all-purpose flour
1 teaspoon sugar
1-1/4 teaspoon Kosher salt
8 oz. (1 pkg) cream cheese
1 cup unsalted butter (2 sticks), well chilled

Crust Assembly Ingredients:
2 egg whites, beaten
1 tablespoon coarse sugar for crust topping

Blueberry Filling:
2 cups blueberries
3 tablespoons sugar
1 tablespoon cornstarch

Directions:

1. PLACE the flour, sugar, and salt in
the bowl of the food processor. PULSE a few times to evenly distribute the sugar and salt.
2. CUT the butter and cream cheese into 1/2-inch cubes. Use a little of the flour mixture to keep the pieces from sticking together. CHILL the cut butter and cream cheese cubes for 15 minutes.
3. PLACE the butter and cream cheese cubes in the food processor with the flour mixture. PULSE 6-8 times to cut the butter and cream cheese into the flour. The dough mixture will be coarse with some pea-sized pieces of butter and cream cheese remaining. (Resist the urge to keep pulsing.)
4. REMOVE the rough dough from the work bowl and form into a ball using your hands and a light touch.
5. FLATTEN the dough ball into a disk about a half-inch thick, and wrap in plastic wrap.
6. CHILL the wrapped dough disk for an hour or overnight.
7. REMOVE the dough from the refrigerator when ready to bake the hand pies and let set for 10 minutes on the countertop while the filling is mixed.
8. STIR the cornstarch and sugar together, then sprinkle over the fresh blueberries. Gently toss the fruit to distribute the cornstarch/sugar mixture. Set aside while finishing crust preparation.
9. ROLL the dough on a lightly floured surface to a 1/8- to 3/16-inch thickness.
10. CUT circles from the dough (5-inch circles for 6 pies; 4-inch circles for 8 pies). TRANSFER half of the circles to a baking sheet lined with parchment paper.
11. BEAT the egg whites with 2 teaspoons of water, and BRUSH the egg white wash lightly on the edge of each circle.
12. SPOON the prepared blueberries into the center of each bottom circle mounding them slightly. Leave about 1/2-inch of the crust clear for sealing.
13. STRETCH the top circles slightly to fit over the mounded blueberries. MATCH the edges of the top crust with the bottom crust pressing them together. CRIMP the edges with fork tines.
14. BRUSH the formed hand pies with the egg white wash. SPRINKLE lightly with sugar if desired. VENT the pies by cutting small slits on the top with the tip of a paring knife in a decorative design of your choosing. (We like a simple star with five small cuts placed in a radiating pattern.)
15. BAKE the hand pies in a 400° oven for 15-20 minutes, or until the crust is golden brown.
16. SERVE warm or cooled to room temperature.

Fresh Blueberry Crostata

This crostata is one of the many ways to enjoy blueberry season! It features fresh blueberries encased in a simple crust that has just the right sweetness. Its rustic presentation couldn’t be simpler. The crust is rolled, filled, and the edges flipped over the fruit. Serve wedges of this crostata with a scoop of ice cream or dollop of whipped cream.

Pâte Brisée Crust Ingredients:
2-1/2 cups all-purpose flour
1 tablespoon sugar
1-1/2 teaspoons Kosher salt
1 cup unsalted butter (2 sticks), well chilled
4-6 tablespoons ice water

Blueberry Filling
5 cups fresh, blueberries
3 tablespoons sugar
1 tablespoon cornstarch

Crust Topping:
1 egg for egg wash
1 tablespoon white sugar for crust topping

Directions:

1. PLACE the flour, sugar, and salt in the bowl of the food processor. PULSE to evenly distribute the sugar and salt.

2. CUT the butter into 1/2-inch cubes. Use a little of the flour mixture to keep the butter pieces from sticking togeth- er.CHILL the cut butter cubes for 15 minutes.

3. PREPARE the ice water by filling a small bowl with ice cubes and adding water. STIR until the water is well-chilled.

4. PLACE the butter cubes in the food processor with the flour mixture. PULSE 4-5 times to cut the butter into the flour.The flour-butter mixture will be coarse with some pea-sized pieces of butter remaining. (Resist the urge to keep pulsing.)

5. ADD 2 tablespoons of the ice water by sprinkling on top of the flour and butter mixture. PULSE 2-3 times. CONTINUE adding ice water by the tablespoon pulsing after each addition until a rough dough is formed. Test the dough by pinching together – if it holds together, enough water has been added. If it crumbles apart, add another tablespoon of water. (Avoid adding too much water or pulsing too much.)

6. REMOVE the dough from the work bowl gathering it into a rough ball. FLATTEN the dough ball into a disk about a half-inch in thickness and wrap in plastic wrap.

7. Forming the Crostata: CHILL the wrapped dough disk for an hour or overnight.

8. REMOVE the dough from the refrigerator when ready to bake the crostata and let set for 10 minutes on the countertop while mixing the filling.

9. STIR the cornstarch and sugar together, then sprinkle over the fresh blueberries. Gently toss the fruit to distribute the cornstarch/sugar mixture. Set aside while finishing crust preparation.
10. ROLL the dough on a lightly floured surface into a 16-inch rough circle with about a 1/8- to 3/16-inch thickness.
11. TRANSFER the rolled dough to a baking sheet lined with parchment paper. The sides of the dough may temporarily drape over the edges.

12. PLACE the prepared blueberry filling in the center of the crust circle and spread into an even layer leaving a 2 to2-1/2 inch perimeter of crust free. FOLD the edges of the crust over the filling.

13. BEAT an egg with 1 teaspoon of water in a small bowl. BRUSH the egg wash on the crust’s surfaces.

14. SPRINKLE with coarse sugar. CHILL the crostata in the refrigerator for about 15 minutes while the oven preheats.

15. BAKE the crostata in a 400° oven for 20-25 minutes, checking after 15 minutes. The crust will develop a lovely golden brown color and the filling will be bubbling and slightly thickened. The filling continues to thicken as is cools.

16. SERVE warm or cooled to room temperature with a side of vanilla bean ice cream, or sweetened whipped cream.

Fresh Strawberry Pie

Fresh strawberry pie is hard to beat! Unlike most fruit pies where the fruit cooks and changes character during baking, this chilled pie celebrates strawberries in fresh form. All the goodness of these red gems is held in a flaky crust that bakes quickly and perfectly complements the strawberries’ starring role. It’s a pie best eaten within a day or two – but accomplishing that is usually not a problem!

Fresh Strawberry Pie
Makes a 9-inch pie

Pie Crust Ingredients:
2 cups flour
1 teaspoon salt
1 tablespoon sugar
2/3 cup shortening
6-8 tablespoons cold water

Whipped cream or vanilla ice cream for serving

Prepare the Pie Crust

Filling Ingredients
3 tablespoons corn starch
1/2 cup cold water
1 cup sugar
1/2 package or 3 tablespoons strawberry gelatin
2 quarts fresh strawberries, sliced,about 5 cups, hulled and sliced

1. In a food processor, add the flour, salt, and sugar. pulse a few times to combine.

2. Add the shortening, and pulse to cut the shortening into the flour mixture. The mixture should be coarse with some pea-sized pieces of shortening remaining.

3. Slowly add water a tablespoon at a time to the dough while pulsing in short bursts until a dough ball is just formed. Test the readiness by pinching together -- if it holds together, enough water has been added. If it crumbles apart, add another tablespoon of water. Be sure to not over mix; this will ensure that a flakier crust is achieved. Wrap the dough in plastic wrap, and refrigerate for 30 minutes.

4. Roll the dough ball into a rough 12-inch circle, about 1/8-inch thick.

5. Using a rolling pin to help lift the dough, place the crust into a 9-inch pie dish. Trim off excess crust around the edge, and pinch the edge into your favorite edge finish style.

6. Dock the pie crust with a fork to make steam holes for the crust. Line the crust with pie weights and bake in a 450 degree F oven for 10 to 12 minutes, or until golden brown. Allow to cool completely.

Prepare the Strawberry Filling:
7. Dissolve the cornstarch in three tablespoons of the cold water. Set aside.

8. In a saucepan, combine the sugar and remaining water. Heat and stir until the sugar has dissolved and the mixture is clear. Gradually pour the cornstarch mixture into the sugar mixture. Increase the heat and with continuous stirring, allow the mixture to reach the simmering stage and begin to thicken. Continue cooking and stirring until nicely thickened.

9. Remove the saucepan from the heat and stir in the gelatin.

Assemble and Serve the Pie;
10. Add the sliced strawberries to the baked and cooled pie crust. Pour the strawberry filling over the strawberries.

11. Cover and refrigerate the pie until the filling has set, about 2-4 hours. 12. Serve with whipping cream or vanilla ice cream and enjoy immediately.

Summer Peach-Almond Galettes

Sweet, ripe peaches are nearly synonymous with summer! These amazing fruits develop their sweet flavor and tangy taste on petite trees over several months – a test of patience amply rewarded when picking time arrives! Botanically related, this peach preparation features a pairing with almonds and almond flavoring. The combination creates fabulous complementary flavors in both the crust and filling. This recipe makes four individual galettes, or one larger rustic pie. The crust is sweeter and richer than a typical pie crust – we think you’ll love it!

Summer Peach-Almond Galettes
Makes 4 individual servings

Pâte Sucrée Crust Ingredients
3 cups all-purpose flour
1 cup sugar
2 teaspoons Kosher salt
1 cup unsalted butter (2 sticks), well chilled
2 egg yolks
1 teaspoon pure vanilla extract
1/2 teaspoon almond extract
4-6 tablespoons heavy cream

Crust Topping:
2 tablespoons flour
2 tablespoons sugar
2 tablespoons butter
2 tablespoons sliced almonds
2 tablespoons heavy cream, for brushing on crust
1 tablespoon coarse sugar for crust topping

Peach-Almond Filling:
4-6 ripe peaches, peeled and sliced (or 4 cups sliced)
3 tablespoons sugar
1 tablespoon cornstarch

The crust may be mixed by hand or with a food processor. Choose your preferred method, then continue forming the galette at Step 7.

Directions:

Mixing by Hand:

1a. MIX the flour, sugar, and salt together in a large bowl with a whisk until evenly distributed.

2a. CUT the butter into 1/2-inch cubes. Use a little of the flour mixture to keep the butter pieces from sticking together. CHILL the cut butter cubes for 15 minutes.

3a. PLACE the butter cubes in the flour mixture. Using a simple pastry blender, cut the butter and flour mixture together until a coarse texture is reached with some pea-sized pieces of butter remaining.

4a. BEAT the two egg yolks together with the vanilla and almond extracts. ADD to the flour-butter mixture and cut several times with the pastry blender.

5a. ADD 2 tablespoons of the heavy cream by sprinkling on top of the flour and butter mixture. With a fork, gently toss the mixture. CONTINUE adding cream one tablespoon at a time tossing after each addition until a rough ball of dough forms. (Avoid adding too much cream.)

6a. FLATTEN the dough ball into a disk about a half-inch thick, and wrap in plastic wrap.

Mixing with a Food Processor:

1b. PLACE the flour, sugar, and salt in the bowl of the food processor. PULSE a few times to distribute the sugar and salt.

2b. CUT the butter into 1/2-inch cubes. Use a little of the flour mixture to keep the butter pieces from sticking together. CHILL the cut butter cubes for 15 minutes.

3b. PLACE the butter cubes in the food processor with the flour mixture. PULSE 4-5 times to cut the butter into the flour. The flour-butter mixture will be coarse with some pea-sized pieces of butter remaining. (Resist the urge to keep pulsing.) 4b. BEAT the two egg yolks with the vanilla and almond extracts. ADD to the flour-butter mixture, PULSE 3-4 times.

5b. ADD 2 tablespoons of the cream by sprinkling on top of the flour and butter mixture. PULSE twice. CONTINUE adding cream by the tablespoon pulsing after each addition until a rough dough is formed. Test the dough by pinching together – if it holds together, enough cream has been added. If it crumbles apart, add another tablespoon of cream. (Avoid adding too much cream or pulsing too much.)

6b. REMOVE the dough from the work bowl, forming a rough ball. DIVIDE into four pieces. FORM into individual balls, then FLATTEN each into a disk about a half-inch in thickness and wrap in plastic wrap.

Forming the Galettes:

7. CHILL the wrapped dough disks for an hour or overnight.

8. REMOVE the dough from the refrigerator when ready to bake the galettes and let set for 10 minutes on the countertop while the filling is mixed.

9. STIR the cornstarch and sugar together, then sprinkle over the fresh peach slices. Gently toss the fruit to distribute the cornstarch/sugar mixture. Set aside while finishing crust preparation.

10. ROLL out one disk of dough into a rough 8-inch circle, about 3/16-inch in thickness, on a lightly floured surface. Repeat with the remaining three dough pieces. Leave the edges rough, or if you prefer, use a plate to cut a neat circle of dough.

11. TRANSFER the rolled dough to a baking sheet lined with parchment paper. The sides of the dough may temporarily drape over the edges.

12. PLACE the prepared peach slices in the center of the crust circle arranging the wedges evenly. Leave a 1- to 1-1/2 inch perimeter of crust free of filling.

13. FOLD the edges of the crust over the filling pleating or overlapping as you go.

14. MIX equal parts of flour, sugar and butter (2 tablespoons each) together until combined and a crumbly texture is formed. SPRINKLE the crumb mixture and sliced almonds over the exposed fruit portion of the galettes.

15. BRUSH the crust’s surfaces with heavy cream. SPRINKLE with coarse sugar. CHILL the galettes in the refrigerator for 10 minutes while the oven preheats.

16. BAKE the galettes in a 400° oven for 20-25 minutes, or until the crust is golden brown and the filling bubbly and slightly thickened. It will continue to thicken as is cools.

17. SERVE warm or cooled to room temperature with a side of vanilla bean ice cream, or sweetened whipped cream.

Sweet Biscuit Strawberry Shortcakes

One of our favorite ways to enjoy fresh strawberries is as strawberry shortcake -- the biscuit kind, not the cake kind. We grew up with this treat, so its seasonal comeback revives all kinds of wonderful memories in addition to all the great tastes! In this recipe, chopped strawberries are added to the biscuit dough, which makes the biscuits sweeter, and the biscuit color a lovely shade of pink! 


Sweet Biscuit Strawberry Shortcake
Makes 8-10 shortcakes

SWEET STRAWBERRY BISCUITS:
2 cups all-purpose flour 
1 tablespoon baking powder 
1/4 teaspoon salt 
1/4 cup sugar
1 tablespoon lemon zest
1 pint strawberries (1 cup, finely chopped)
1/2 cup milk
1/2 cup buttermilk 
4 tablespoons butter, melted

STRAWBERRY FILLING:
1 tablespoon freshly squeezed lemon juice
1 tablespoon freshly squeezed orange juice
1 tablespoon honey
1 quart fresh strawberries, hulled and sliced

WHIPPED CREAM INGREDIENTS:
2 cups heavy whipping cream
1/2 teaspoon vanilla extract
1/4 cup confectioner’s sugar

Directions:
1. Preheat the oven to 375°F. Line a baking sheet with a silicone baking mat or piece of parchment paper. 

2. In a mixing bowl, whisk together the flour, baking powder, salt, sugar and lemon zest. Add the chopped strawberries, gently stirring to distribute. 

3. In large bowl, stir together the milk and buttermilk. Slowly add the milk to the flour mixture and stir a couple of times until barely combined.

4. Pour in the melted butter and continue to fold in until combined. Do not over mix. It will be a coarse dough, and rather sticky. 

5. Drop spoonfuls of the dough onto the prepared baking sheet in 8 equal portions. Bake biscuits for 18-20 minutes, or until baked through and the top and edges begin to turn golden brown. Cool on the pan for five minutes, then transfer to a cooling rack.

6. While the biscuits are baking, prepare the strawberries by hulling and slicing. Combine the citrus juices and honey in a small bowl, whisk until the honey is dissolved. 

7. Pour the honey-sweetened juice over the sliced strawberries and toss to evenly coat the berries. Let the sweetened strawberries stand and macerate while the biscuits bake.

8. In a stand mixer with the whisk attachment, whisk the whipping cream, vanilla extract, and powdered sugar until soft peaks form. Split the biscuits and add a layer of strawberries. Add the biscuit top, and place a generous dollop of whipped cream.


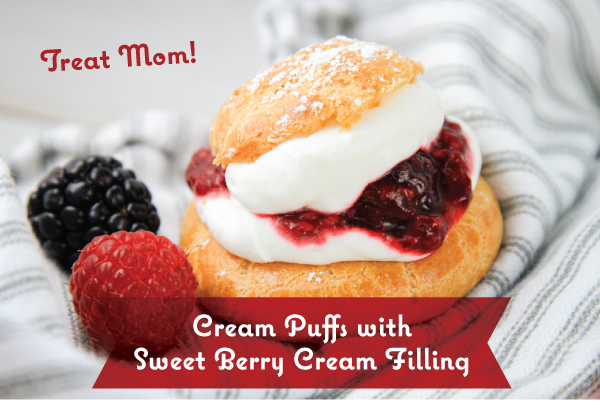
Cream Puffs with Berries

Cream Puffs with Berry Filling

Expanding your repertoire of kitchen skills these days? Add cream puffs to your list of culinary mastery while celebrating the return of fresh berries. The light, delicate, cream puffs with sweet berry filling are perfect for Mother’s Day, too! This recipe starts with a classic French pâte à choux and finishes things off with bright, jammy berries, and homemade whipped cream.

Cream Puffs with Berry Filling

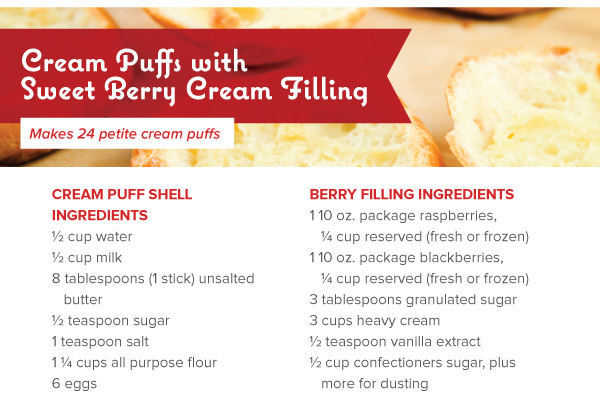
Cream Puffs with Sweet Berry Cream Filling
Makes 24 petite cream puffs

Cream Puff Shell Ingredients:
1/2 cup water
1/2 cup milk
8 tablespoons (1 stick) unsalted butter
1/2 teaspoon sugar
1 teaspoon salt
1-1/4 cups all purpose flour
6 eggs

Berry Filling Dressing:
1 package (10 oz) raspberries, fresh or frozen 1/4 cup reserved
1 package (10 oz) package blackberries, fresh or frozen, 1/4 cup reserved
3 tablespoons granulated sugar
3 cups heavy cream
1/2 teaspoon vanilla extract
1/2 cup confectioners sugar, plus more for dusting

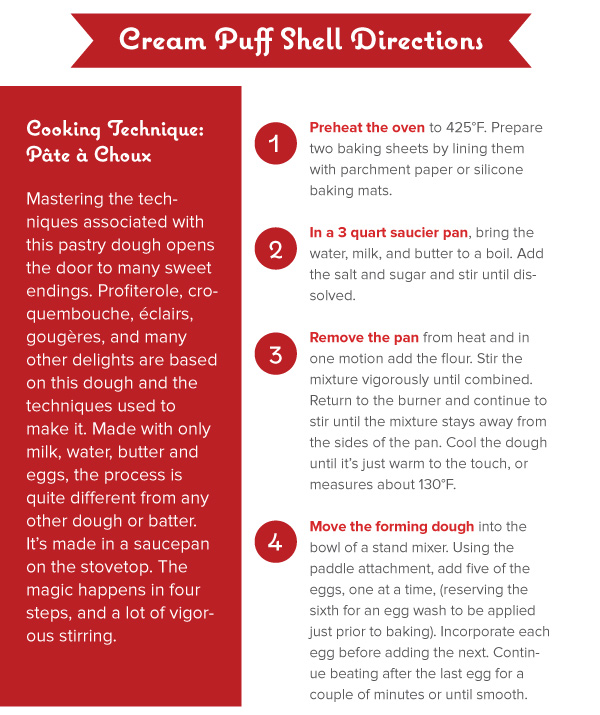
1. Preheat the oven to 425°F. Prepare two baking sheets by lining them with parchment paper or silicone baking mats.

2. In a 3 quart saucier pan, bring the water, milk, and butter to a boil. Add the salt and sugar and stir until dissolved.

3. Remove the pan from heat and in one motion add the flour. Stir the mixture vigorously until combined. Return to the burner and continue to stir until the mixture stays away from the sides of the pan. Cool the dough until it’s just warm to the touch, or measures about 130°F.

4. Move the forming dough into the bowl of a stand mixer. Using the paddle attachment, add five of the eggs, one at a time, (reserving the sixth for an egg wash to be applied just prior to baking). Incorporate each egg before adding the next. Continue beating after the last egg for a couple of minutes or until smooth.

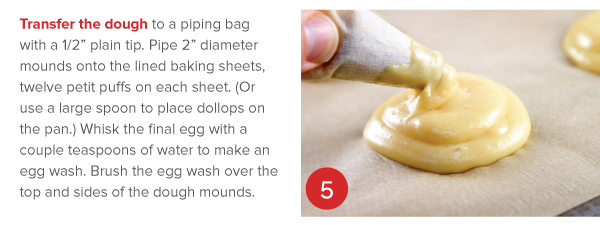
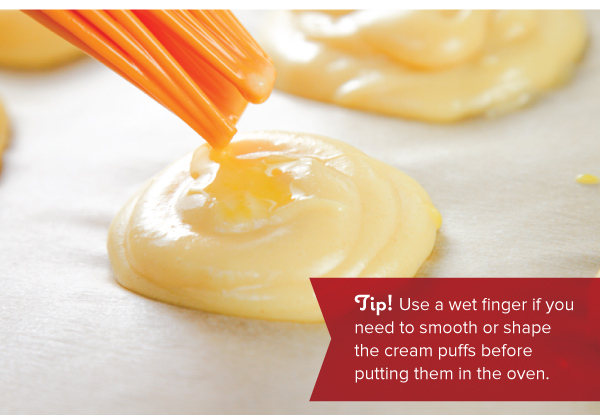
5. Transfer the dough to a piping bag with a 1/2” plain tip. Pipe 2” diameter mounds onto the lined baking sheets, twelve petit puffs on each sheet. (Or use a spoon to place dollops.) Whisk the final egg with a couple teaspoons of water to make an egg wash. Brush the egg wash over the top and sides of the dough mounds.

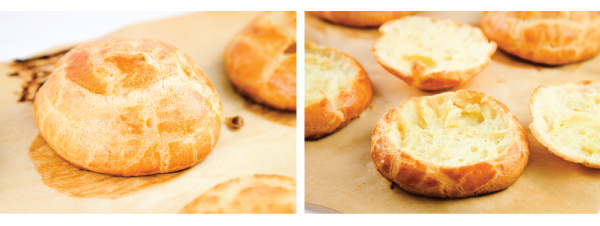
6. Bake in the preheated oven for 10 minutes, then reduce heat to 350°F and continue baking for another 15 minutes. The pastries should be evenly golden brown.

7. Immediately after removing from the oven, cut the tops off the puffs with a serrated knife to allow steam to escape. This will assist greatly in the puffs retaining their shape. Set aside to cool.

Filling Directions:

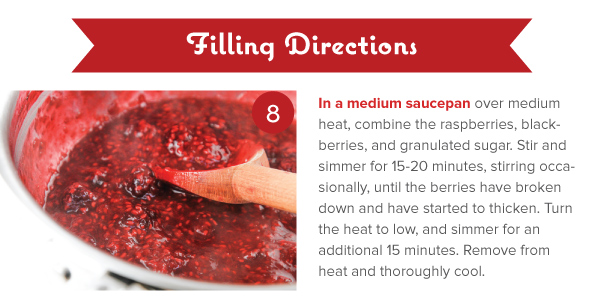
8. In a medium saucepan over medium heat, combine the raspberries, blackberries, and granulated sugar. Stir and simmer for 15-20 minutes, stirring occasionally, until the berries have broken down and begin to thicken. Turn the heat to low and simmer for an additional 15 minutes. Remove from heat and cool.

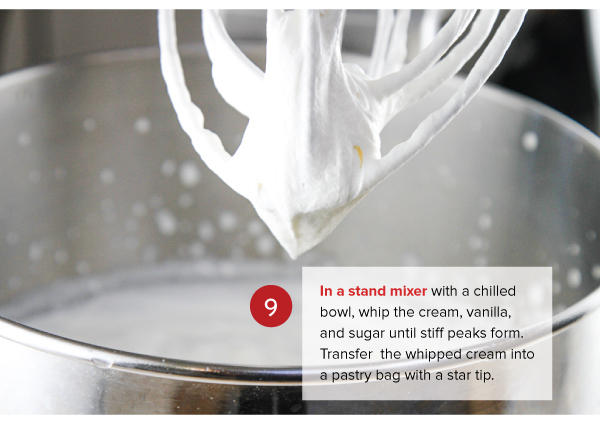
9. In a stand mixer with a chilled bowl, whip the cream, vanilla, and sugar until stiff peaks form. Transfer the whipped cream into a pastry bag with a star tip.

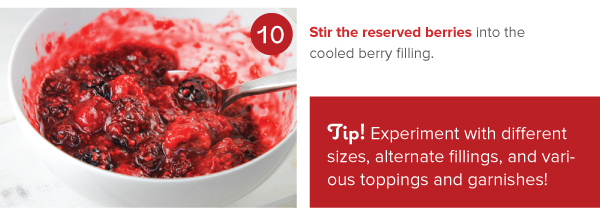
10. Stir reserved berries into cooled berry filling.

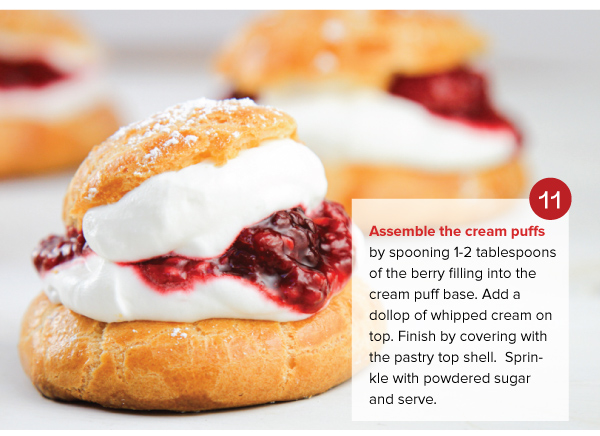
11. Assemble the cream puffs by spooning 1-2 tablespoons of the berry filling in the cream puff base. Add a dollop of whipped cream on top. Finish by covering with the pastry top shell. Sprinkle with powdered sugar and serve.

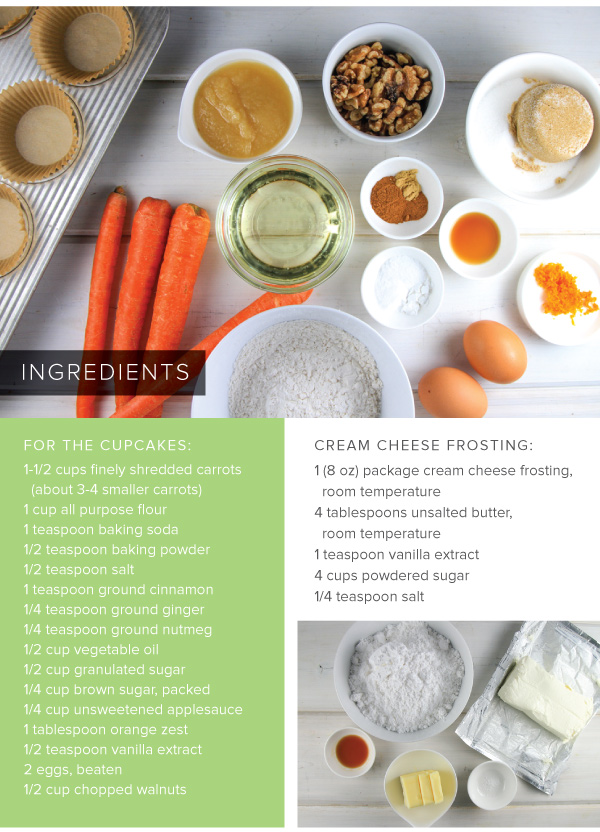
Carrot Cake Cupcakes

Carrot Cake Cupcakes

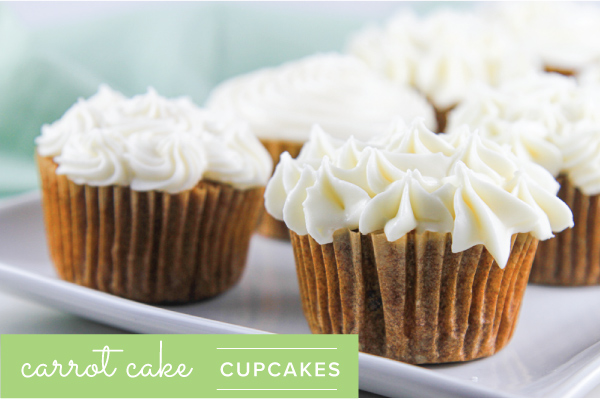
Treat yourrself to these flavorful carrot cake cupcakes topped with a decadent cream cheese frosting. The cupcake is moist and filled with comforting spices. The shredded carrots and hint of orange zest lend a sweet flavor while the walnuts add depth. These cupcakes assemble easily and are guaranteed to make the day just a little better!

Carrot Cake Cupcakes

Carrot Cake Cupcakes
Makes 12 cupcakes

Cupcakes Ingredients:
1-1/2 cups finely shredded carrots (about 3-4 smaller carrots)
1 cup all purpose flour
1 teaspoon baking soda
1/2 teaspoon baking powder
1/2 teaspoon salt
1 teaspoon ground cinnamon
1/4 teaspoon ground ginger
1/4 teaspoon ground nutmeg
1/2 cup vegetable oil
1/2 cup granulated sugar
1/4 cup brown sugar, packed
1/4 cup unsweetened applesauce
1 tablespoon orange zest
1/2 teaspoon vanilla extract
2 eggs, beaten
1/2 cup chopped walnuts

Cream Cheese Frosting:
1 (8 oz) package cream cheese frosting, room temperature
4 tablespoons butter, room temperature
1 teaspoon vanilla extract
2 cups powdered sugar
1/4 teaspoon salt

Directions:
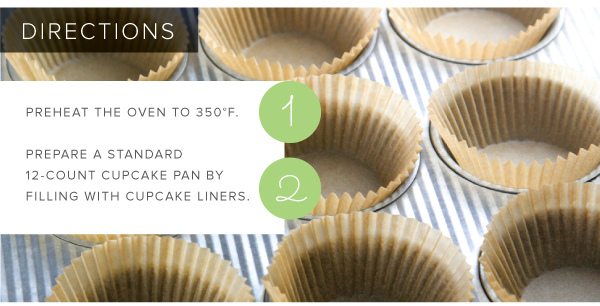
1. Preheat the oven to 350 degrees F.
2. Prepare a standard 12-count cupcake pan by filling with cupcake liners.
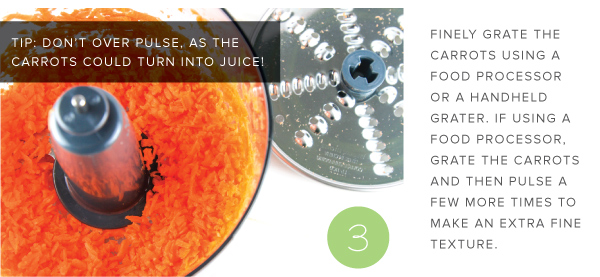
3. Finely grate the carrots using a food processor or a handheld grater. If using a food processor, grate the carrots and then pulse a few more times to make an extra fine texture. Don’t over pulse, as the carrots could turn into juice!
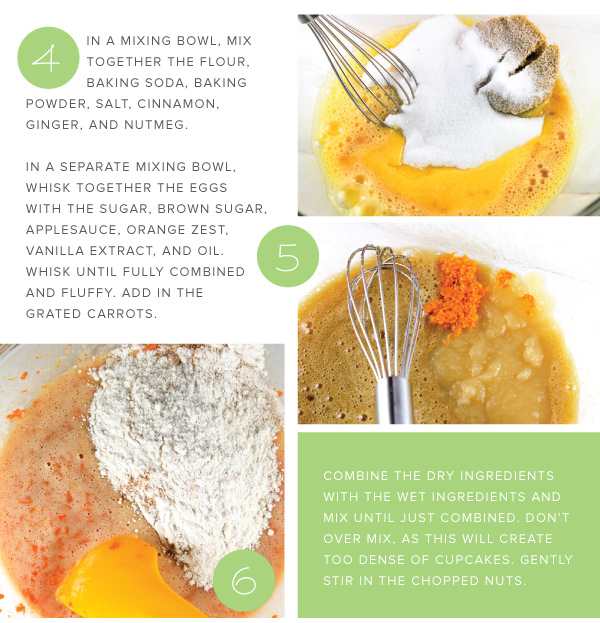
4. In a mixing bowl, mix together the flour, baking soda, baking powder, salt, cinnamon, ginger, and nutmeg.
5. In a separate mixing bowl, whisk together the eggs with the sugar, brown sugar, applesauce, orange zest, vanilla extract, and oil. Whisk until fully combined and fluffffy. Add in the grated carrots.
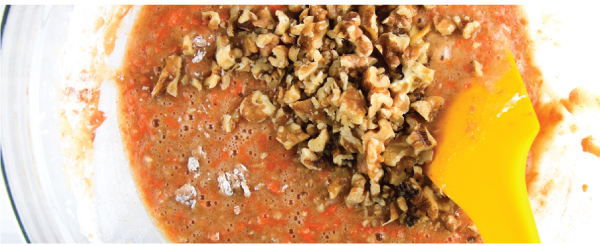
6. Combine the dry ingredients with the wet ingredients and mix until just combined. Don’t over mix; this will create too dense of cupcakes. Gently stir in the chopped nuts.
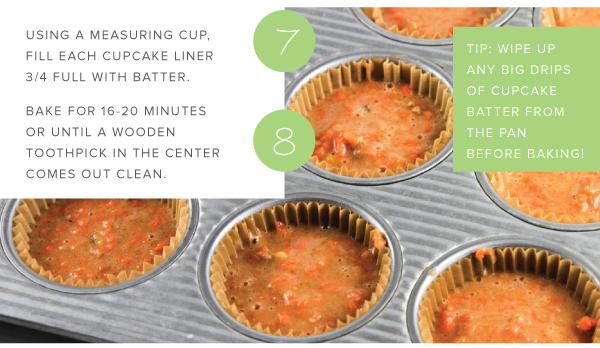
7. Using a measuring cup, fill each cupcake liner 3/4 full of batter.
8. Bake for 16-20 minutes or until a wooden toothpick pierced in the center comes out clean.
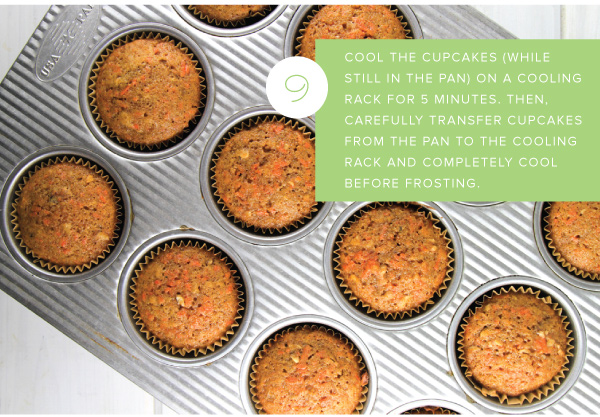
9. Cool the cupcakes in the pan for 5 minutes, then carefully transfer the cupcakes to a wire cooling rack to completely cool before frosting.
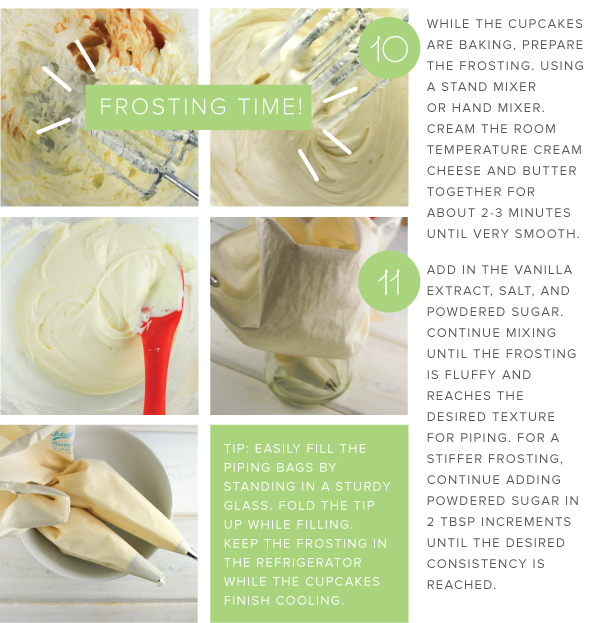
10. While the cupcakes are baking, prepare the frosting. Using a stand mixer or hand mixer, cream the room temperature cream cheese and butter together for about 2-3 minutes until it’s very smooth.
11. Add in the vanilla extract, salt, and powdered sugar. Continue mixing until the frosting is fluffffy and reaches the desired texture for piping. For a stiffffer frosting, continue adding powdered sugar in 2 tablespoon increments until the desired consistency is reached.
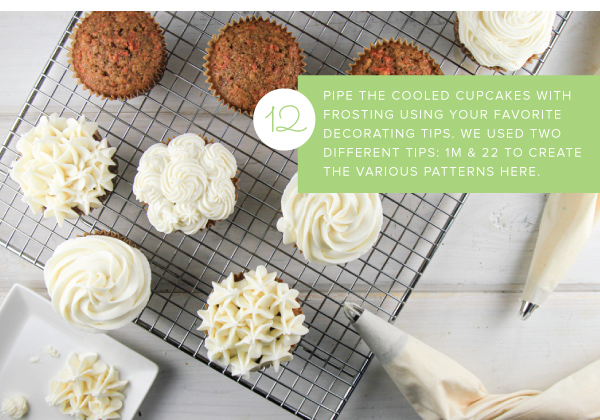
12. Pipe the cooled cupcakes with frosting using your favorite decorating tips. We used two difffferent decorating tips: 1m & 22 to create various patterns.
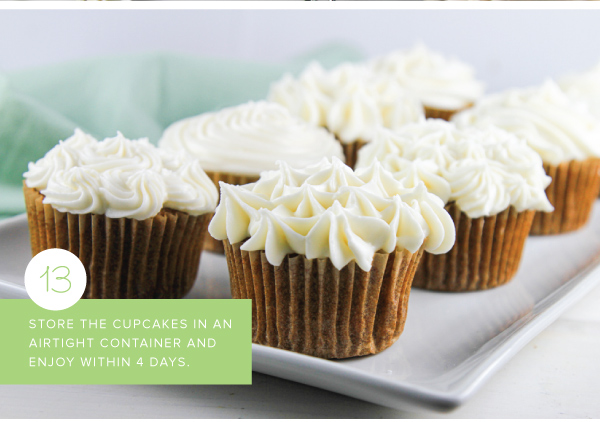
13. Store the cupcakes in an airtight container and enjoy within 4 days.

Meyer Lemon Olive Oil Cake

We present an olive oil cake that features the bright and fresh citrus flavor of Meyer lemons. An easy to prepare cake, the olive oil lends its fruity flavor to the final cake. Serve slices of this moist cake with freshly whipped cream and berries for a delicious, subtly sweet dessert.

Meyer Lemon Olive Oil Cake

Meyer Lemon Olive Oil Cake
Makes one 9-inch cake

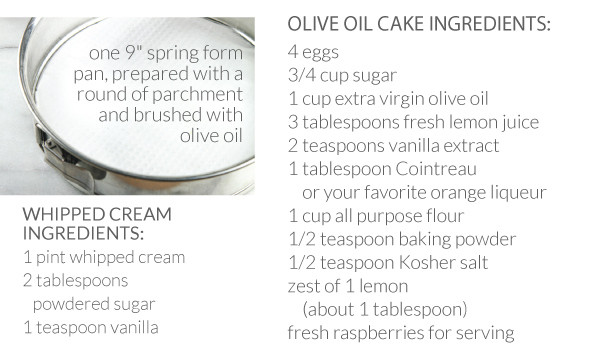
Cake Ingredients:
4 eggs
3/4 cup sugar
1 cup extra virgin olive oil
3 tablespoons fresh lemon juice
2 teaspoons vanilla extract
1 tablespoon Cointreau, or your favorite orange liqueur
1 cup all purpose flour
1/2 tsp baking powder
1/2 tsp Kosher salt
Zest of 1 lemon (about 1 tablespoon)
powdered sugar for serving

Whipped Cream Ingredients:
1 pint whipped cream
2 tablespoons powdered sugar
1 teaspoon vanilla

Directions:

1. Preheat the oven to 350 degrees F.

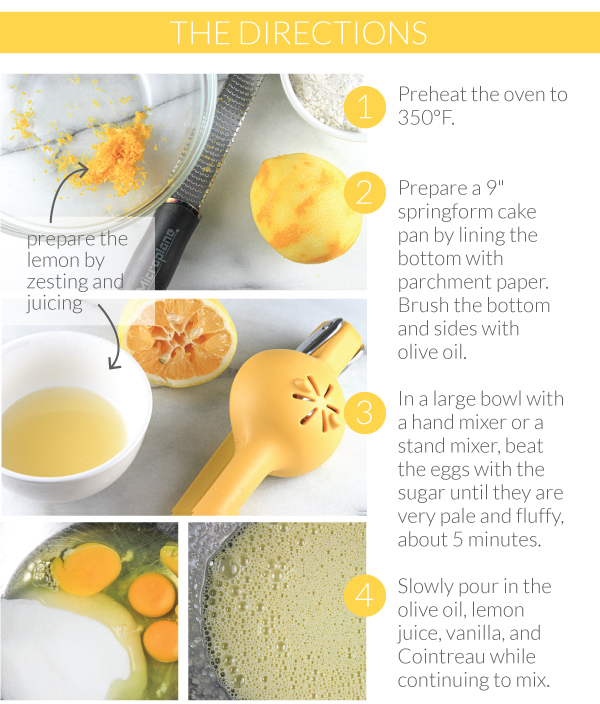
2. Prepare a 9" springform cake pan by lining the bottom with parchment paper. Brush the bottom and sides with olive oil.

3. In a large bowl with a hand mixer or a stand mixer, beat the eggs with the sugar until they are very pale and fluffy, about 5 minutes.

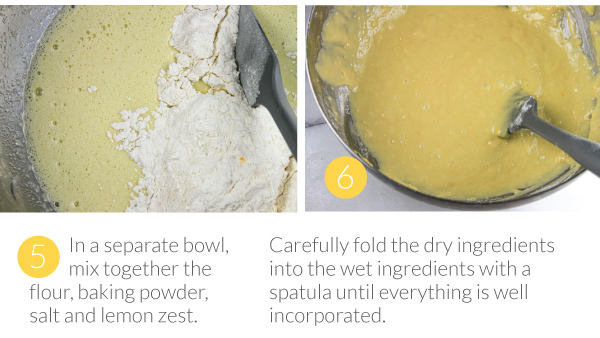
4. Slowly pour in the olive oil, lemon juice, vanilla, and Cointreau while continuing to mix. 5. In a separate bowl, mix together the flour, baking powder, salt and lemon zest.

6. Carefully fold the dry ingredients into the wet ingredients with a spatula until everything is well incorpo- rated.

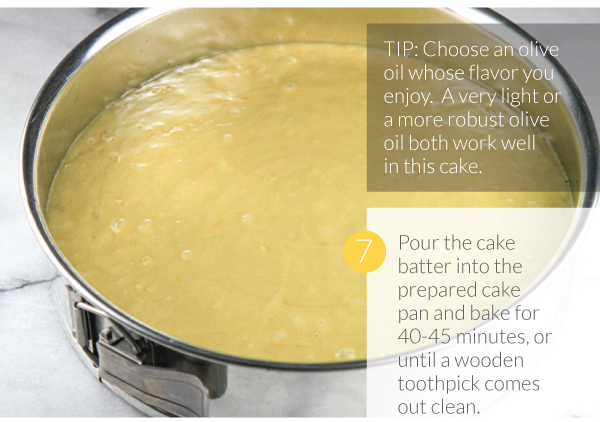
7. Pour the cake batter into the prepared cake pan and bake for 40-45 minutes, or until a wooden toothpick comes out clean.

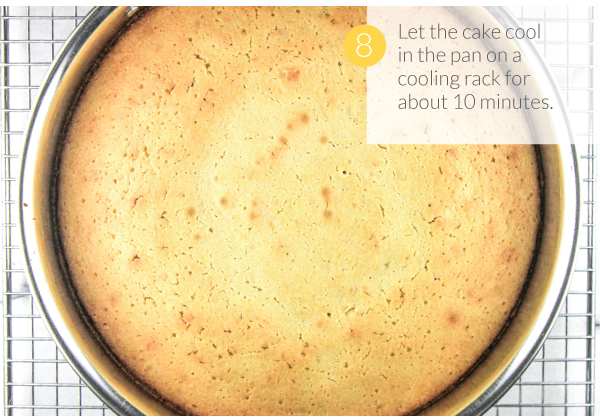
8. Let the cake cool in the pan on a cooling rack for about 10 minutes.

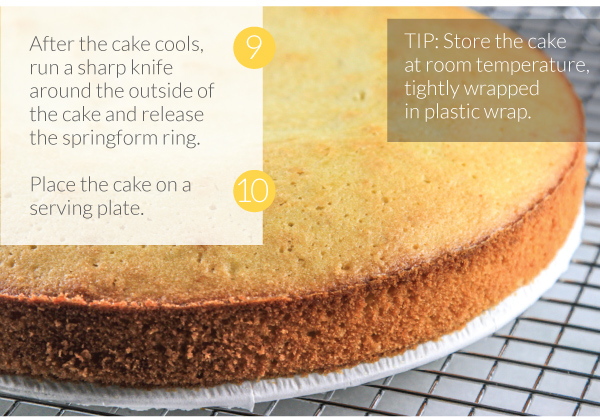
9. After the cake cools, run a sharp knife around the outside of the cake and release the springform ring.

10. Place the cake on a serving plate.

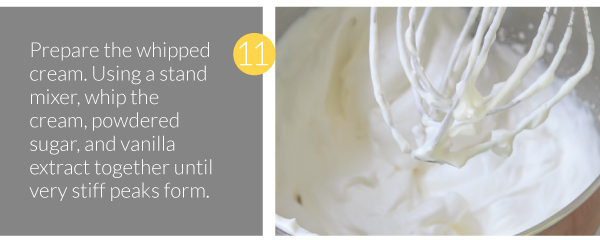
11. Prepare the whipped cream. Using a stand mixer, whip the cream, powdered sugar, and vanilla extract together until very stiff peaks form.

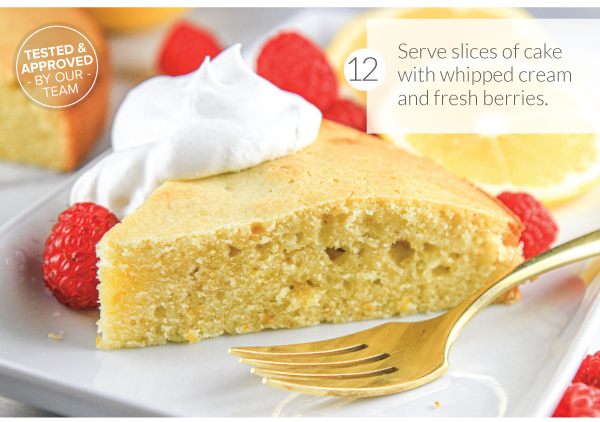
12. Serve slices of cake with whipped cream and fresh berries.

Chocolate Brownie Cupcakes

A perfect sweet ending to a meal, these hybrid cupcake brownies are nutty, chocolate-y, and oh so delightful! With more of a cake-like texture (instead of chewy), these are a perfect dessert or an anytime treat to share with loved ones this Valentine’s season. Makes 16 - 18 cupcakes

Ingredients:
1 cup butter, melted
1/2 cup chocolate chips
1-1/2 cup walnuts, broken into pieces
1-1/4 cup flour 1/4 teaspoon salt
1-1/4 cup sugar
4 eggs, beaten
1 teaspoon vanilla Cupcake liners

Directions:
1. Preheat the oven to 325 degrees F.
2. In a large mixing bowl, beat the eggs and vanilla with a wire whisk.
3. In a separate smaller bowl, melt the butter with the chocolate chips. Beat the sugar into the melted mixture. Add this mixture into the eggs.
4. In a separate bowl, mix the flour and salt together until evenly combined.
5. Add the dry ingredients to the egg mixture and stir with a silicone spatula. Stir in the walnuts.
6. Line a cupcake pan with paper liners. Fill each cup 1/2 full.
7. Bake for 25-30 minutes.

Best Ever Blondies

Loaded with goodies, these are our best ever blondies! Get ready to love how each bite is filled with sweet white chocolate, fresh baked raspberries, and rich macadamia nuts. In addition to these all-star ingredients, the brown sugar gives a caramel-like flavor to these just-sweet-enough chewy bars. Makes a 9’ x 13” pan -- about 15 brownie pieces.

Ingredients:
8 tablespoons salted butter, melted and cooled
1-3/4 cup brown sugar
2 large eggs, at room temperature
1 teaspoon pure vanilla extract
2 cups all-purpose flour
1/2 teaspoon baking powder
1/2 teaspoon salt
1 cup white chocolate chips
1/2 cup chopped macadamia nuts
1 cup fresh raspberries

Directions:
1. Prepare a 9 x 13 pan. Rub the bottom and all sides with butter. Add about a tablespoon of flour to the pan, and tap the pan to “dust” all buttered surfaces. Shake out any excess flour.
2. Preheat the oven to 350 degrees F.
3. In a microwave-safe bowl, melt the butter. Stir the brown sugar into the melted butter.
4. Whisk the eggs and vanilla extract together, then add into the butter and sugar.
5. In a separate bowl, whisk together the dry ingredients. Stir until the flour, baking powder, and salt are evenly combined.
6. In a large mixing bowl, fold the dry ingredients into the wet ingredients, mix until combined.
7. Fold in the white chocolate chips, then fold in the nuts. Finally, carefully fold in the raspberries.
8. Pour the batter into the prepared pan and bake for 25-30 minutes or until a toothpick comes out almost clean (not runny).
9. Cool before cutting and enjoying!

Classic Cocoa Brownies

We love how simple these brownies are to make! Simply whisk the eggs with the vanilla, add the sugars to melted butter, mix the cocoa powder with the flour and salt, fold the dry ingredients into the wet, and bake - it couldn’t be easier for a homemade delight. The brownies are chewy, ultra-chocolate-y and easily satisfy any sweet craving. Makes 9 brownies.

Ingredients:
3 large eggs
1 teaspoon vanilla extract
1 cup brown sugar
1/2 cup cane sugar
8 ounces butter, melted
1 cup cocoa powder, sifted
1/2 cup flour, sifted
1/2 teaspoon salt Parchment paper for lining

Directions:
1. Prepare a 9x9" baking pan by lining it with parchment paper.
2. Preheat the oven to 350 degrees F.
3. In a large bowl, whisk the eggs until fluffy. Stir in the vanilla.
4. Melt the butter in a microwave -safe bowl, then whisk both the brown sugar and cane sugar into the melted butter.
5. In a separate bowl, mix together the cocoa powder, flour, and salt; stir until evenly distributed.
6. Fold the dry ingredients into the wet ingredients, mixing until just combined.
7. Bake for 30-35 minutes.
8. Cool before cutting and enjoying!

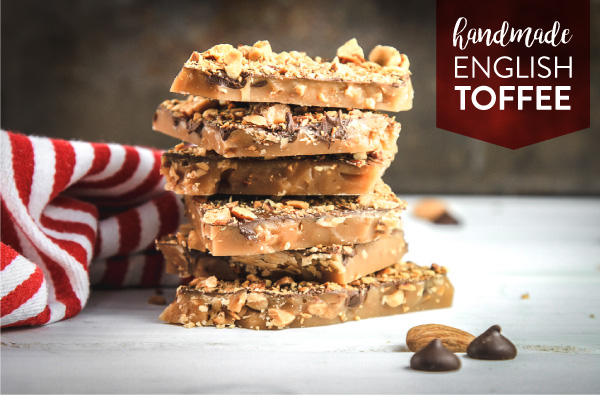
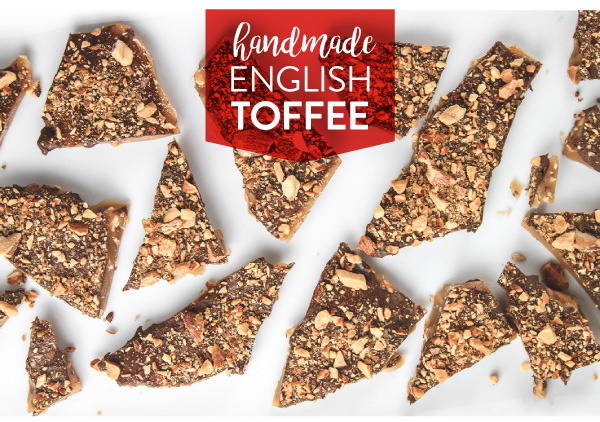
Handmade English Toffee

Handmade English Toffee
A Festive Holiday Menu
Handmade English Toffee
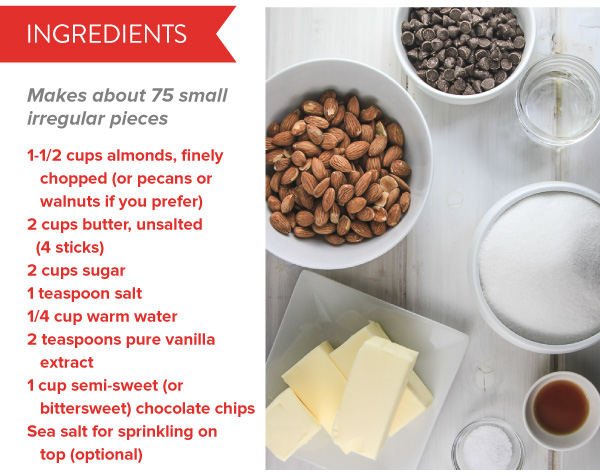
Ingredients
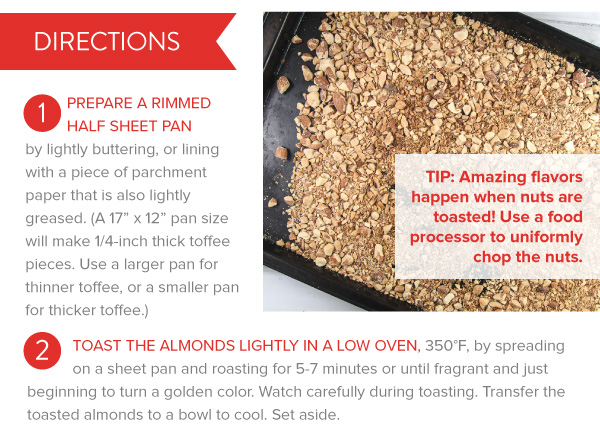
Directions
Handmade English Toffee

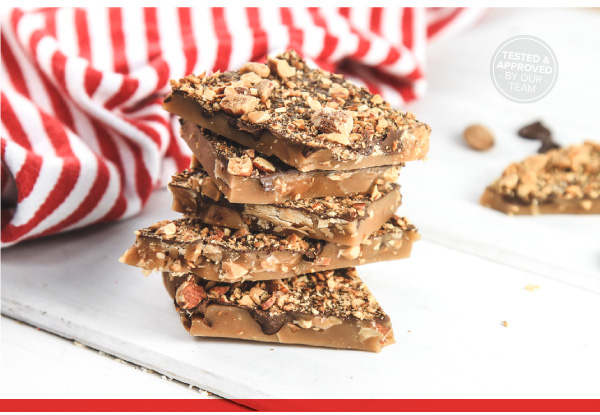
This nutty toffee has a buttery flavor with a rich caramel taste and crunchy, texture - perfect for gifting and sharing this holiday season! With just a ingredients and some kitchen alchemy, delicious toffee is easy to make with the assist of a candy thermometer. The other secret to great toffee is proper toasting of the nuts. We’ll walk you through the all the steps needed for immediate success! Makes about 75 candies.

Ingredients:
1-1/2 cups almonds, finely chopped (or pecans or walnuts if you prefer)
2 cups butter, unsalted (4 sticks)
2 cups sugar
1 teaspoon salt
1/4 cup warm water
2 teaspoons pure vanilla extract
1 cup semi-sweet (or bittersweet) chocolate chips
Sea salt for sprinkling on top (optional)

Directions:
1. Prepare a sheet pan 17” x 12” by lightly buttering, or lining with a piece of parchment paper also lightly greased. (This pan size will make 1/4-inch thick toffee pieces. Use a larger pan for thinner toffee, or a smaller pan for thicker toffee.)
2. Toast the almonds lightly in a low oven, 350°F, by spreading on a sheet pan and roasting for 5-7 minutes or until fragrant and just beginning to turn a golden color. Watch carefully during toasting. Transfer the toasted almonds to a bowl to cool. Set aside.
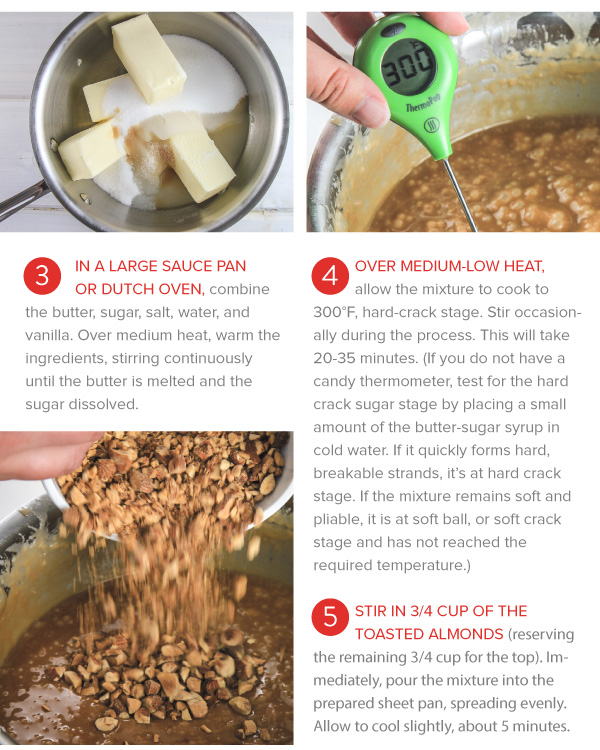
3. In a large saucepan or Dutch oven, combine the butter, sugar, salt, water, and vanilla. Over medium heat, warm the ingredients, stirring continuously until the butter is melted and the sugar dissolved.
4. Over medium-low heat, allow the mixture to cook to 300°F, hard-crack stage. Stir occasionally during the process. This will take 20-35 minutes. (If you do not have a candy thermometer, test for the hard crack sugar stage by placing a small amount of the butter-sugar syrup in cold water. If it quickly forms hard, breakable strands, it’s at hard crack stage. If the mixture remains soft and pliable, it is at soft ball, or soft crack stage and has not reached the required temperature.)
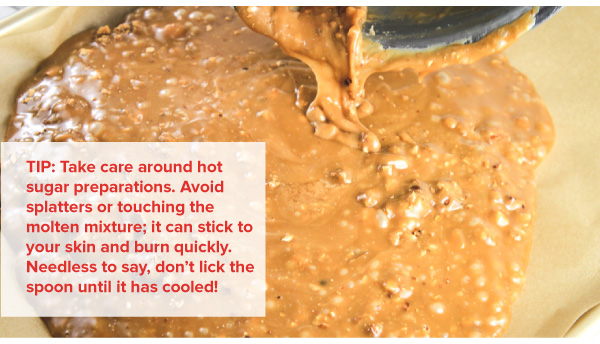
5. Stir in 3/4 cup of the toasted almonds (reserving the remaining 3/4 cup for the top). Immediately, pour the mixture into the prepared sheet pan, spreading evenly. Allow to cool slightly, about 5 minutes.
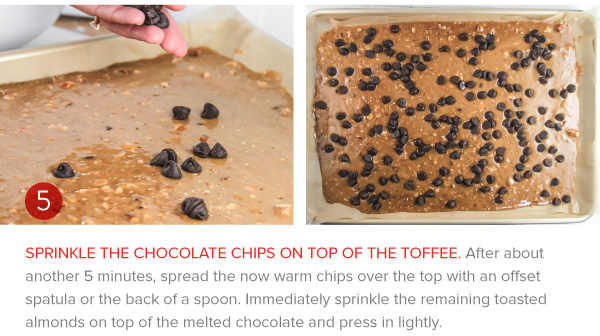
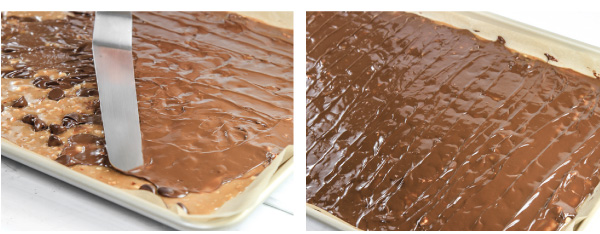
6. Sprinkle the chocolate chips on top of the toffee. After about another 5 minutes, spread the now warm chips over the top with an offset spatula or the back of a spoon. Immediately sprinkle the remaining toasted almonds on top of the melted chocolate and press in lightly.
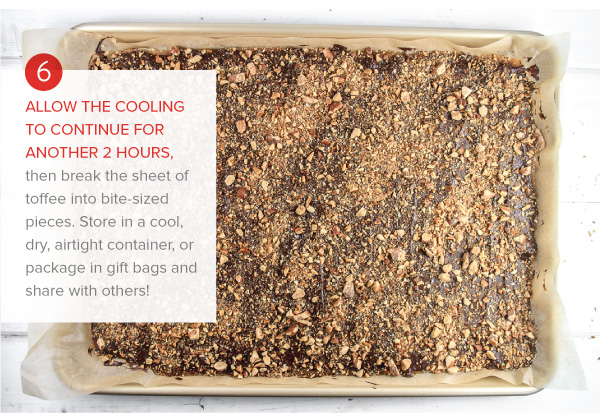
7. Allow the cooling to continue for another 2 hours, then break the sheet of toffee into bite-sized pieces. Store in a cool, dry, airtight container, or package in gift bags and share with others!

Handmade English Toffee

Easy Chocolate & Peanut Butter Fudge

Nothing boasts a ‘holiday homemade gift’ quite like a classic fudge. We are big fans of anything that marries chocolate and peanut butter and this decadent treat is no exception. Serve these little squares in a beautiful tin and keep people guessing how you did it. Makes about 36 squares (1”).

Peanut Layer Ingredients:
1 cup butter
1 cup creamy peanut butter
1 teaspoon vanilla extract
3-1/2 cups powdered sugar

Chocolate Layer Ingredients:
7 ounces sweetened condensed milk
12 ounces semi-sweet chocolate chips
1 teaspoon vanilla extract
1/4 teaspoon salt
Garnish with flakes of grated or shaved chocolate

Directions:
1. Prepare an 8x8" square pan by lining it with parchment paper. 2. Prepare the peanut butter layer. In a small saucepan, melt the butter. Remove from heat and stir in the peanut butter and vanilla extract, and stir until smooth. Stir in the powdered sugar.
3. Meanwhile, prepare the chocolate layer. In a large microwave safe bowl, combine the sweetened condensed milk, chocolate chips, vanilla extract, and salt. Microwave for 1-2 minutes, stirring every 30 seconds. Stir until smooth and well-combined.
4. Pour the chocolate layer in the prepared pan leaving gaps as you pour, then swirl in the peanut butter layer into the gaps. Use a knife to create additional marbling effects, or leave the fudge in two distinct layers with chocolate on the bottom, peanut butter on the top.
5. Press down on the top of the fudge with another piece of parchment paper, so that fudge has a smooth, level top. Garnish with small flakes of shaved chocolate.
6. Refrigerate for at least 1 hour. Remove the bark from the refrigerator, and using the parchment paper as a sling, lift the layers from the pan, and cut into 1" squares. Serve, or package for giving. Store up to 1 week in an airtight container

Peppermint Bark

December means peppermint season, and what better way to embrace peppermint than with rich , creamy bark. Made as one slab that can either be broken into irregular pieces, or scored and cut into specific shapes, this treat is ready to be delightfully packaged for your favorite people. Who knew four simple ingredients could taste so good? Makes approximately (40) 1.5” square pieces.

Ingredients:
1/4 cup crushed peppermint candy canes (about 4 medium canes)
2 cups (12 oz) dark bittersweet chocolate (> 60% cacao)
2 cups (12 oz) white chocolate
1 teaspoon peppermint extract

Directions:
(1) Prepare a 9 x 13 low-rimmed baking pan by buttering the interior surface and lining with parchment paper. "
(2) Prepare the crushed candy canes by placing the candy in a thick plastic bag. Cover the bag with a kitchen towel to minimize holes in the bag during crushing. Working on a cutting board, pound the candy with the side of a meat mallet (or hammer) until the candy canes are crushed to the desired consistency. Set aside.
(3) In a double boiler, or a heat-safe bowl over simmering water in a saucepan, melt the dark chocolate, stirring frequently. (Take care that no water touches or steam condenses on the chocolate – water will cause melted chocolate to seize.). When the dark chocolate is thoroughly melted, pour onto the prepared pan. Smooth the chocolate across the pan forming an even layer. Allow this first layer to cool to room temperature, then harden in the refrigerator for 30 minutes.
(4) Using a similar melting process, melt the white chocolate in a double boiler, or in a heat-safe bowl over simmering water, stirring frequently. (White chocolate melts at a lower temperature than dark chocolate; take care not to scorch the chocolate.) Once melted, stir in the peppermint extract, then pour over the chilled dark chocolate and spread into an even layer.
(5) While the white chocolate is still warm, sprinkle the crushed candy canes on top pressing gently into the the top of the white chocolate layer. Allow the bark to cool to room temperature, then place in the refrigerator for another 30 minutes.
(6) Remove the bark from the refrigerator, and using the parchment paper as a sling, lift the chocolate layers from the pan. Break into pieces, or when at room temperature, score, and cut into squares. Serve, or package for giving.

Apple Pie with Streusel Topping

This generously filled apple pie is adorned with a streusel topping AND pairs perfectly with a big scoop of vanilla ice cream. The cream cheese-based crust complements the apple and cinnamon flavors to perfection. Follow these directions that include a few key tips for making this delicious, well-filled pie. Makes one 10” pie.

Cream Cheese Crust Ingredients:
1-1/2 cups all-purpose flour 1 tablespoon sugar 1-1/2 teaspoons Kosher salt 6 oz. cream cheese 3/4 cup unsalted butter (1-1/2 sticks), well chilled

Filling Ingredients:
8-10 cups sliced Honey Crisp apples (about 5-6 large apples) 2 tablespoons lemon juice 1/2 cup sugar 1/4 cup all-purpose flour 1/2 teaspoon ground cinnamon Pinch of salt

Streusel Topping Ingredients:
2/3 cup all-purpose flour 1/2 cup packed brown sugar 1/2 teaspoon cinnamon Pinch of salt 1/2 cup sliced almonds 4 tablespoons firm butter, plus 6 pats to top pie

Directions:

Prepare the Crust:
The crust may be mixed by hand or with a food processor. Mixing by Hand:
1a. Mix the flour, sugar, and salt together in a large bowl with a whisk until evenly distributed.
2a. Cut the butter and cream cheese into 1/2-inch cubes. Use a little of the flour mixture to keep the pieces from sticking together. Chill the cubes for 15 minutes.
3a. Place the butter and cream cheese cubes in the flour mixture. Using a simple pastry blender, cut the butter, cream cheese, and flour mixture together until a coarse texture is reached with some pea-sized pieces of butter and/or cream cheese remaining.
4a. Form the rough dough into a half-inch thick flat disk (using your hands and a light touch) and wrap in plastic wrap.
5a. Chill the wrapped dough disks for an hour or overnight.

Mixing with a Food Processor:
1b. Place the flour, sugar, and salt in the bowl of the food processor. Pulse a few times to evenly distribute.
2b. Cut the butter and cream cheese into 1/2-inch cubes. Use a little of the flour mixture to keep the pieces from sticking together. Chill the cut butter and cream cheese cubes for 15 minutes.
3b. Place the butter and cream cheese cubes in the food processor with the flour mixture. Pulse 6-8 times to cut the butter and cream cheese into the flour. The dough mixture will be coarse with some pea-sized pieces of butter and cream cheese remaining. (Resist the urge to keep pulsing.)
4b. Remove the rough dough from the work bowl. Form the rough dough into a half-inch thick flat disk (using your hands and a light touch) and wrap in plastic wrap.
5b. Chill the wrapped dough disks for an hour or overnight.

Assemble the Pie:
6. While the dough is chilling, prepare the apples by peeling and slicing thinly. Toss the cut apples with the lemon juice, sugar, flour, cinnamon, and salt. Let the coated apples sit for 1 hour so that excess juices begin to drain from the apples.
7. Roll out the pie crust: Remove the dough from the refrigerator when ready to assemble the pie and allow it to warm slightly until pliable and easy to roll out. Roll the pie dough to a 1/4-inch thickness. Line the bottom of a 10” diameter deep dish pie plate leaving a 1-inch overhang.
8. Prepare the streusel topping. In a large bowl, use a pastry blender to mix the flour with the brown sugar, cinnamon, salt, almonds, and butter.
9. Fill the pie crust with the apple mixture mounding them in the center. Flute the crust's edge as desired. Top with the streusel topping. Place pats of butter evenly around the streusel topping.
10. Preheat the oven to 400 degrees F. Place the pie on an oven guard to catch any drips. Bake 45 to 55 minutes or until pie crust and crumb topping are deep golden brown and the filling begins to bubble. The crust and streusel topping will brown quickly; after the first 25 minutes; place a piece of aluminum foil over the whole pie. To avoid a runny pie, continue baking for another 10 minutes after the juices begin to bubble. Transfer to cooling rack to cool completely. Letting the pie cool overnight before cutting will help solidify any excess juices.
11. Cut pie slices with a serrated knife, serve with a scoop of vanilla ice cream and enjoy!